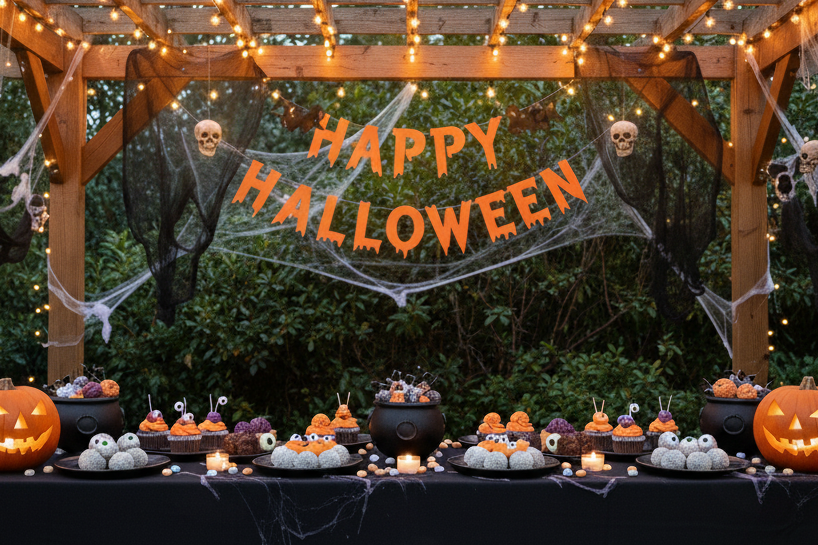


Create budget-friendly Halloween table decor with safe, family-friendly DIYs that’ll light up your dinner party.
- 7 beginner-friendly projects under $15 or less each
- Uses LED lights and low-odor materials for safety purposes
- Includes easy centerpiece, candle, and favor ideas
Hosting a Halloween dinner party for friends and family this year? Aside from a creepily good menu, table décor is what makes spooky soirées memorable, as it sets up a hauntingly fun ambiance that puts everyone in a trick-or-treat mood.
This year’s spooktacular tablescape projects lean toward safe, family-friendly DIY centerpieces that look high-end yet affordable to make. We thoughtfully curated a Halloween table decor roundup that features unique items like glowing mushroom terrariums and floating candles that’ll surely impress the guests. The projects also use LED lights instead of open flames and low-odor paints instead of strong-scent formulas to ensure a hazard-free gathering.
The Best Halloween Table Decor DIYs for 2025
We’ve curated seven boo-tiful Halloween table decor projects that cost $15 or less and provided essential safety tips for a worry-free celebration. Get ready to cast a spell on your guests with a stunning setup that’s all treat and no trick.
1. Gothic Mushroom Terrarium Centerpieces

Difficulty: Easy
Time: ~20 min
Cost: $6–$12
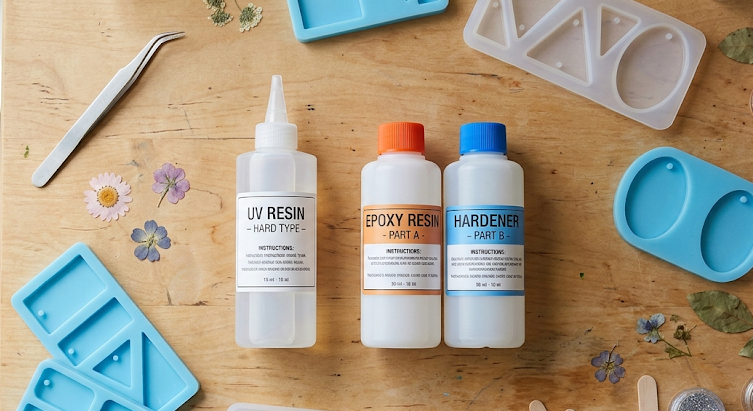
Materials: thrifted glass jar, sheet moss, faux mushrooms, tiny bone/beetle charms, warm-white LED tea light or puck, hot glue, iridescent glitter (optional)
Steps:
- Press a sheet of moss into the clean jar.
- Hot-glue faux mushrooms and tiny charms onto the moss and inner glass in small clusters.
- Place the warm-white LED inside the jar or attach it under the lid.
- Add a light pinch of glitter (optional), close the lid, and set it on the table.
Safety/cleanup tip: Use battery-powered LEDs (no open flames) and dust off stray glitter to ensure food safety.
2. Wire Pumpkin Fairy-Light Centerpieces
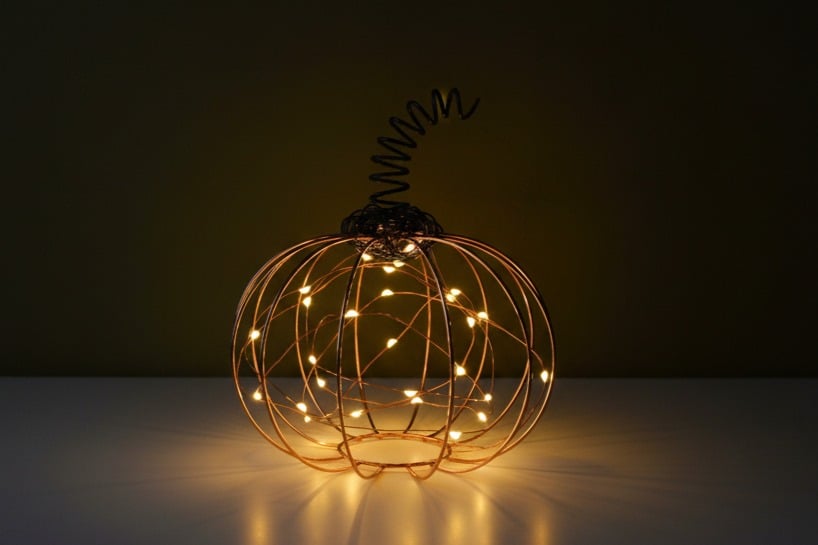
Difficulty: Easy
Time: ~20 min each
Cost: $8–$14 (per pumpkin)
Materials: 16–18 ga craft wire, micro-LED fairy lights, wire cutters or pliers, round form (bowl/ball), ribbon or twine, tape (to secure battery pack)
Steps:
- Shape 6–8 wire ribs over a bowl to form the pumpkin curve.
- Twist all wire ends together at the top and bottom to hold the shape.
- Wrap the fairy lights around the ribs and hide the battery pack underneath.
- Finish by tying ribbon or twine around the top twist to create a stem.
Safety/cleanup tip: Cover sharp wire ends and secure cords to avoid electrical hazards.
3. Ghost Face Taper Candles (No-Pour)
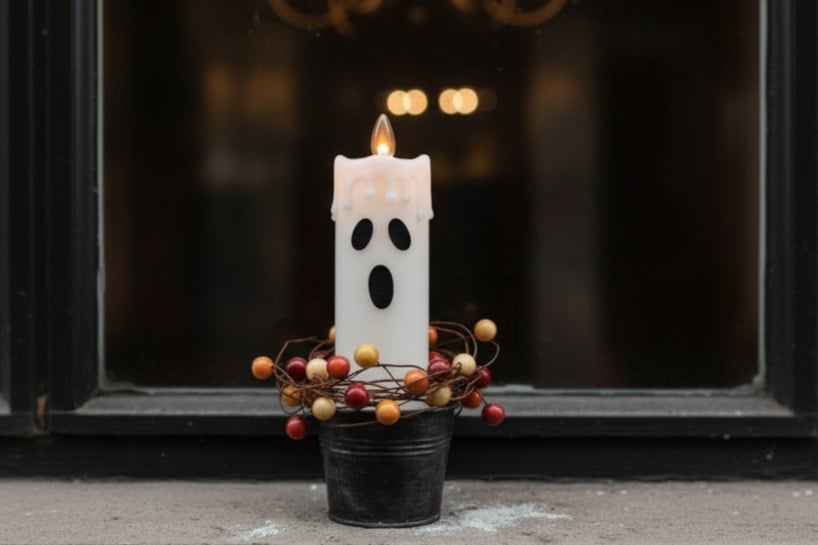
Difficulty: Easy
Time: ~15 min (set of 6–8)
Cost: $3–$7
Materials: white tapers or LED tapers, black paint pen (or acrylic + fine brush), holders, rubbing alcohol + cotton pad (optional)
Steps:
- Clean the tapers so the ink will stick better.
- Dot two oval eyes and a tiny “O” mouth.
- Let the tapers dry for a few minutes, then add a second layer of color if needed.
- Set the candles in holders and line them down the table.
Safety/cleanup tip: It’s best recommended to use LED tapers for crowded tables; if using real candles, keep décor 12″ away and never leave the flame unattended.
4. Skeleton-Hand Napkin Rings
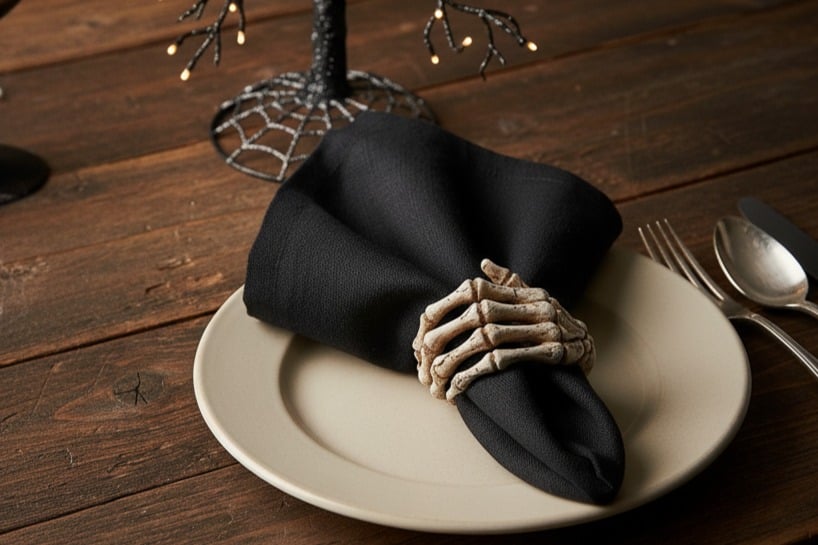
Difficulty: Easy
Time: ~15 min (set of 6)
Cost: $5–$10
Materials: plastic skeleton hands (party aisle), plain napkin rings (metal/wood), black or pewter spray paint, strong craft adhesive/gel super glue, scrap paper/cardboard
Steps:
- Spray skeleton hands and rings in black/pewter and let them dry.
- Glue one hand across each ring and press for 20–30 seconds.
- Add paint touch-ups if needed.
- Slide onto folded napkins and place them on plates.
Safety/cleanup tip: Spray outside or by an open window and discard the paper once the paint dries.
5. Hanging “Floating” Candles
Difficulty: Easy
Time: ~15 min (set of 6–8)
Cost: $6–$15
Materials: LED tapers, clear fishing line, removable ceiling/command hooks, scissors; glass vases/cylinders, water, submersible or floating LED tealights, glass pebbles (optional)
Steps:
- Attach removable hooks to the ceiling directly above the table.
- Cut equal lengths of fishing line and tie them securely to the tops of the LED tapers.
- Hang each candle from a hook, adjusting heights for a staggered look.
- Switch on the LEDs and dim the room lights for a floating effect.
Safety/cleanup tip: Stick with LED candles and gently remove adhesive after the event to avoid ceiling marks.
6. Mini Cauldrons as Place Settings

Difficulty: Easy
Time: ~10–15 min (set of 6–8)
Cost: $6–$14
Materials: mini plastic cauldrons, wrapped candies or moss, LED tealights (optional), cardstock/name tags, twine or ribbon, hole punch, tissue or crinkle paper
Steps:
- Rinse and dry the cauldrons then put tissue/crinkle inside.
- Fill with wrapped candy or add a pinch of moss and an LED tealight.
- Tie a ribbon or twine bow around the handle or add a name tag.
- Set one on each dinner plate.
Safety/cleanup tip: Make sure to wash the cauldron before using and add only wrapped candies for a quicker cleanup.
7. Cheesecloth Ghost Minis

Difficulty: Easy
Time: ~20 min (+ 1–2 hr dry)
Cost: $4–$10
Materials: cheesecloth, liquid starch or diluted Mod Podge, jars/cones + small balloons (forms), wax/parchment paper, tape, black felt dots or googly eyes, LED tealights, wood slices (optional)
Steps:
- Rest small balloons on jars to form ghost shapes.
- Cover with cheesecloth and soak in starch or Mod Podge.
- Let dry until stiff, then remove balloons.
- Stick on eyes, then place each ghost over a small LED tealight so it glows from underneath.
Safety/cleanup tip: Let the ghost cheesecloths dry in a well-ventilated area or outdoors to avoid starch’s strong scent.
Halloween Table Decor Ideas: DIY ‘Til Midnight
Now that you have a cauldron full of wickedly easy DIY ideas, you’re ready to give everyone the best Halloween dinner party yet. Remember, the goal is to have fun and create lasting memories with your favorite ghouls and goblins.
Which of these Halloween table decor ideas will you be crafting this year?
Related Projects
Check out more Halloween-inspired ideas on DIYProjects.com:
- DIY Halloween Makeup Looks 2025: Cool Ideas For $10 or Less
- DIY Ghosts: Create Floating Halloween Decorations with Cheesecloth
- 9 Halloween Wood Crafts To Decorate Your Spooky Home With
FAQs
Q1. Are these Halloween table decor projects safe for kids and pets?
Yes, all projects use LED lights, low-odor paint, and non-toxic materials to ensure a safe, flame-free setup suitable for family-friendly spaces.
Q2. Can I make the decorations ahead of time?
Definitely! Most projects can be prepped days in advance. Just store them in a cool, dry place to keep everything fresh and intact.
Q3. I’m not crafty. Are these DIYs easy?
Absolutely. These are beginner-friendly projects using easy-to-find materials and simple steps.