


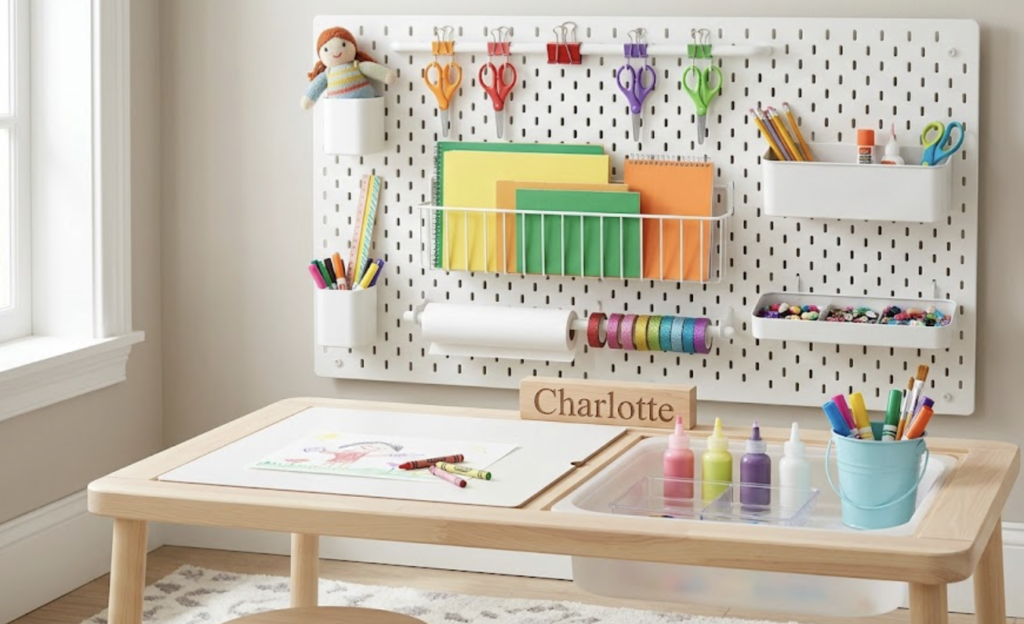

At a Glance: Organize Kids Crafts Using Pegboard
- Saves Space: Using empty walls keeps desks and floors totally clear of clutter.
- Grows With You: You can move hooks and cups around easily as your child gets older and needs different supplies.
- Teaches Independence: Kids can see exactly where things belong, making cleanup time fast and easy.
If you are a parent, you know the struggle. Markers without caps are hiding under the couch. Glitter is spilled on the rug. When your child wants to make a masterpiece, they can never find the glue! The number one problem with craft time is the huge mess it leaves behind.
With back-to-school season right around the corner, now is the perfect time to build a homework and craft station. When you organize kids craft supplies, you take away the stress of cleaning up. Plus, it gives your kids a huge benefit! When they can see all their tools neatly displayed, it sparks their imagination. They learn independence because they can grab what they need and put it back all by themselves.
Safety Reminder: Before we start building, remember safety first! Adults should handle the saws and drills. Wear safety goggles and a dust mask. Work in an open, breezy space. To keep things eco-friendly, try to use scrap wood if you have it and always pick low-VOC (safe) paints!
How to Organize Kids Craft Supplies With a Pegboard
A pegboard is a flat piece of wood with rows of little holes. It is the best secret weapon for organizing! Instead of throwing everything into a deep, messy drawer, a pegboard uses blank wall space.
By adding simple hooks, little wire baskets, and colorful hanging cups to the holes, you can give every single crayon, scissor, and tape roll its own special home. The best part? As your kids grow and their tools change, you can just move the hooks around.
Materials List
Head to your local hardware store (like Home Depot or Lowe’s) for these basic items. Try to pick FSC-certified wood to help out the environment!
- 1 Pegboard sheet (Standard 2 foot by 4 foot size works great)
- 2 1×2 pine wood boards (Cut to make a frame)
- 1 Box of 2-inch wood screws
- 1 Kit of pegboard hooks and cups
- 1 Can of low-VOC paint (Pick your kid’s favorite color!)
- Tools Needed: Drill, stud finder, tape measure, level, and a paintbrush.
Steps to Build Your Pegboard
Step 1: Paint It Up
Lay your pegboard flat on a drop cloth. Have your kids help paint it with fun, bright colors. Let it dry completely.
Step 2: Build the Frame
Pegboards need a little gap behind them so the hooks can slide into the holes. Use your 1×2 pine boards to make a simple square frame on the wall. Use a stud finder to find the strong parts of your wall, and screw the 1×2 boards directly into those wall studs.
Step 3: Attach the Board
Place your painted pegboard over the 1×2 frame. Use your drill to drive screws through the pegboard and into the wood frame. Use your level to make sure it is perfectly straight!
Step 4: Decorate and Organize
This is the fun part for the kids! Slide the metal hooks into the holes. Hang up little plastic cups for markers and pens. Use wire baskets for paper and glue. Hang safety scissors directly on single hooks.
Conclusion
Building a pegboard is a super easy weekend project that changes everything. Parents, you get your clean living room back. Kids, you get a cool, colorful art station that makes back-to-school homework and weekend crafts so much fun. When everything has a place, cleaning up is a breeze. Give yourselves a high-five for building something awesome together!
FAQs
1. Where is the best place to hang the pegboard?
Hang it low enough so your kids can easily reach their supplies. Above a small desk or play table is perfect.
2. What size pegboard do I need?
A 2-foot by 4-foot board is a great size for most kids, but you can ask the hardware store to cut it smaller if you have a tight space.
3. Can I paint the pegboard?
Yes! Using a foam roller with low-VOC interior paint works best. Do not let the paint drip into the holes, or the hooks won’t fit.
4. What should go in the pegboard cups?
Cups are perfect for tall, skinny things. Fill them with markers, colored pencils, paintbrushes, and crayons.
5. Are pegboards safe for young kids?
Yes, as long as the board is screwed tightly into the wall studs so it cannot fall. Make sure to use kid-safe craft supplies on the hooks.









