
At a Glance: Ice Dye Shirt
- Time Required: 30 minutes of active prep | 12–24 hours of passive melting and curing time.
- Skill Level: Beginner.
- Adult + Kid Notes: This is a fantastic collaborative family craft. Kids excel at crumpling the fabric and building the ice mountain. Because dry dye powder and soda ash can be irritating if inhaled or touched with bare skin, an adult must handle the chemical mixing and powder application phases.
Safety Reminder: Wear PPE (rubber gloves, safety goggles, and an N95 dust mask when handling dry dye powder). Use chemicals responsibly. Adults must supervise.
What is the Ice Dye Technique?
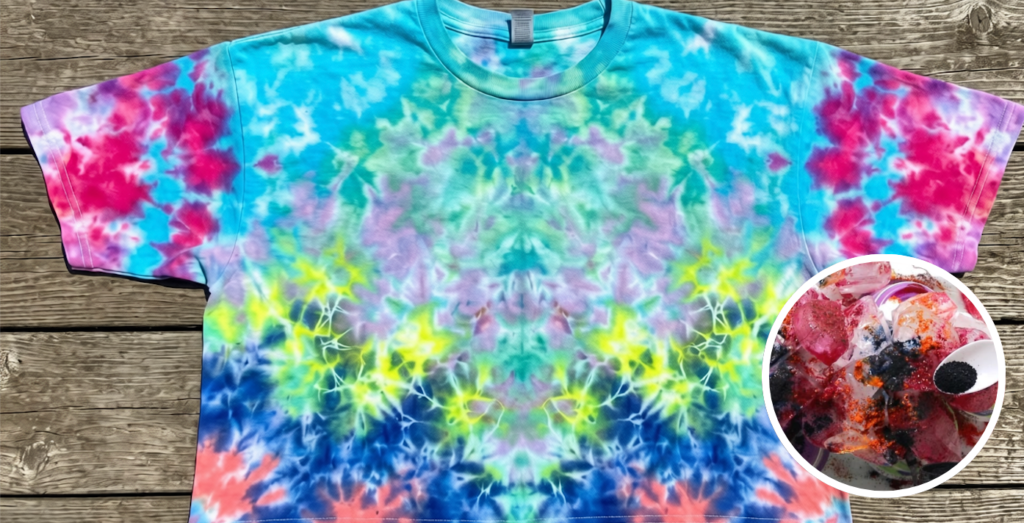
Ice dyeing is a textile coloring method where dry, fiber-reactive dye powder is sprinkled directly onto a layer of ice covering prepared fabric. As the ice melts, it slowly dissolves the powder and carries the pigments down into the fibers. This slow-release process yields organic, watercolor-like blends, striking gradients, and a unique phenomenon called “color splitting,” where mixed dye colors break down into their individual pigment components as they travel through the ice.
Ice Dye vs. Normal Tie Dye
| Feature | Normal Tie Dye | Ice Dye |
| Dye State | Liquid (mixed with water) | Dry powder |
| Application | Squeeze bottles directly on fabric | Sprinkled over a layer of ice |
| Control | High control; sharp, geometric patterns | Low control; fluid, unpredictable patterns |
| Texture | Saturated, distinct blocks of color | Soft, mottled watercolor textures |
| Negative Space | Defined by tight rubber bands | Formed naturally by gaps in the ice melt |
RELATED: How to Make a Classic Spiral Tie Dye Shirt (Kids Tutorial)
Materials & Tools List
Materials
- Fabric: 1x 100% Cotton White T-Shirt (organic cotton preferred for sustainability; synthetic blends will not absorb fiber-reactive dye).
- Fixative: 1 Cup Soda Ash (Sodium Carbonate).
- Dye Powder: Procion MX Fiber Reactive Dye (1 tsp Fuchsia/Hot Pink, 1 tsp Turquoise/Cerulean Blue).
- Ice: 7–10 lbs of standard cubed ice (cubes create broad watercolor pools; crushed ice creates fine speckles).
Tools Needed
- The Jig: 1x Wire cooling rack or baking grate.
- Catch Basin: 1x Plastic tub or deep tray (sized to support the wire rack above the bottom).
- Soak Bucket: 1x Standard plastic bucket.
- Application Tool: 1x Small spoon or powder shaker.
Technical Specifications & Precise Dimensions
- Soda Ash Solution Ratio: 1 cup of soda ash per 1 gallon of warm water.
- Soaking Duration: Exactly 20 minutes.
- Ice Barrier Depth: 2 inches of uniform ice coverage over the crumpled fabric.
- Dye Dosage: 1 teaspoon total per color to maintain optimal balance and preserve clean, white negative space.
- Cure Time: 12 to 24 hours (dependent on ambient room temperature melting rates).
These are the two materials I had to specifically get for the ice-dye process:
No products found.
Step-by-Step Instructions (Beginner & Kid-Friendly)
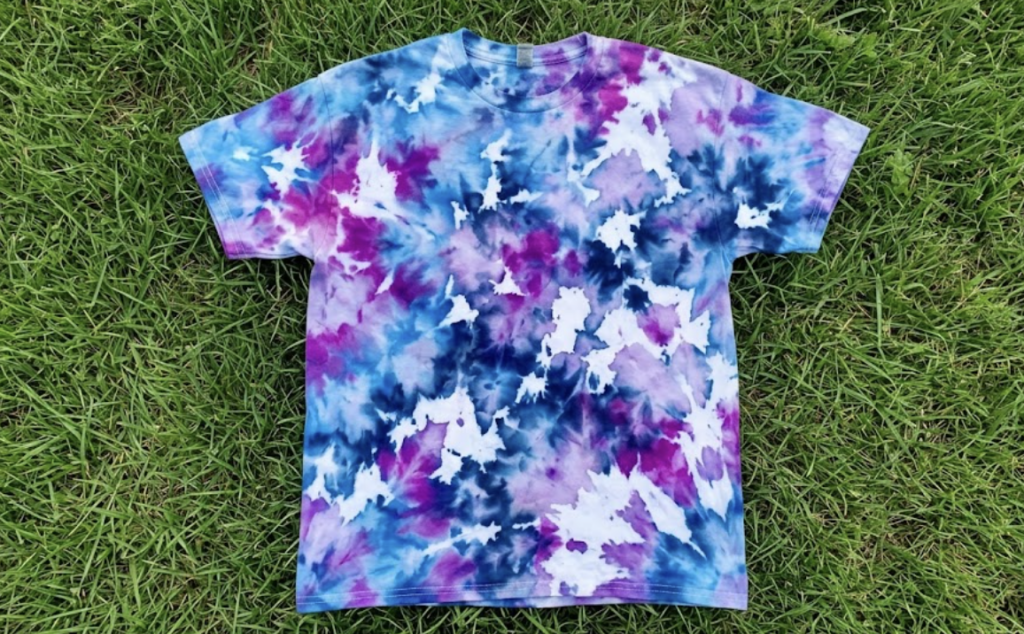
Phase 1: Fiber Activation (Adult Supervision)
- Pour 1 gallon of warm water into the soak bucket and stir in 1 cup of soda ash until completely dissolved.
- Submerge the white cotton shirt fully into the solution.
- Allow it to soak for 20 minutes to alter the chemical pH of the fabric, ensuring a permanent bond with the dye.
- Wring out the shirt thoroughly until it is uniformly damp but not dripping.
Phase 2: The Crumple Layout (Kid-Friendly)
- Lay the damp shirt completely flat on a clean workspace.
- Using your fingers, gather and scrunch the fabric randomly from the edges toward the center to form a loose, rumpled mound.
- Do not secure the fabric with rubber bands or twine. Keeping the crumple loose allows the melting dye to pool naturally and leaves beautiful untouched white spaces.
- Carefully transfer the crumpled mound onto the wire cooling rack, ensuring it sits flat. Place the rack directly over the plastic catch basin.
Phase 3: The Ice Shield (Kid-Friendly)
- Pile the ice cubes carefully over the top of the crumpled shirt.
- Build the ice layer until it is roughly 2 inches deep, ensuring the fabric is completely covered and hidden beneath the ice.
Phase 4: Powder Application (Adult Step)
- Put on your N95 dust mask and protective gloves before opening the dye jars.
- Using a small spoon or shaker, lightly dust the Fuchsia dye powder over one half of the ice mountain.
- Dust the Turquoise dye powder over the remaining half of the ice.
- Allow a 1-inch overlapping zone in the middle where the two colors meet. As the ice melts, this intersection will organically blend to create vibrant secondary purples and violets.
Phase 5: The Melting Process
- Set the entire assembly in a warm, undisturbed area (70°F or higher).
- Allow the setup to sit for 12 to 24 hours until the ice has completely melted through the shirt and drained into the basin below. Do not use external heat sources to accelerate the process.
Finishing & Washing
- Transfer the fully melted shirt to a sink and rinse it thoroughly under cold running water to remove loose surface pigments. Rinse until the runoff is mostly clear.
- Place the shirt by itself into a washing machine. Run a standard cycle on a hot temperature setting using a mild textile detergent to lock in the remaining bonded colors.
- Dry the shirt in a clothes dryer or hang dry.
Eco Notes
Minimize water waste by turning off the faucet while manipulating the fabric during the initial rinse phases. Always opt for non-toxic, fiber-reactive dyes to prevent hazardous chemical breakdown and eliminate synthetic micro-plastic pollution in local waterways. Optimize fabric usage by selecting organic or upcycled 100% cotton blanks.
The crumple ice-dye method is an incredibly rewarding, low-effort project that delivers professional, high-end textile results every time. It is perfect for an engaging weekend activity with kids or for crafting custom apparel. Want to scale this up to dye a whole batch of hoodies, or tweak the colors for a different aesthetic? Provide feedback for exact dye measurements on larger runs!
Check out this video from TulipColorCrafts:
FAQs
Q: Can I use standard liquid all-purpose dye over the ice?
A: No. Liquid dyes will instantly run off the ice cubes, over-diluting the mixture and leaving muddy, faded pastel streaks. The entire ice-dyeing process relies on dry powder dissolving at a slow, controlled rate as the ice melts.
Q: Why did my final colors turn out brown or gray instead of vibrant?
A: This happens when complementary colors (opposites on the color wheel, such as red/green or orange/blue) mix together. Stick to analogous or harmonious color pairings like pink and blue which blend into beautiful secondary colors (purple) rather than turning brown.
Q: Is it safe to do this project indoors with children?
A: Yes, provided an adult handles the dry powder application while wearing an N95 mask to prevent inhaling fine particles. Once the powder is applied to the wet ice, it can no longer become airborne, making the remaining steps safe for children.
QUICK POLL
What kind of project fits your week right now?
Not in the choices? Let us know what kind of project you’re looking forward to make!