How to Make Your Own Upcycled Shirt Scarves | DIY No Sew Tutorial!
Here’s a fun DIY that allows for some creative liberties, and a very low budget. Does it get better than that?!
All you truly need is a good pair of scissors, some old t-shirts. and a creative spirit! There are quite a few options for shirt scarves circling the internet already, but none of them explained how to get that varied braid look which I love so much. Which is why I made it my goal to solve this problem, and I am quite happy with the results. Below you will find a tutorial to make your own varied braid t-shirt scarf, as well as a fringed t-shirt scarf.
My name is Lisa, I am a crafter here at DIY Projects, as well as my own little lifestyleblog. itsaLisa.com, and I hope you enjoy following along and making these awesome fashionable scarves with me!
The Varied Braid T-Shirt Scarf Tutorial | DIY Infinity Scarf
Supplies
2 – 3 old t-shirts (2 plain, 1 color pop!)
fabric scissors
tape
(OR) if you don’t have any t-shirts, you can always buy plain jersey knit fabric: 1/2 yard of your base color, 1/3 yard of your color pop. Jersey fabric is the type of fabric that t-shirts are made from.
Step 1: Cut Strips
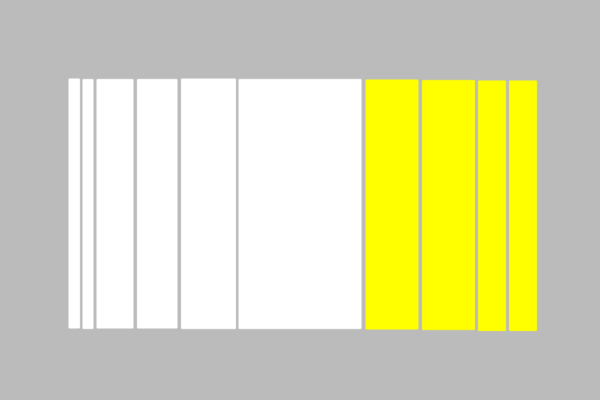
Cut out your strips of jersey, either from your T-shirts, or your plain fabric. If you have a T-shirt, start cutting beneath your sleeves and cut horizontally across the front of the shirt. You will need a few different sizes. Cut thicker strips of your base color, free hand it, or use this graphic as a guide.
Keep in mind that for every rectangle you see below, it is folded in half. Remember, your T-shirt has a front and a back, and fabric always comes folded in half. If you are cutting strips from your shirt, you will need to slice open the circle so you have long strips instead of rings.
Step 2: Start your ropes
Begin with two strips, cross them in their center and leave one aside, tape it down. You will be working with the strip that is not taped and lying in front of you, as pictured below. This is for the twist method which I will show you below. If you want to make a braid, you will need 3 strips.
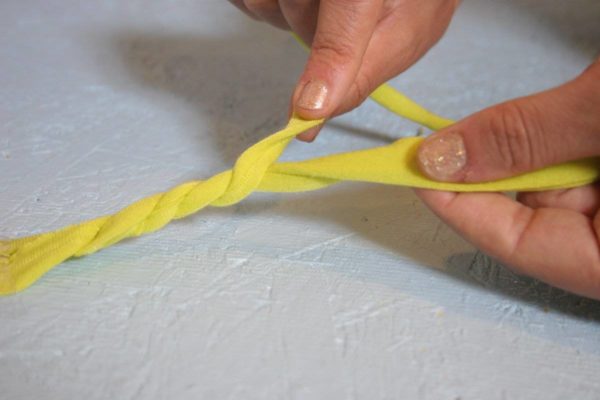
Step 3: Twist
Take your two strips, one in each hand and twist. Make sure your two strips are twisting the same way, counter clockwise. Notice the subtle twist taking place in each strip in the two pictures below.
Step 4: Crossover
Take your lefthand, and bring it over your right hand. The strips should swap sides, in a clockwise direction. Repeat this process and you will notice the twists stays in place. This is because you are twisting them against eachother – you are balancing the twists so they do not unravel.
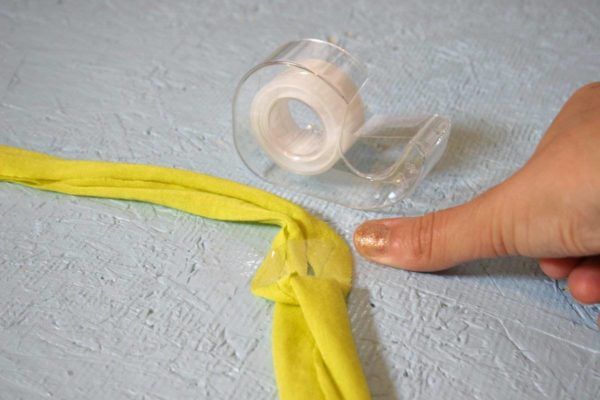
Step 5: Tape
Tape the ends of the two strips so they stay tight while you work on building more mini-chords. Whether they are braided or twisted, you should build up a few to intermix in your scarf along with plain strips of different sizes that have been left alone.
Step 6: Braid
Braid strips together. This adds even more variety and dimension. Use strips of different thicknesses. I tried mixing colors, but personally i think using the same colors together looked best. Use whatever styles, colors, and thicknesses you want to make your very own unique scarf!
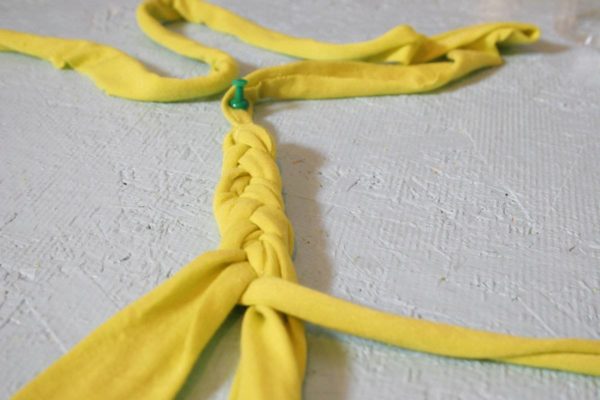
Tip: if the tape is failing you, a pushpin works just as well.
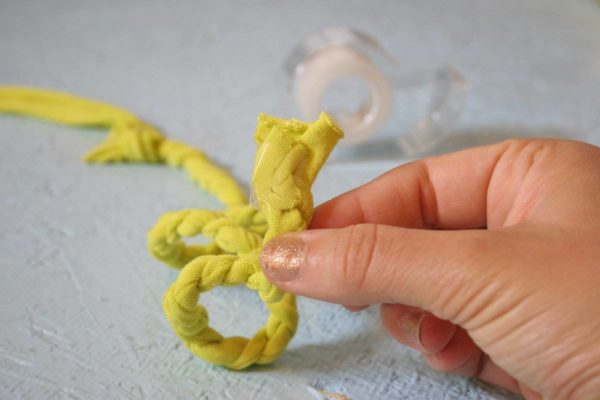
Step 7: Knot them together
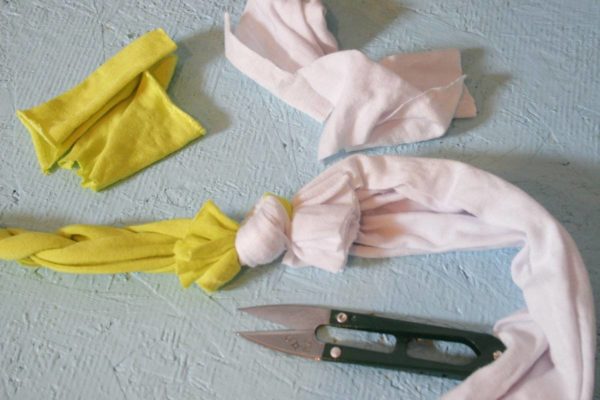
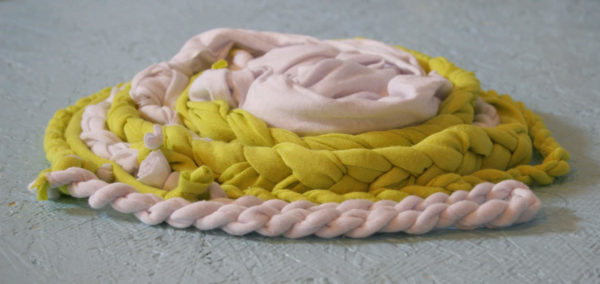
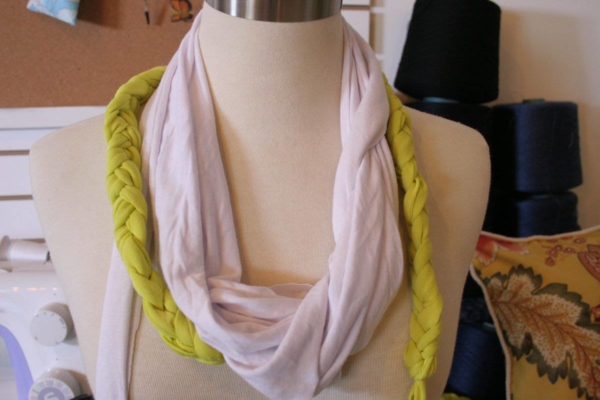
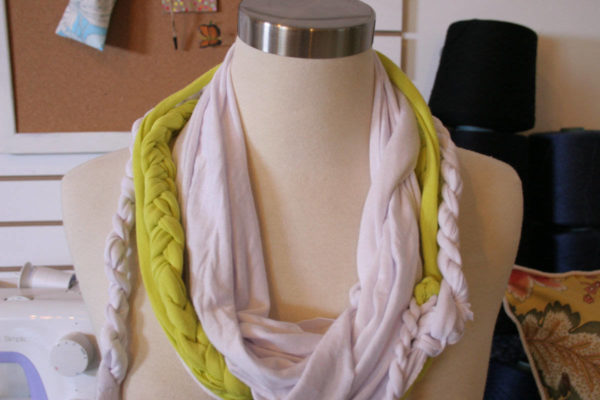
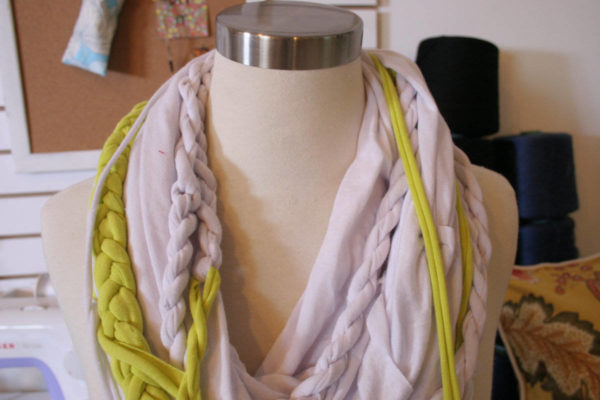
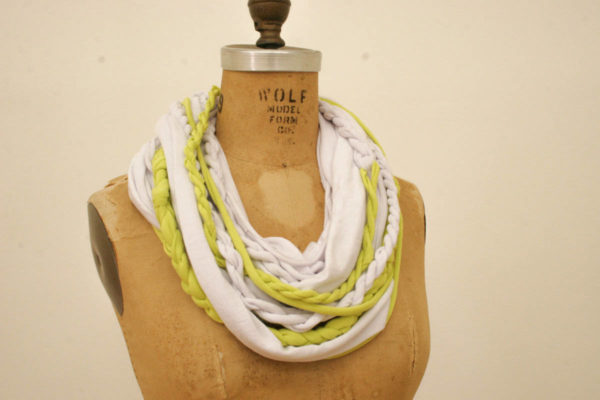
Once you have made as many different pieces as you would like, it is time to knot them all together. Since this is a NO-SEW Tutorial, this step is super easy. Simply knot the two ends together to form one long continuous chain. You can cover the knots you just created with more t-shirt material – or leave them exposed for a raw effect. It is best to gradate the sizes, for example, knot your wider pieces together first and work your way towards the smaller pieces. Connect the first and last piece together to complete your circle.
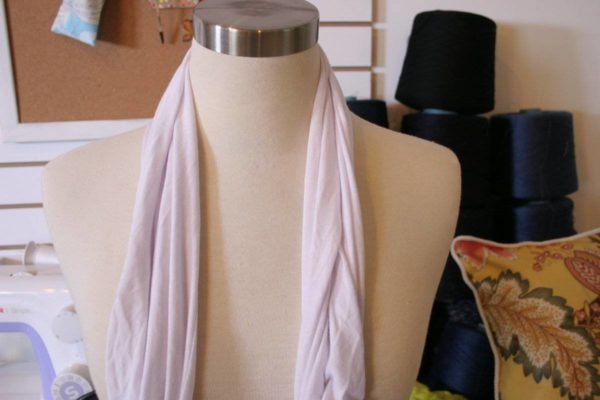
Step 8: wrap around neck
Begin with your widest section, and place this around your neck. Continue to loop every section over your neck one at a time. First the left side, then the right side, repeat. Be mindful of where each piece settles, you can always fix it later, but each layer gets harder to adjust as new layers are added.
Congratulations! You now have your very own braided scarf, upcycled from a T-shirt. With a little TLC this look is totally wearable all season long. Enjoy how it punches up an outfit with color, and adds an artsy elegance to your everyday look. Have fun wearing it, and enjoy the compliments as people admire all the intricate details that went into making your awesome new infinity scarf! Next up, find more old shirts and prepare yourself for a DIY Fringe Scarf Tutorial!
Tassel Fringe T-shirt Scarf Tutorial | DIY No Sew Tutorial
Supplies:
Fabric Shears OR Rotary blade & cutting mat
2 Shirts OR 1/2 yard of jersey fabric
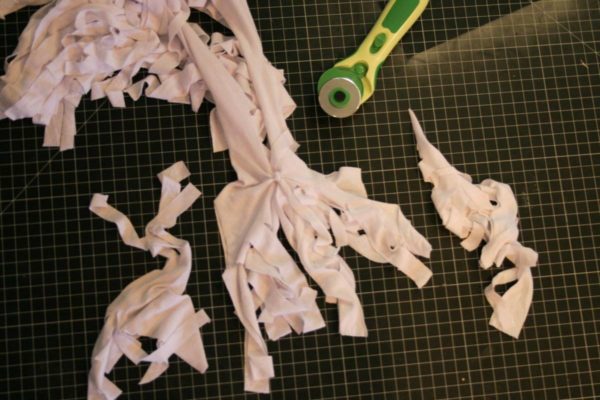
How to cut the tassel shirt scarf:
Step 1: Prepare fabric for cutting
Lay your shirt out flat, cut across the t-shirt just under the armpits, you will be working with this large ring. Cut 2 of those, 2 is better than one.
From here you have two options. Do you want more short tassels, or less longer tassels? If you want more short tassels, fold your fabric in half and cut so that when you unfold it you will have a solid band down the middle and tassels on either side. If you want longer tassels, leave your fabric unfolded. Pictured here is the folded technique.
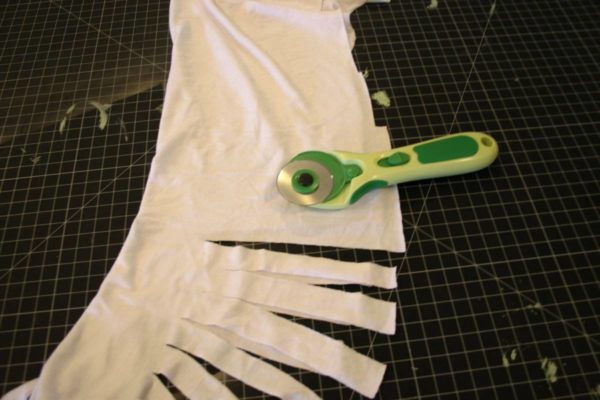
Step 2: Cut fabric
Now take your rotary blade or fabric shears and slice strips out of your fabric. I spaced my strips approximately 1/2 inch apart, and between 6 and 8 inches in length. I liked to vary my distances and lengths for dramatic impact, a more uniform approach will work just great too.
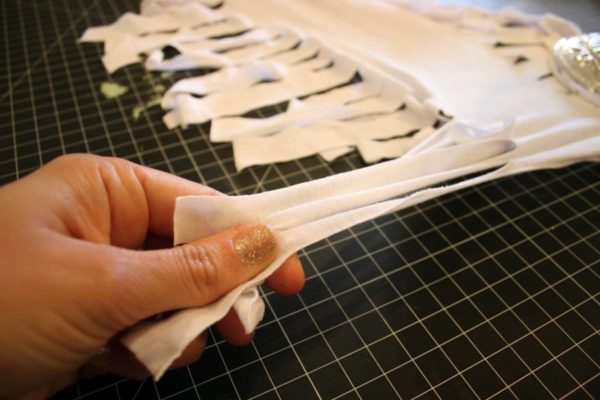
Step 3: Pull
Pull your fringe so the jersey stretches. This will help make the strips thinner and longer.
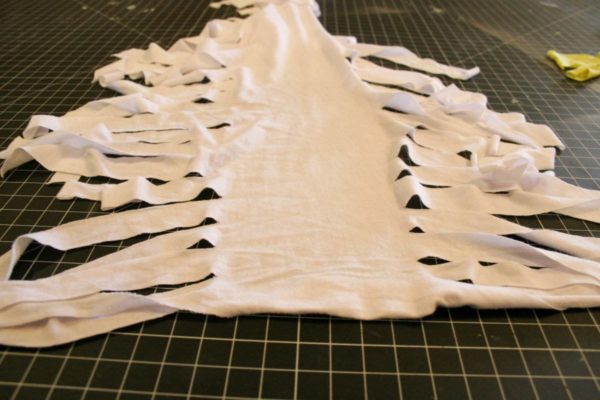
This is what your scarf will look like once you have cut it unfolded it.
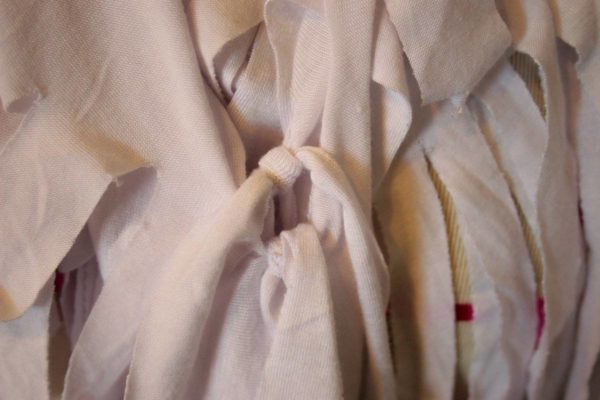
Step 4: Tie ends together
Knot your ends together to make this an infinity scarf. If you were working with a strip of fabric you will need to do this. Note, I wore the scarf first and then decided where to knot the ends after seeing how the scarf fell around my neck.
If you were working with a T-shirt, your tassels are already in a circle, however, you can tie the two shirts together to add volume.
Step 5: Cut away excess fabric
Cut away any excess bulk, since this scarf has a lot going on, you don’t want it to look too busy.
That’s a wrap! You did it, now you have two very cool and very unique scarves to add to your wardrobe – or give to a friend. 😉
Something I like about them is how simple they were to make, and now that I’ve got these techniques down, I can totally use the same skills to make other cool stuff – cool bedroom tassel banner anyone? As I was crafting these I kept thinking how they looked like something straight out of an Anthropologie display. So mark my words, you will be seeing these same ideas reused again in an interior space.
Until then – happy crafting! Please share your own thoughts and adventures in the comments below, I’d love to see what you came up with!