

Instead of spending $100 of your hard earned cash, learn how to make a macro lens for your smartphone…for free.
How To Make A Macro Lens
Get Awesome Close-Up Photos With This DIY Macro Lens For Your Smartphone
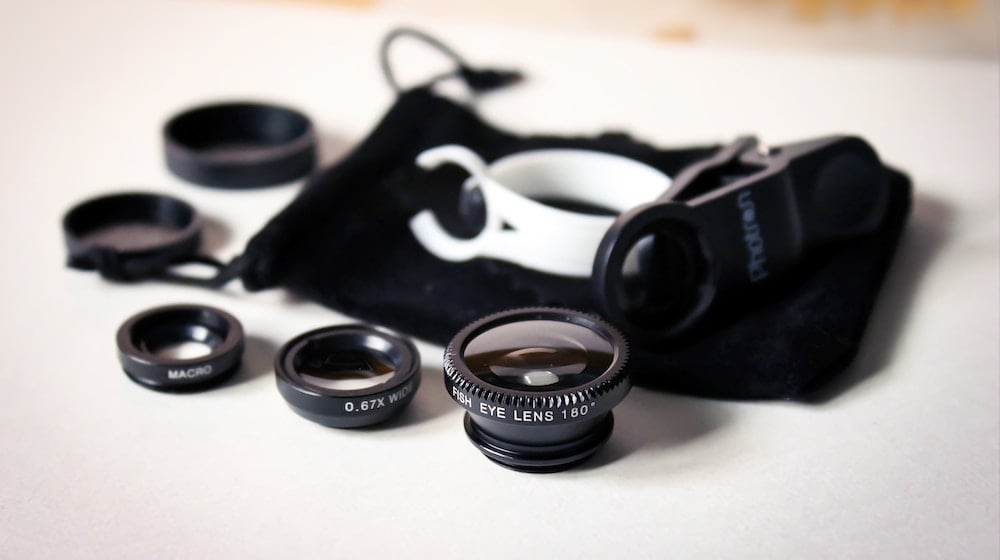
, a company that specializes in tools and accessories for mobile photographers, offers a number of macro lenses that allow anyone with a smartphone to take clear and crisp up-close photographs. Otherwise difficult objects to shoot in great detail, such as small insects, flowers and coins, instead come to life with a macro lens.
Unfortunately, if you want to get this sort of lens for your iPhone or Android device, you’ll need to shell out anywhere from $70 to $120…and that’s not including taxes and shipping (since most lenses are sold online). If you’re interested in your very own macro lens, but don’t want to spend money, why not just make your own?
If you’ve got an old camera laying around, you can pretty easily make a macro lens at home. Using Instructables’ user Victor Does‘ guide, you can learn how to disassemble an old camera and attach its lens to a phone case for an inexpensive DIY macro lens.
What You Need:
- old camera (not a digital camera)
- case for your smartphone
- super glue
Instructions:
1. Grab your old camera and take it apart so that you can detach the lens from it. You might need a few tools, such as different sized screwdrivers, to get everything apart.
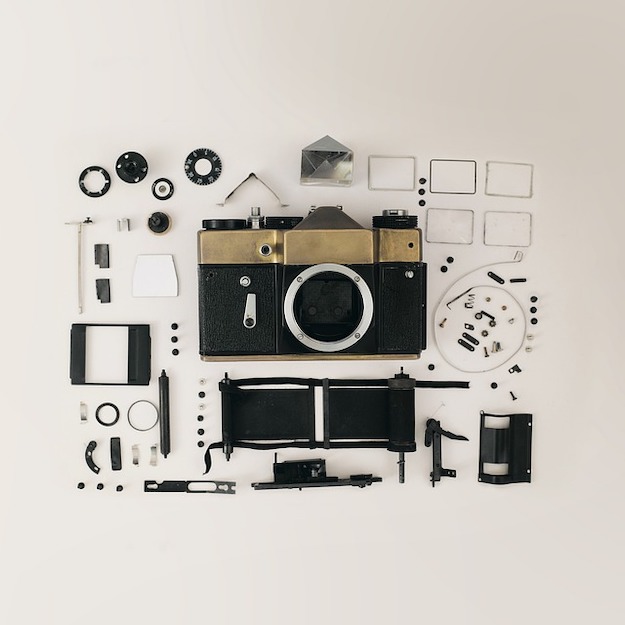
2. Carefully remove the lens from its casing and look through it to see if it does indeed work at magnifying smaller objects, which you’ll be able to tell instantly.

3. Since this is a semi-permanent process, you should use a backup smartphone case that you don’t mind messing with. Next, place your smartphone inside the case and play around with the position of the lens over the opening for the rear camera to see what works best. Remove the phone from the case before you glue the lens to it so that you don’t get any glue on it. Apply glue to the lens first and then press it firmly to the case. Hold it in place for a few seconds while the glue dries.
4. Your macro lens case is now complete!
5. After you’re sure that the glue is completely dry, slip the smartphone into the case, open the camera app and take some pictures. Below you can see a couple of beautiful, very-detailed close up pictures taken with the DIY macro lens.

Make sure to play with the distance in which you take the picture, since you’ll need to be very close to the object to get a better quality picture. This lens won’t be able to take any far away pictures, so you’ll really need to get in there. With this simple tool, you should be able to grab some professional looking photos that will impress your friends and family…all without having to spend a dime.


