Interested in making your own jewelry and don’t know where to start? You’ve come to the right place. Launching into some of the jewelry making basics, we will begin with a tool to make handmade jump rings. Jump rings, if you have never worked with them, are tiny little metal rings that often act as the “glue” that holds most jewelry together, and sometimes jump rings are the only thing that many popular wire jewelry pieces are made out of. If you know how to make jump rings, you end up with endless possibilities in the jewelry making department.
This project is very simple and should only take about 20- 30 min of work time to complete. The design of the mandrel tool is very simple and has not changed at all from those used in medieval times by blacksmiths; who had to make thousands of jump rings a day to produce the chainmaille armor that knights wore.
There are a few pre-made versions of the jump ring mandrel sold in craft stores, but the drawback is they can only make small, 1-inch coils at a time, giving you maybe 20-to-30 jump rings in one shot. This limited capacity can be a major time killer, but we have a solution for you. In fact, you can modify this tutorial to make a mandrel that can produce hundreds and even thousands of jump rings.
Why pay $10 for bag of a few pre-made jump rings from the craft store, when you can make thousands at a tiny fraction of the cost? And don’t forget to check out the bonus video of the mandrel in action at the bottom of this tutorial.
Jump Ring Mandrel | DIY Jewelry Making Supplies
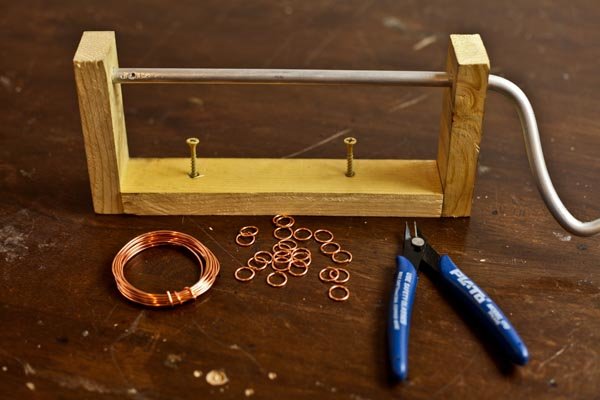
Supplies you will need for this DIY jump ring mandrel:
- (1x) 11-inch long scrap of wood at roughly 2-inches wide and 3/4-inches thick (sizes can vary, see notes below)
- (2x) 4-inch long scrap of wood with the same thickness and width as the 8-inch piece.
- (1x) Aluminum metal rod at 16-inches in length 1/2-inch diameter (sizes can also vary, again, see notes below)
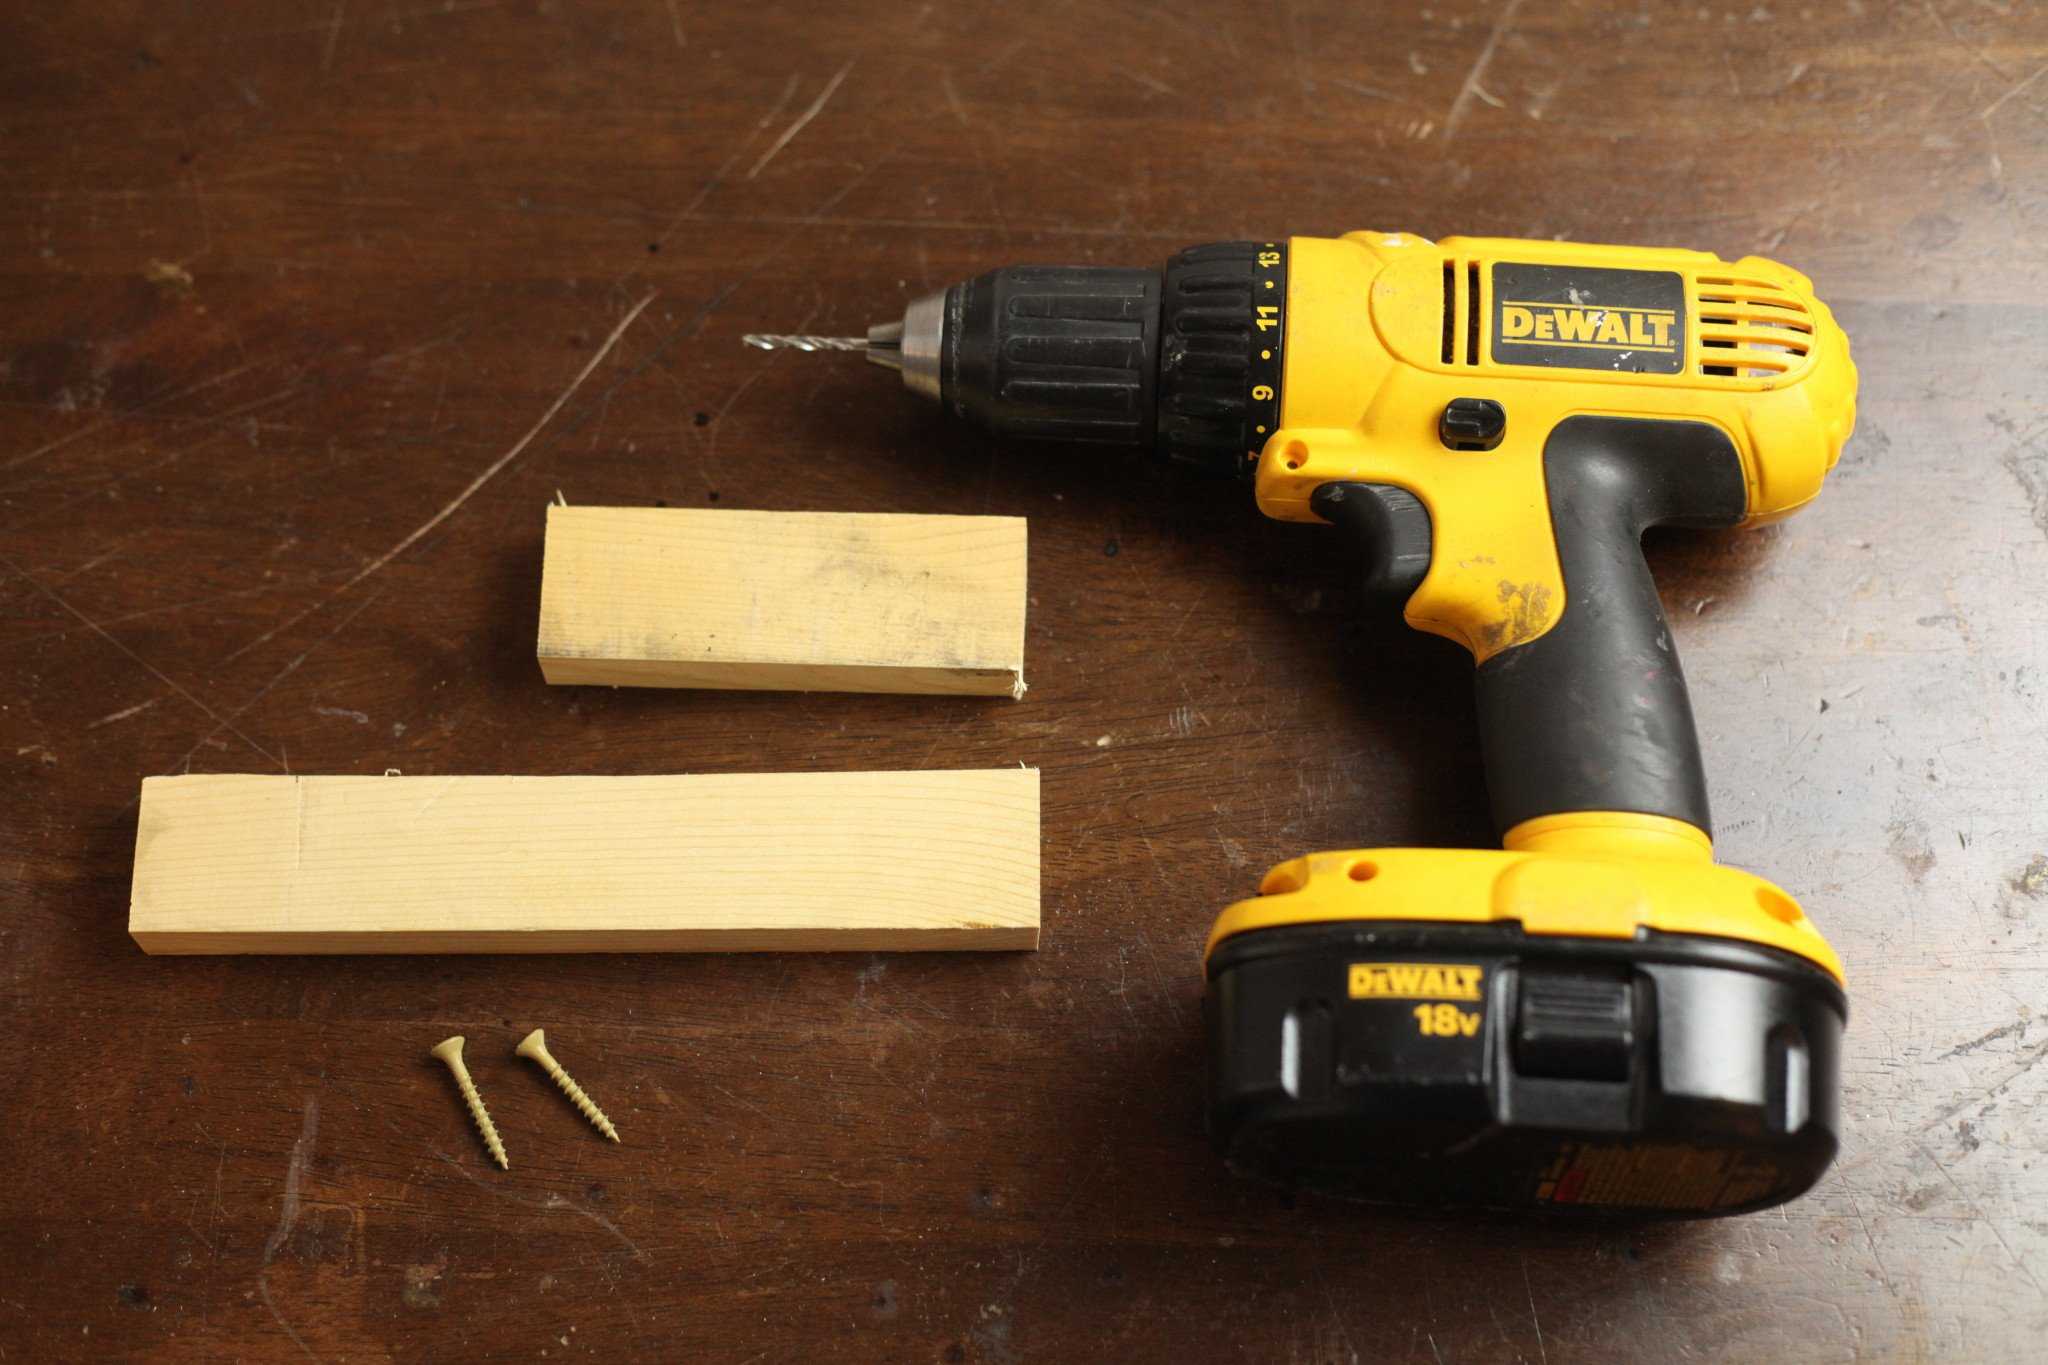
- (x6) 1-inch wood screws (Your length will be based on how large a piece of wood you use)
- Drill with corresponding bits (1/8th for screws, 1/2 for the metal rod we used)
- Handsaw or power saw of your favored variety (you can also get wood cut at the lumber yard if need be)
- Wire cutter/clipper (available at any hardware store)
- Clamps (optional)
Supply Notes:
The size of the wood you use in this project can vary widely because any long, straight pieces of scrap wood will do. I normally just base it on how big I want my tool to be. We used small scraps around the shop from old projects for our mandrel. If you have never done this before, I’d suggest starting with a small one like the one we make below and then building a bigger one later if you so desire.
The aluminum metal rod is readily available in the welding section of any decent hardware store and will usually run you around $4.
The two drill bits needed are going be: one slightly smaller then your screws to make pilot holes (it’s always smart to pre-dill the wood if putting screws near the edges so that the wood doesn’t split when you screw it in) and one the same diameter as the metal rod you end up using. The larger diameter the rod, the bigger your final jump rings will be.
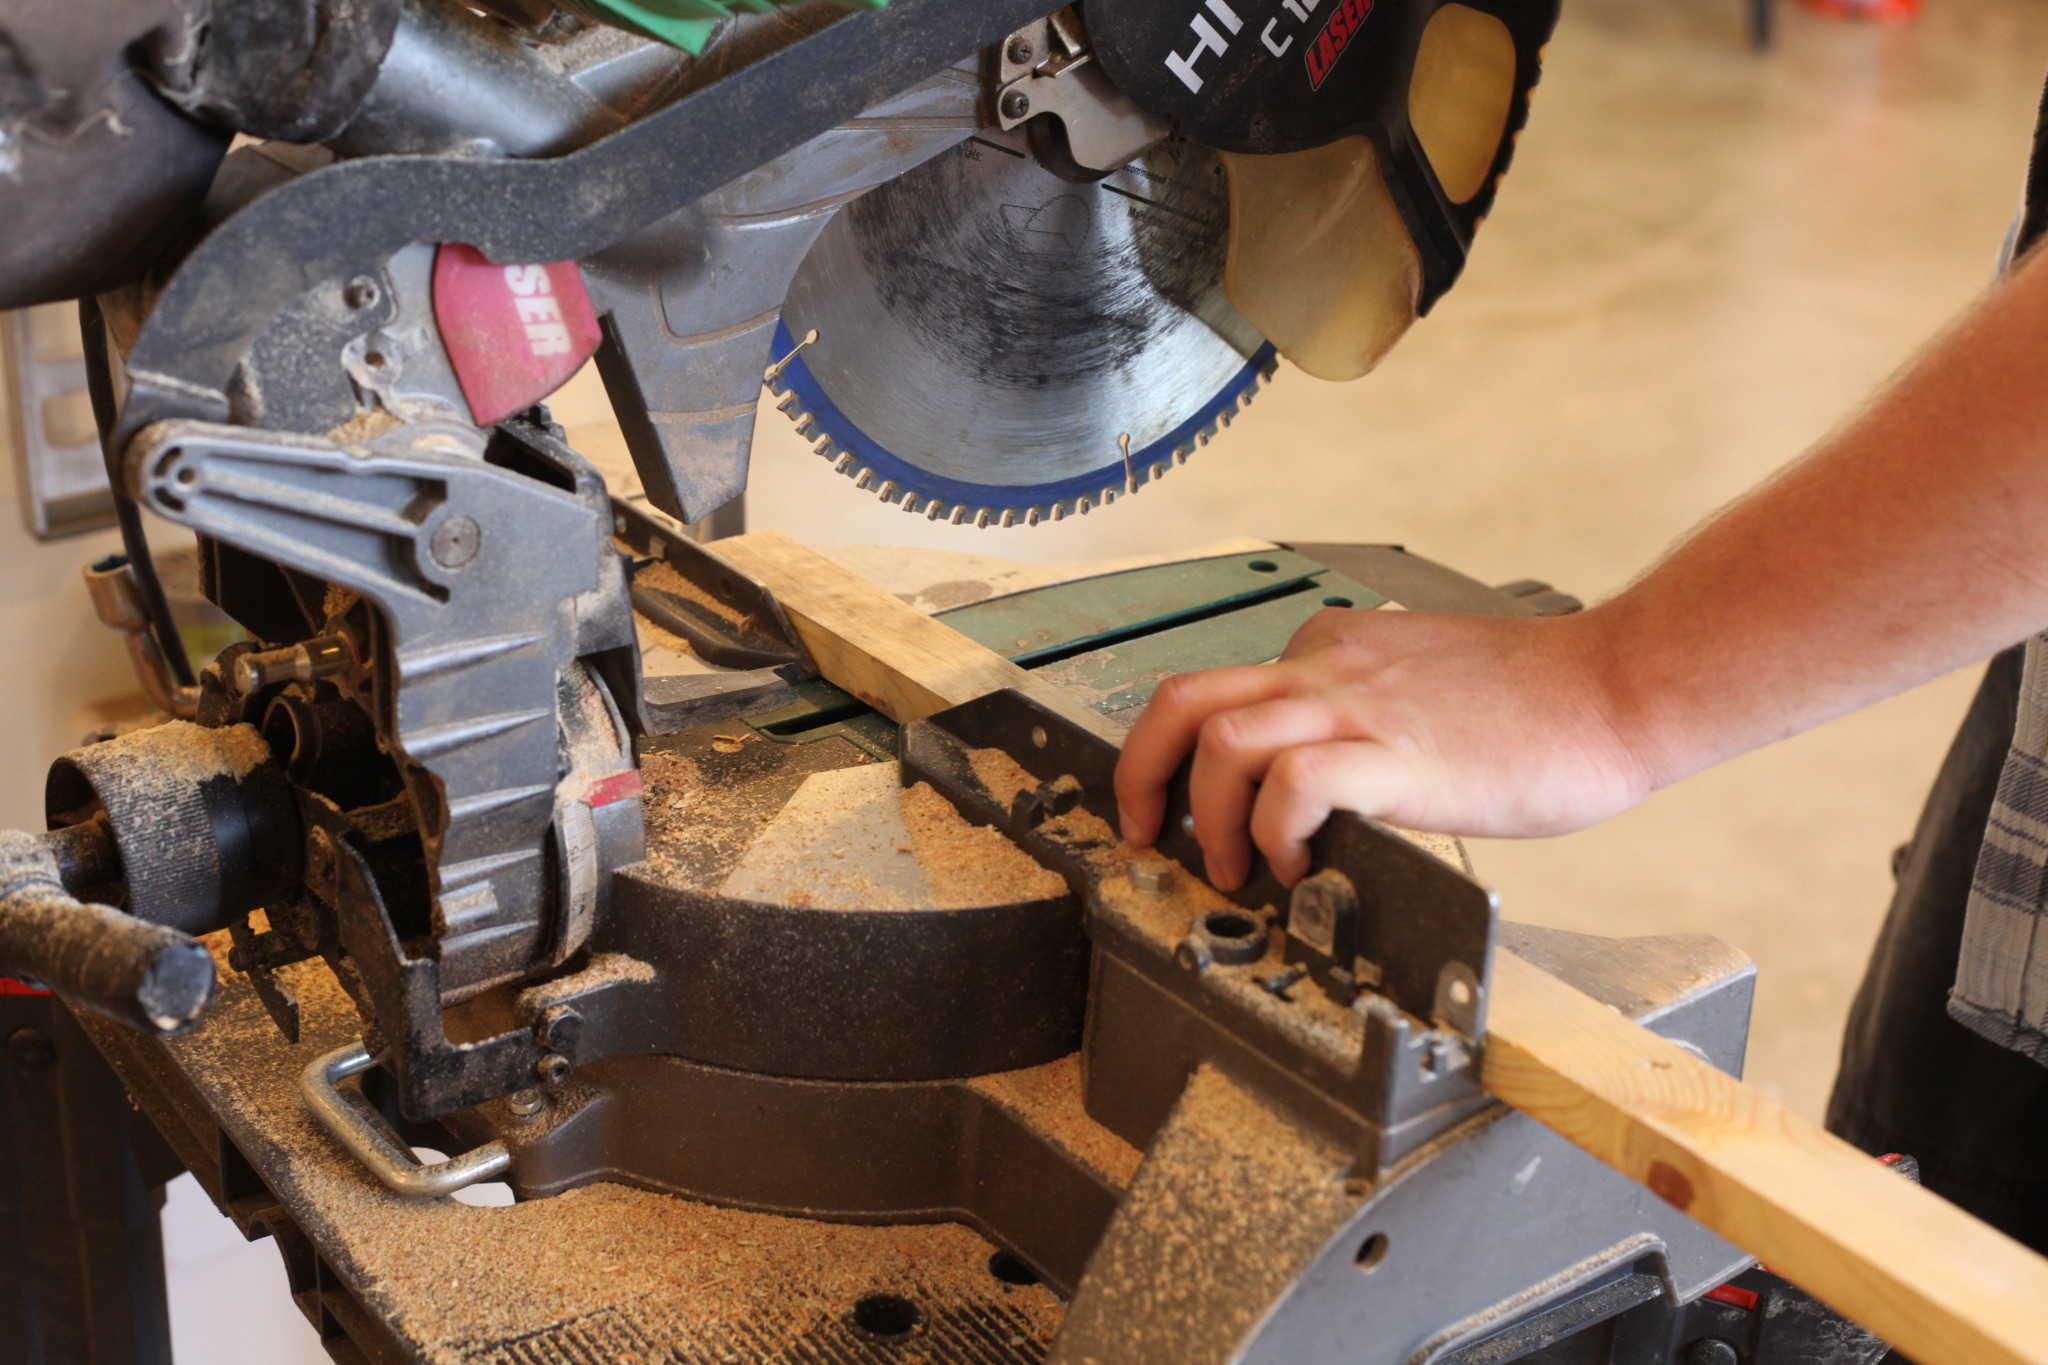
Step 1: Cutting your wood pieces
The easiest way to get your scraps is to cut them all from one piece of wood. I used a chop saw to cut my 11-inch base and two 4-inch side walls, but your sizes can, of course, be bigger. You can very easily use a handsaw or Japanese furniture saw for these simple cuts if you don’t have access to larger power tools.
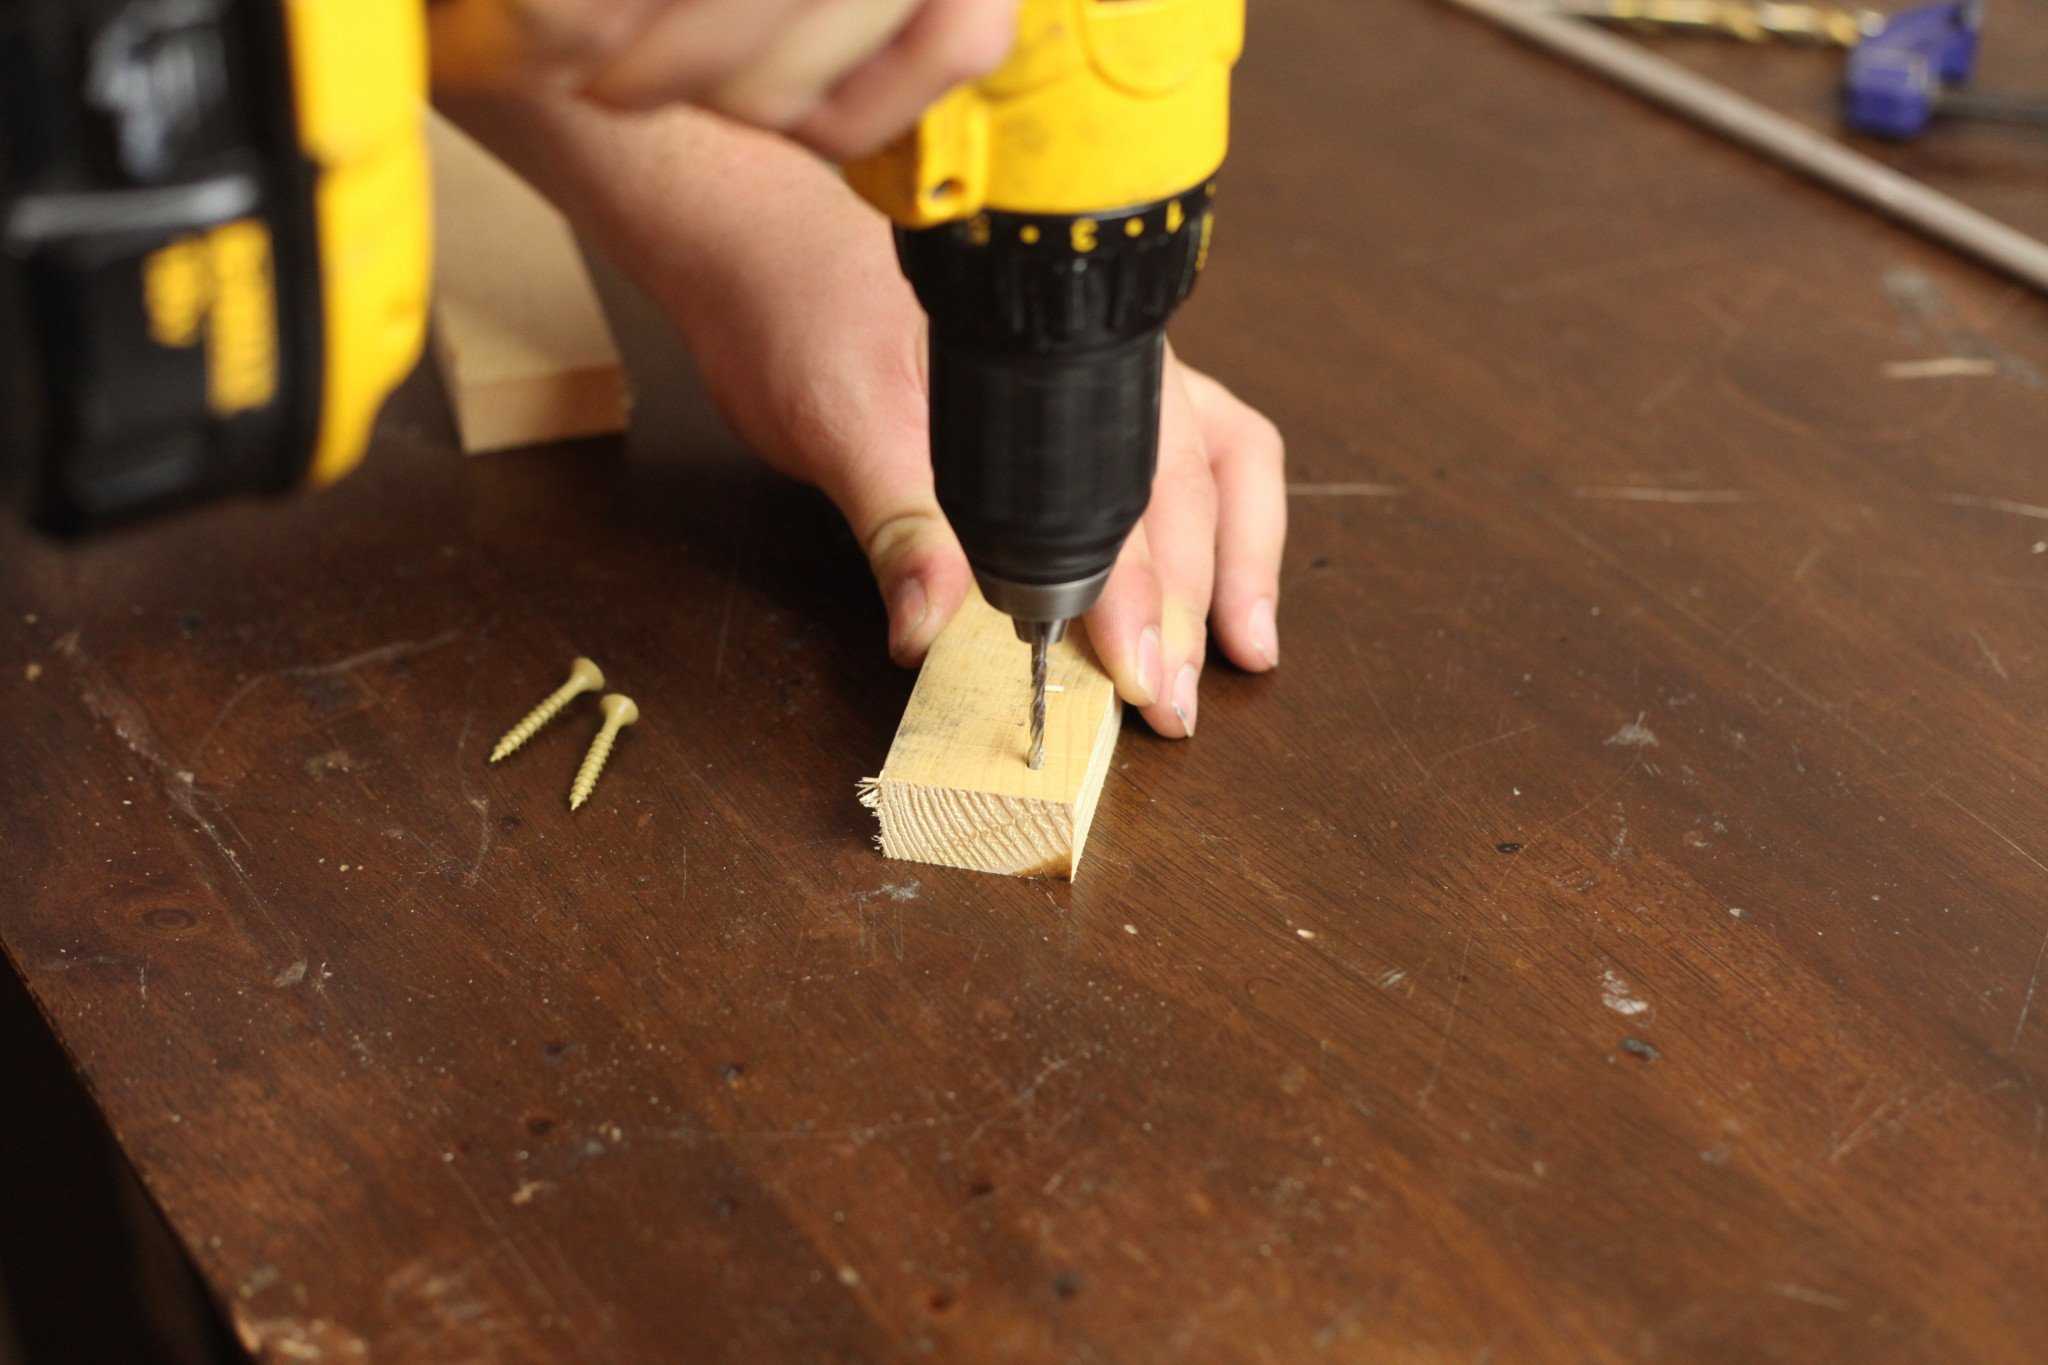
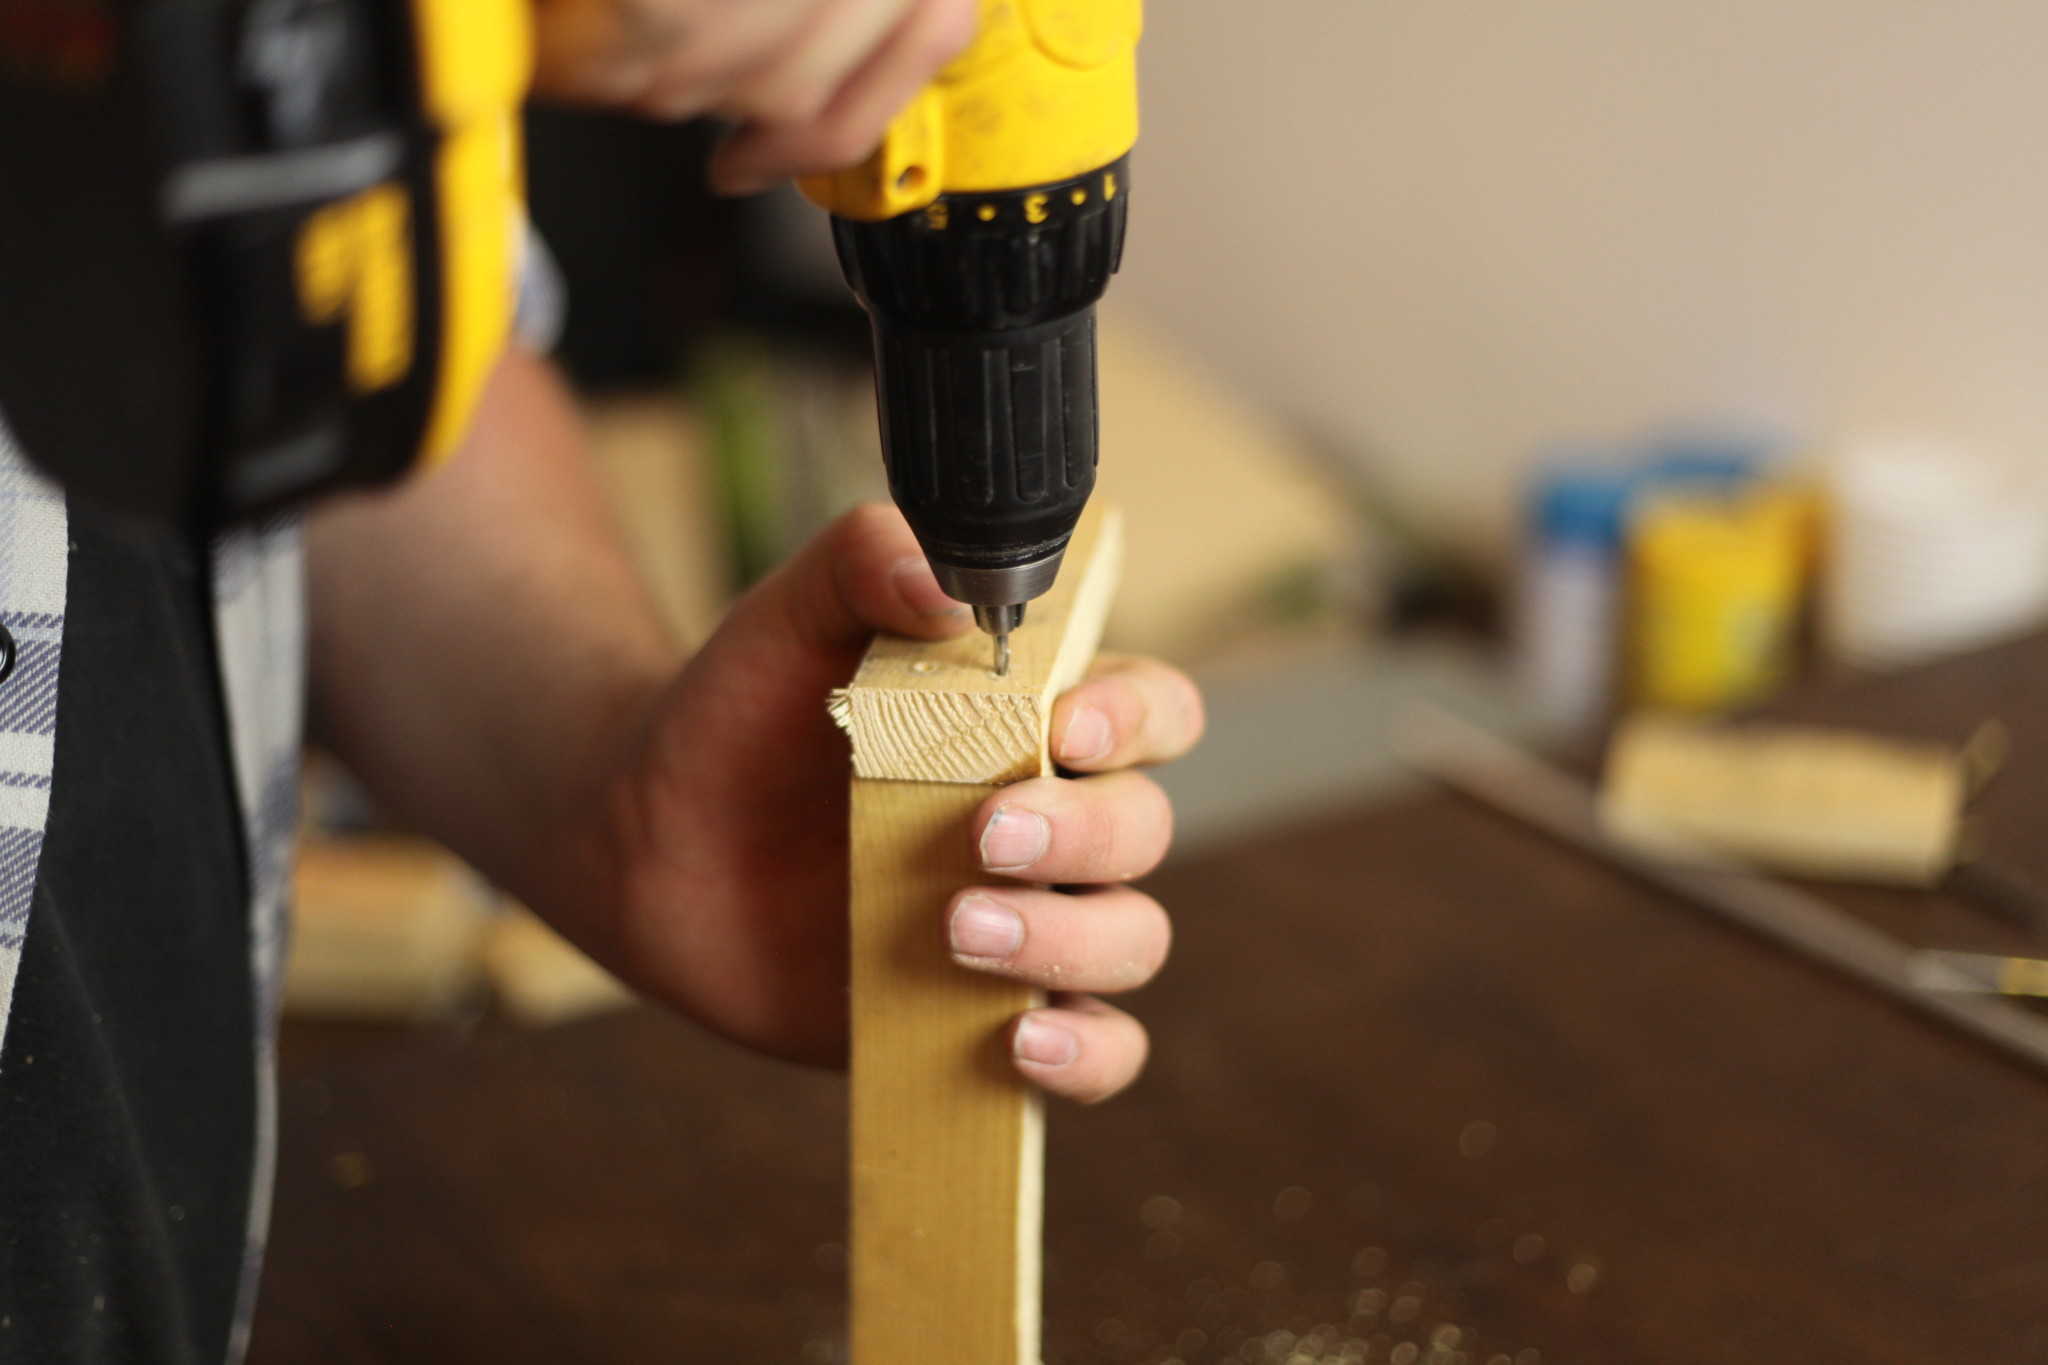
Step 2: Pilot holes in your wall boards
Next we are going take our longer base wood and one of our shorter wall pieces, and attach them together with two screws. Drill two pilot holes into the bottom face of one of your wall pieces first.
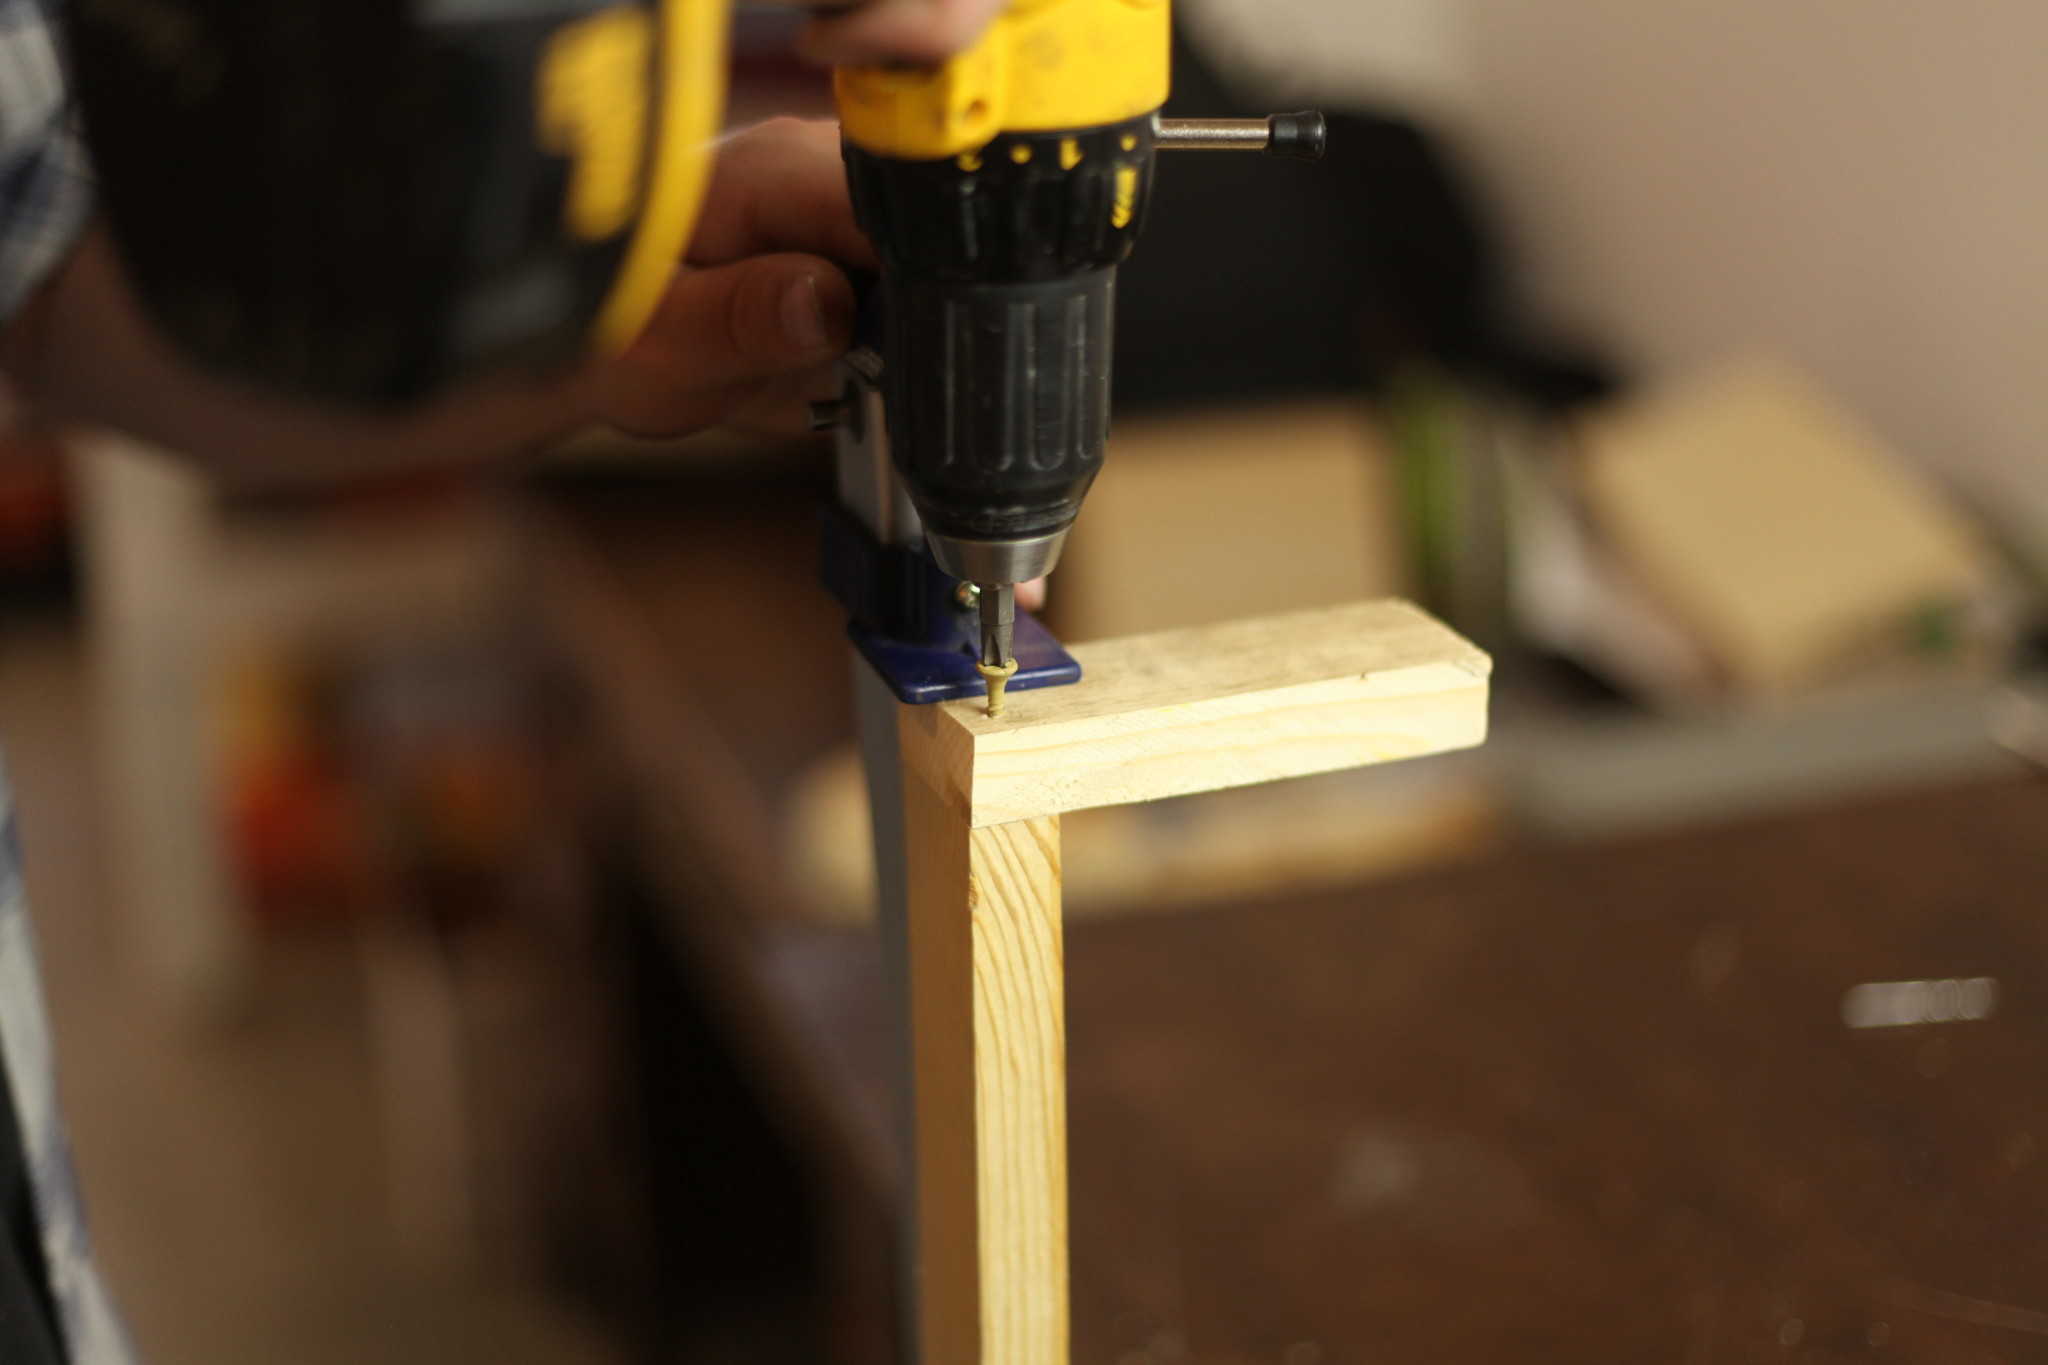
Step 3: Attach the base to one wall
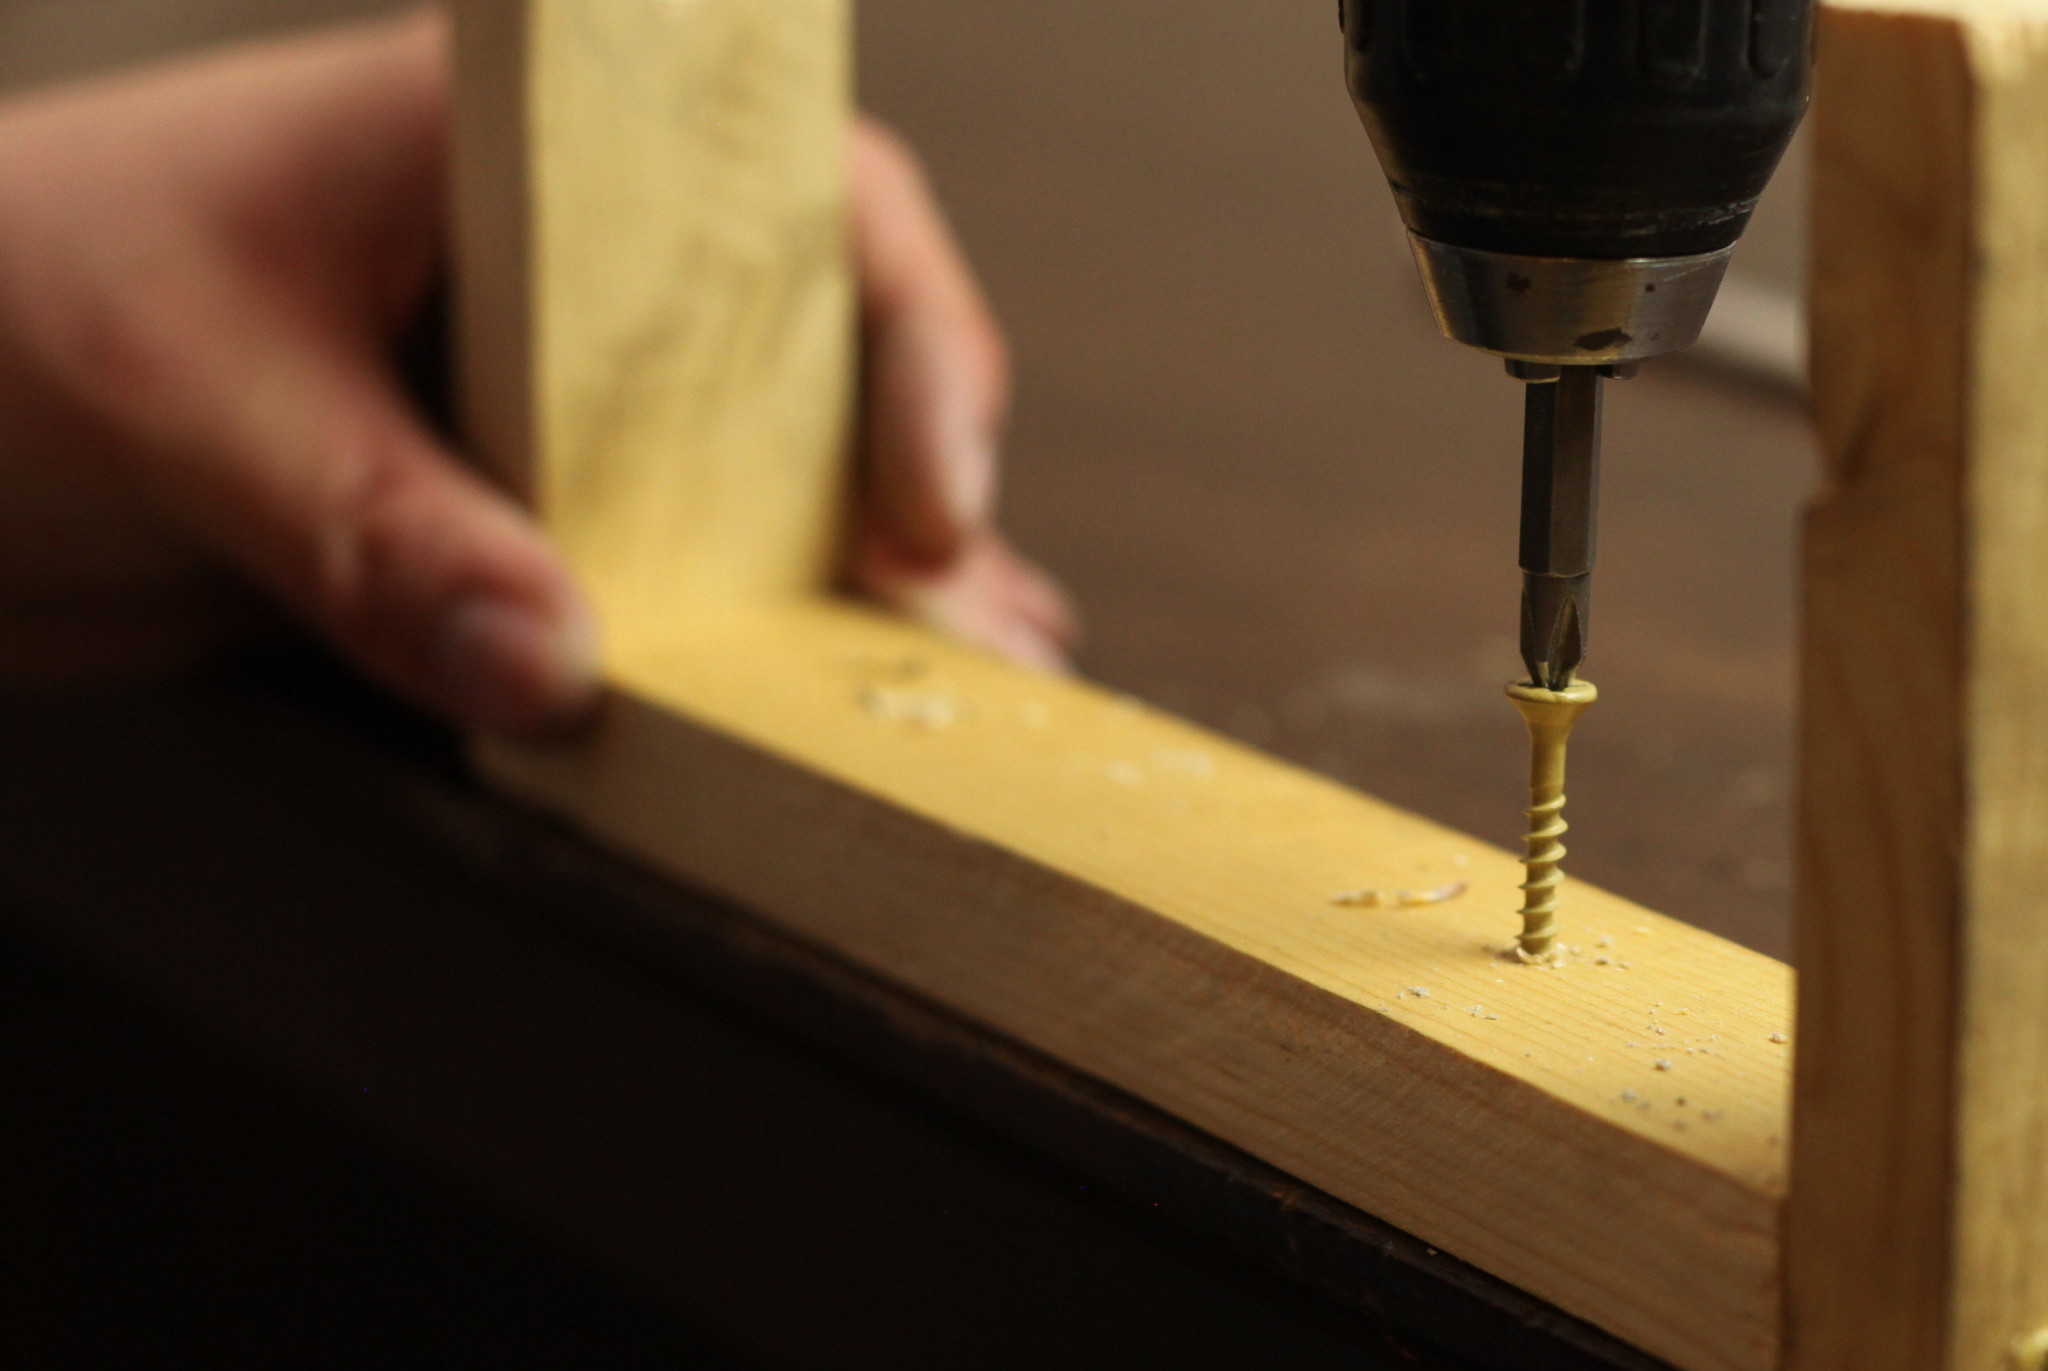
After you have started drilling your holes in the wall board, hold it nice and flush against the side of the base to create an L.
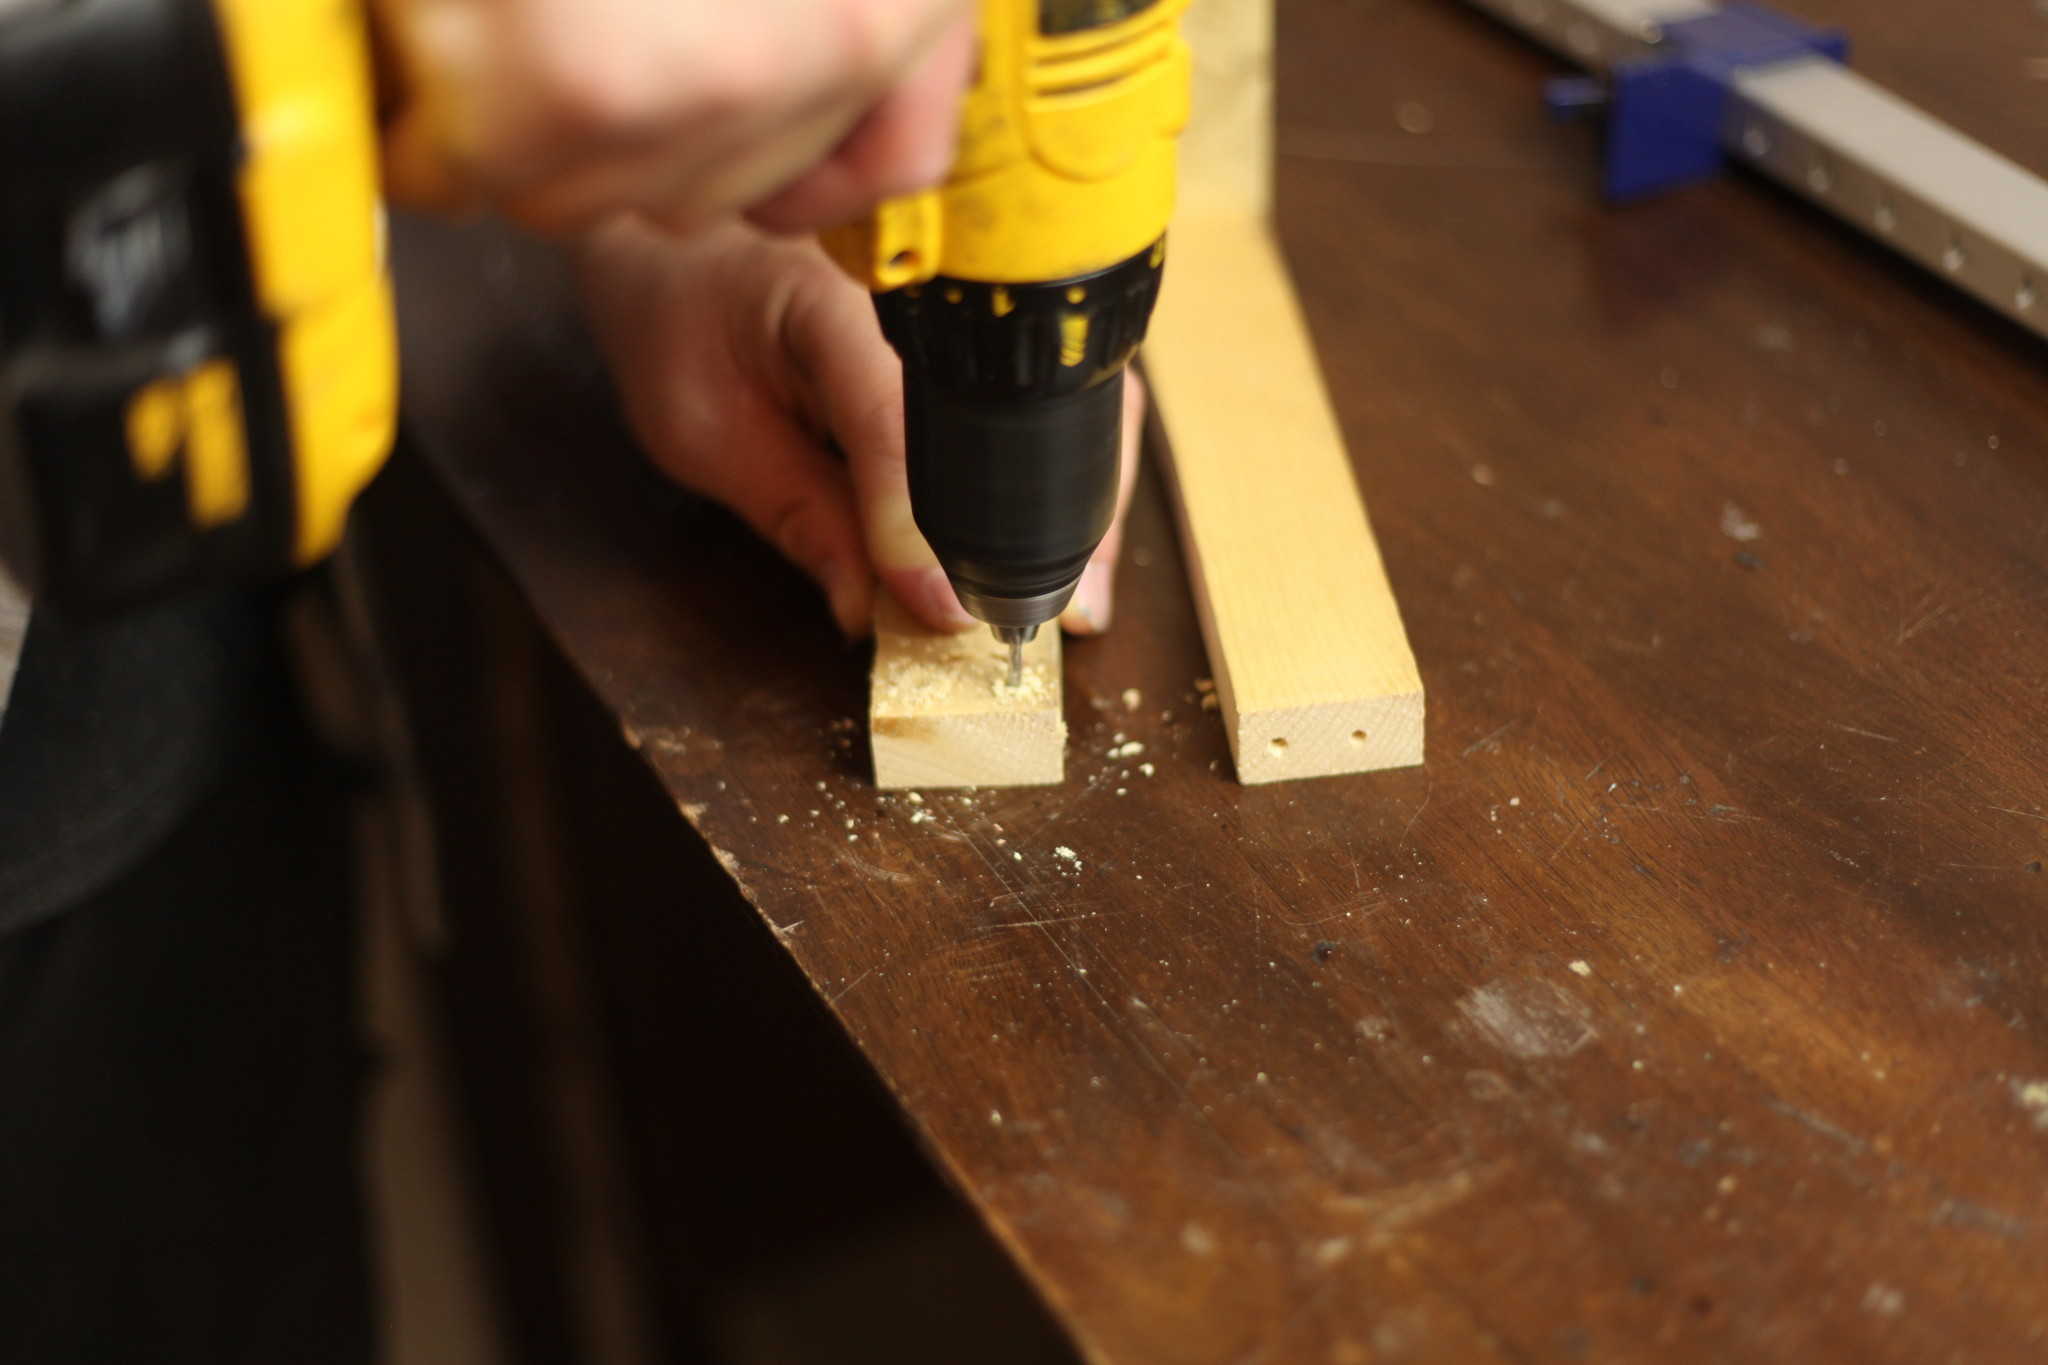
Continue the drill holes into the base. Below you can see how I got away get away with just holding the pieces in my hand, but this can end up making your end result look sloppy and is also not very safe for your fingers.
The best way is to use a wood clamp if you have one long enough to hold the wood wall against the base while you drill. Then, when you have your hole drilled, drive in one screw so when you release your clamp to drill the other side, your wood will not move.


 ‘
‘
Step 4: Repeat for other wall piece
Flip your base around and grab your other wall section of wood. Repeat Step 3 now on the other wall board, drilling and affixing it with screws.

Step 5: Create the hole for your rod
Take the larger drill bit you picked out that matched the size rod you will be using. We used a 1/2 diameter rod, which is why we then used a 1/2-inch drill bit. We will be drilling two holes on each side of the wall. They don’t need be perfectly lined up, but shoot for about 1-inch down from the top of each wall and dead center.

___________________________

Step 6: Slide in your rod, mark your bend
Go ahead and slide your metal rod in-between the wall holes you made to make sure it all fits.
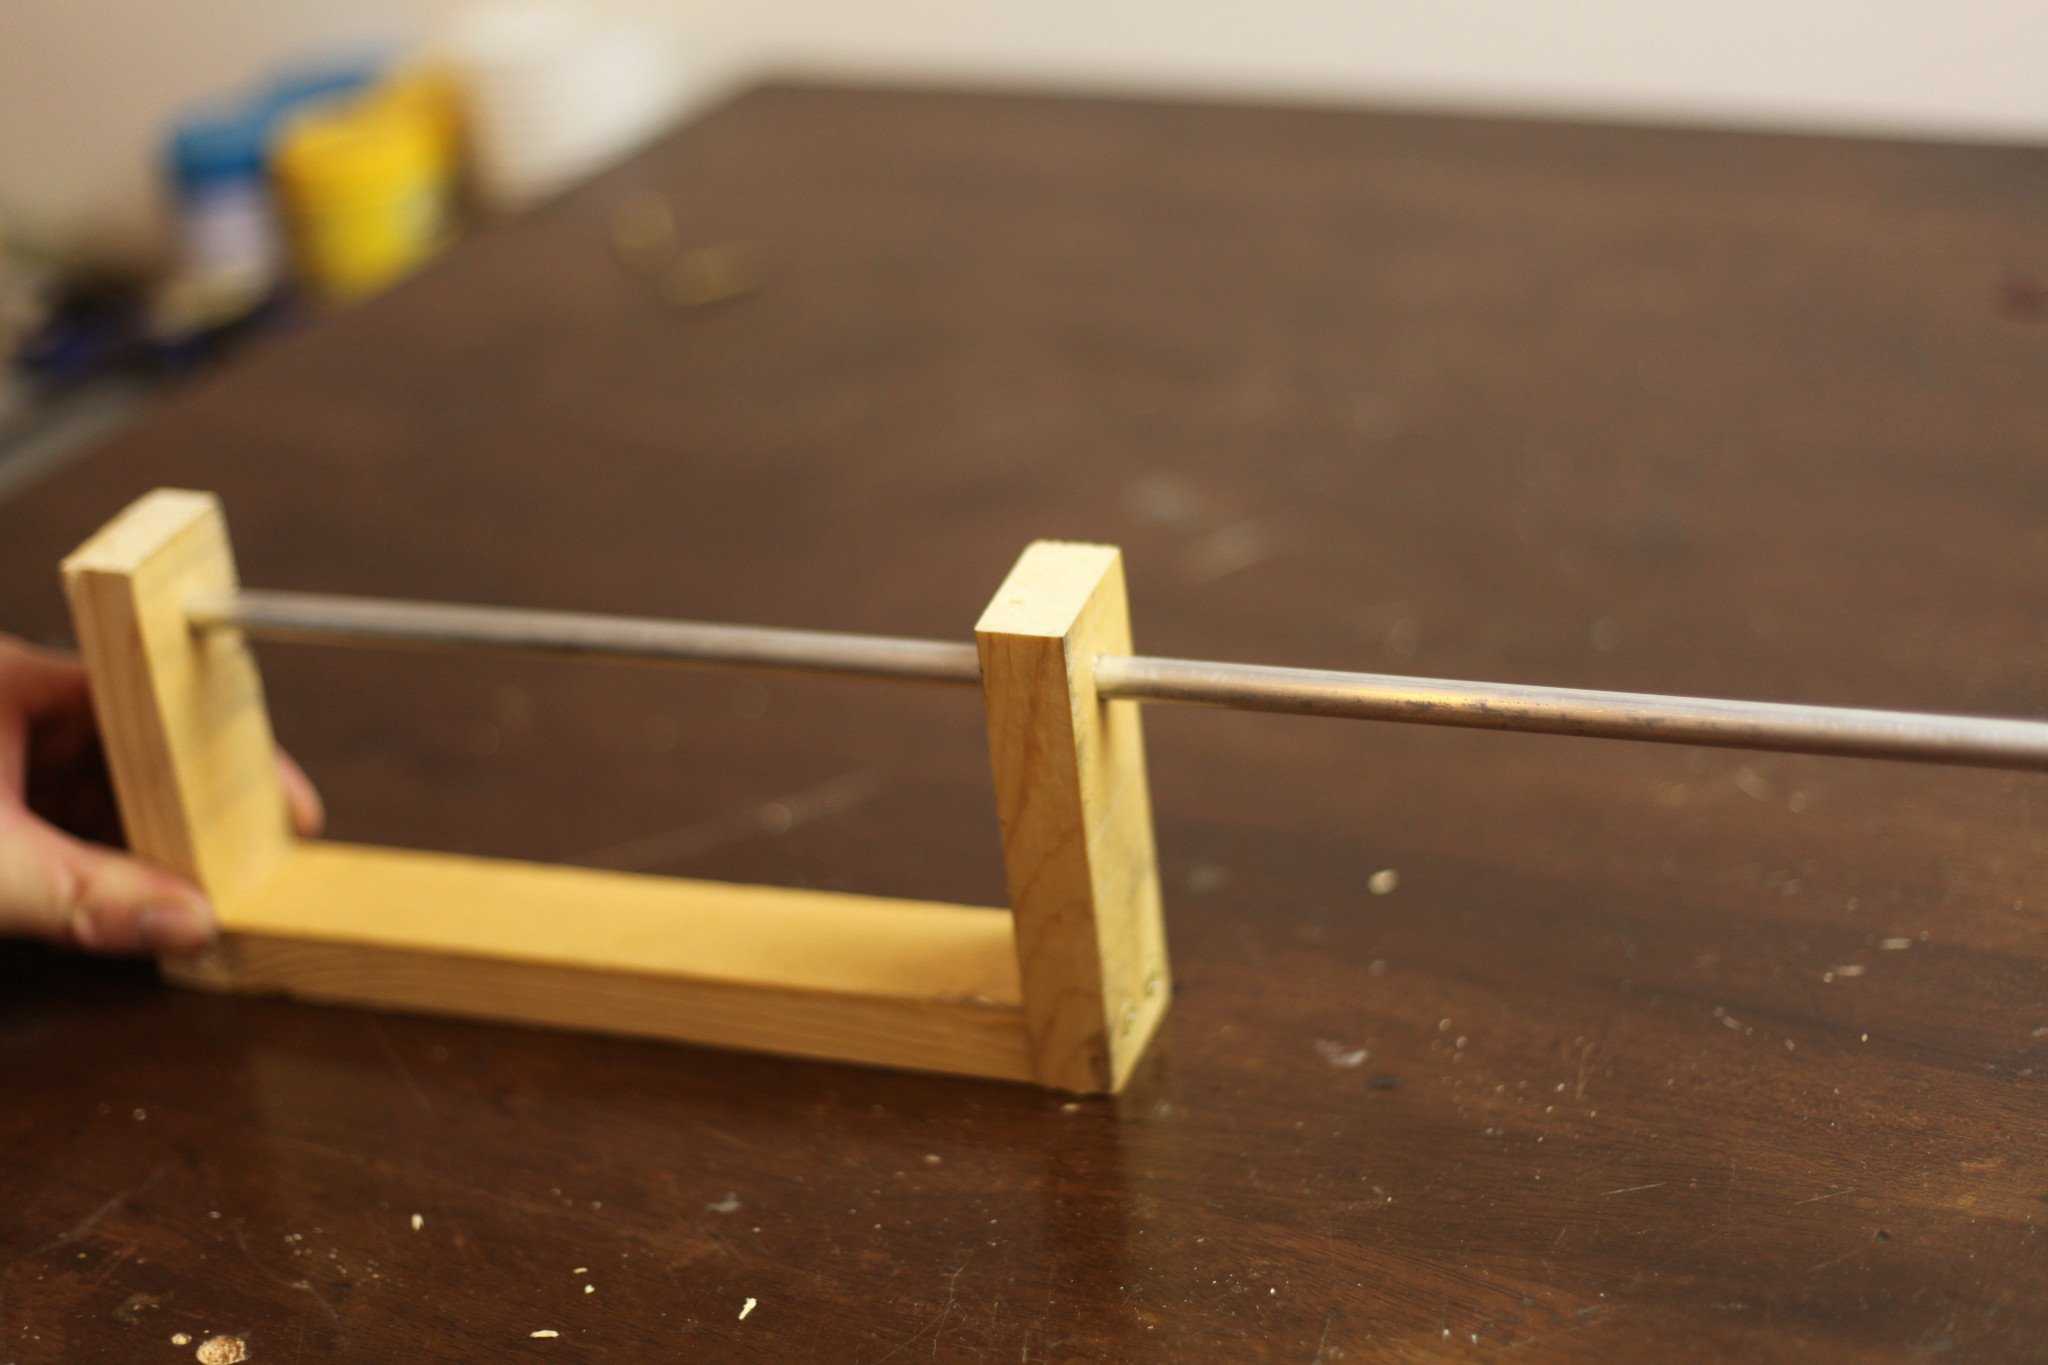
Then make a mark about 1-inch OUTSIDE from the wall (where all the excess rod comes out of). This is the FIRST bend mark for our handle.
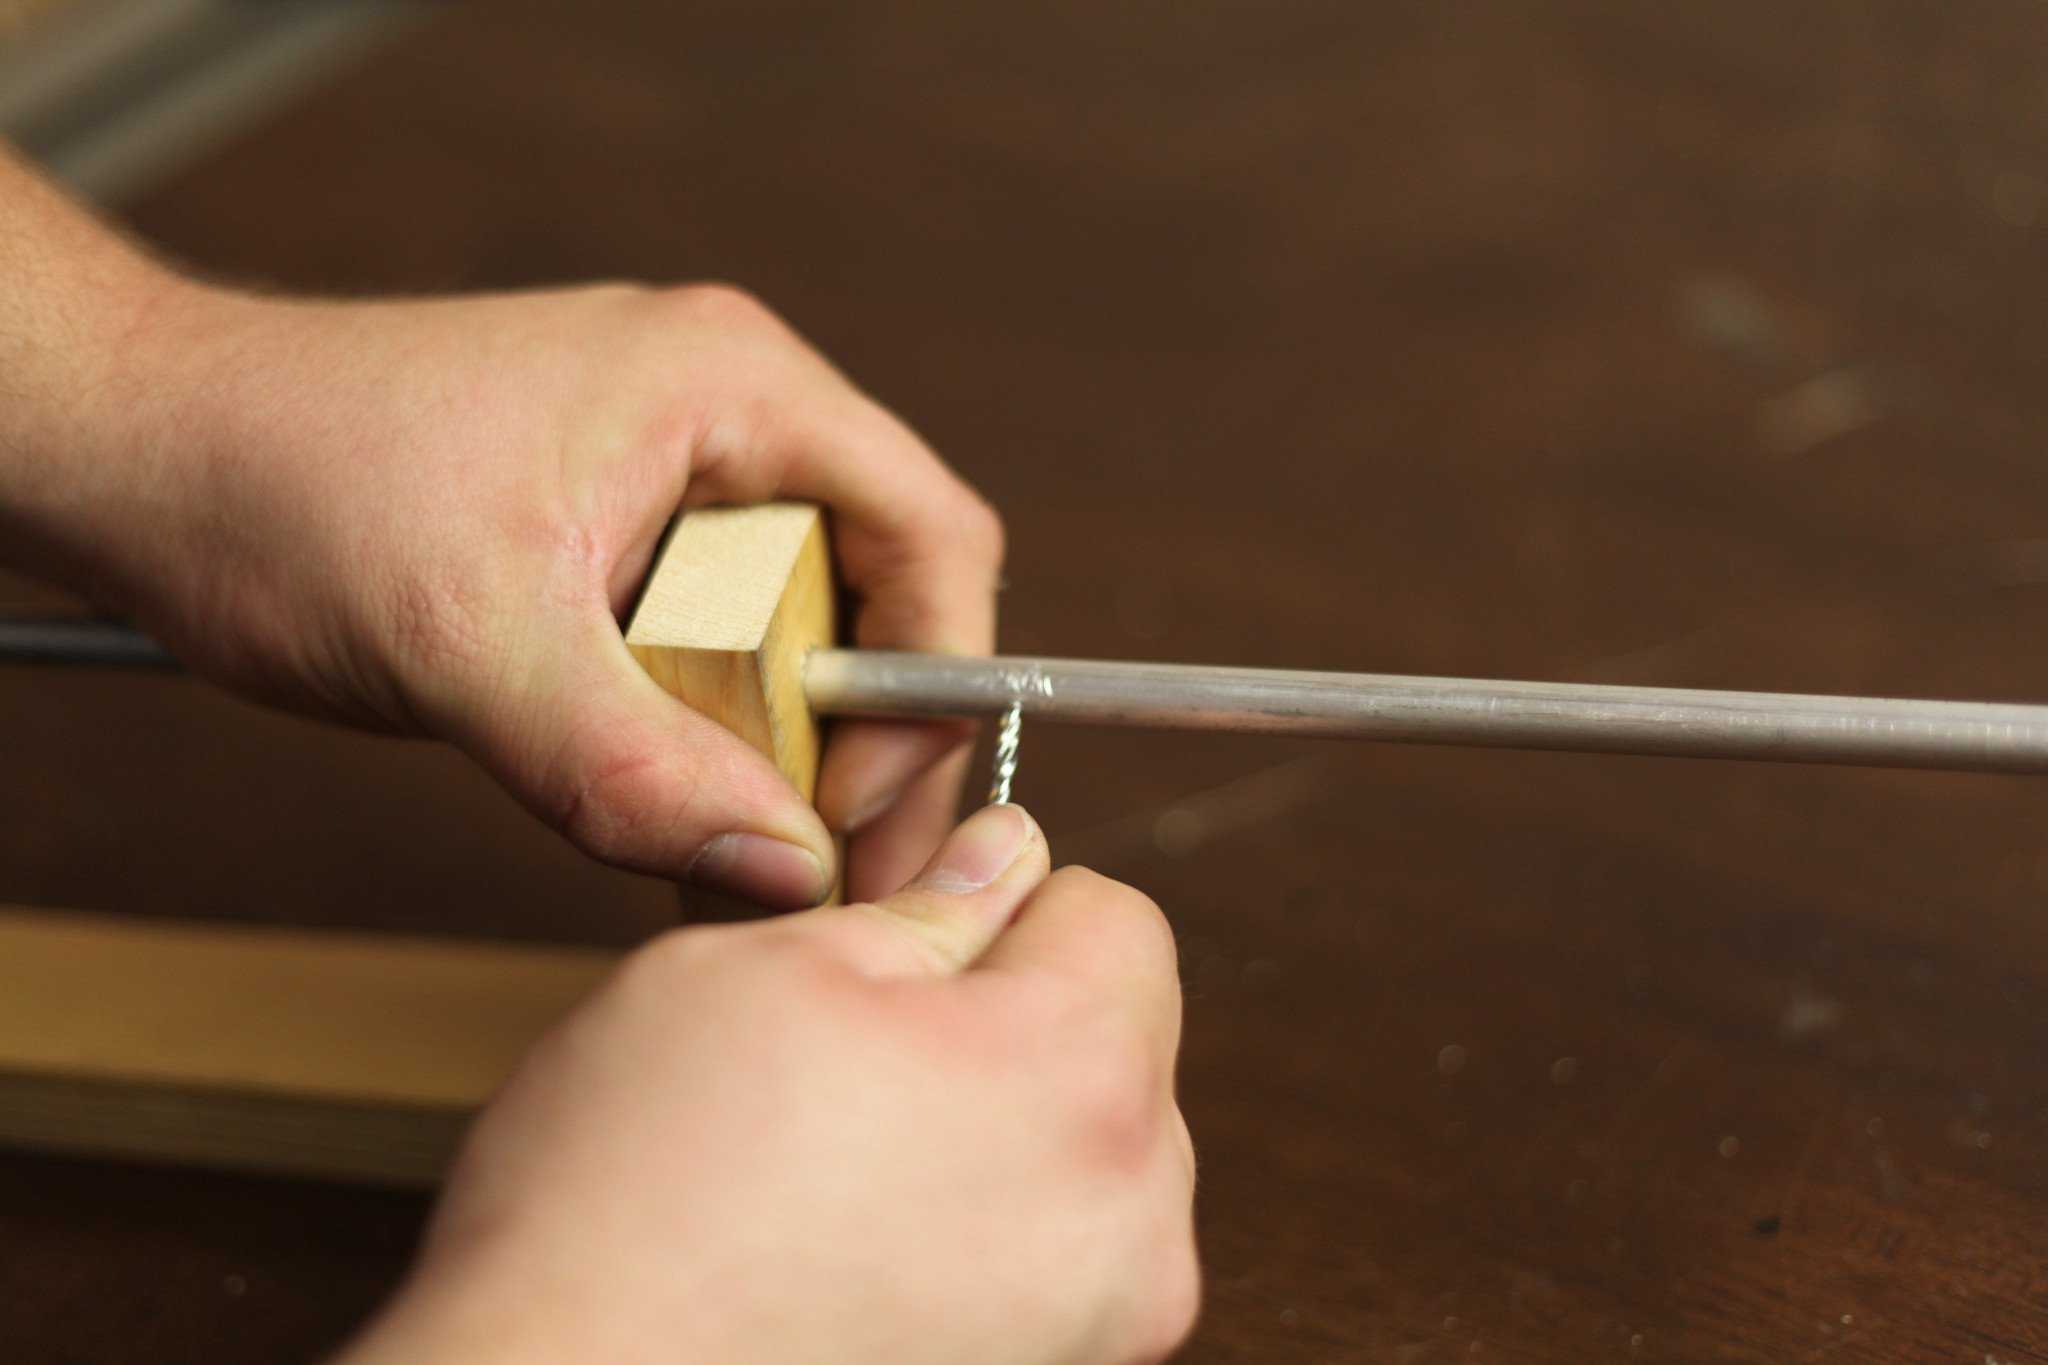
Step 7: Create your handle
We used some brute force to bend the handle into the rod. Either lay the mark you made on the end of a hard edge (like our table) or, ideally, clamp marked area right on the edge . Don’t have a clamp? Don’t worry, it can be done by hand, although it will be harder. However, you will not need to go to the gym that day.
I would normally use a small plumber’s or jewelry fire torch to heat the metal in the spot where I want to bend it, and it will bend like butter. Anyone who tries heating the metal to bend needs to take all the necessary safety precautions, but since this is a beginner’s tutorial I’d prefer to keep the fire at bay till down the road.

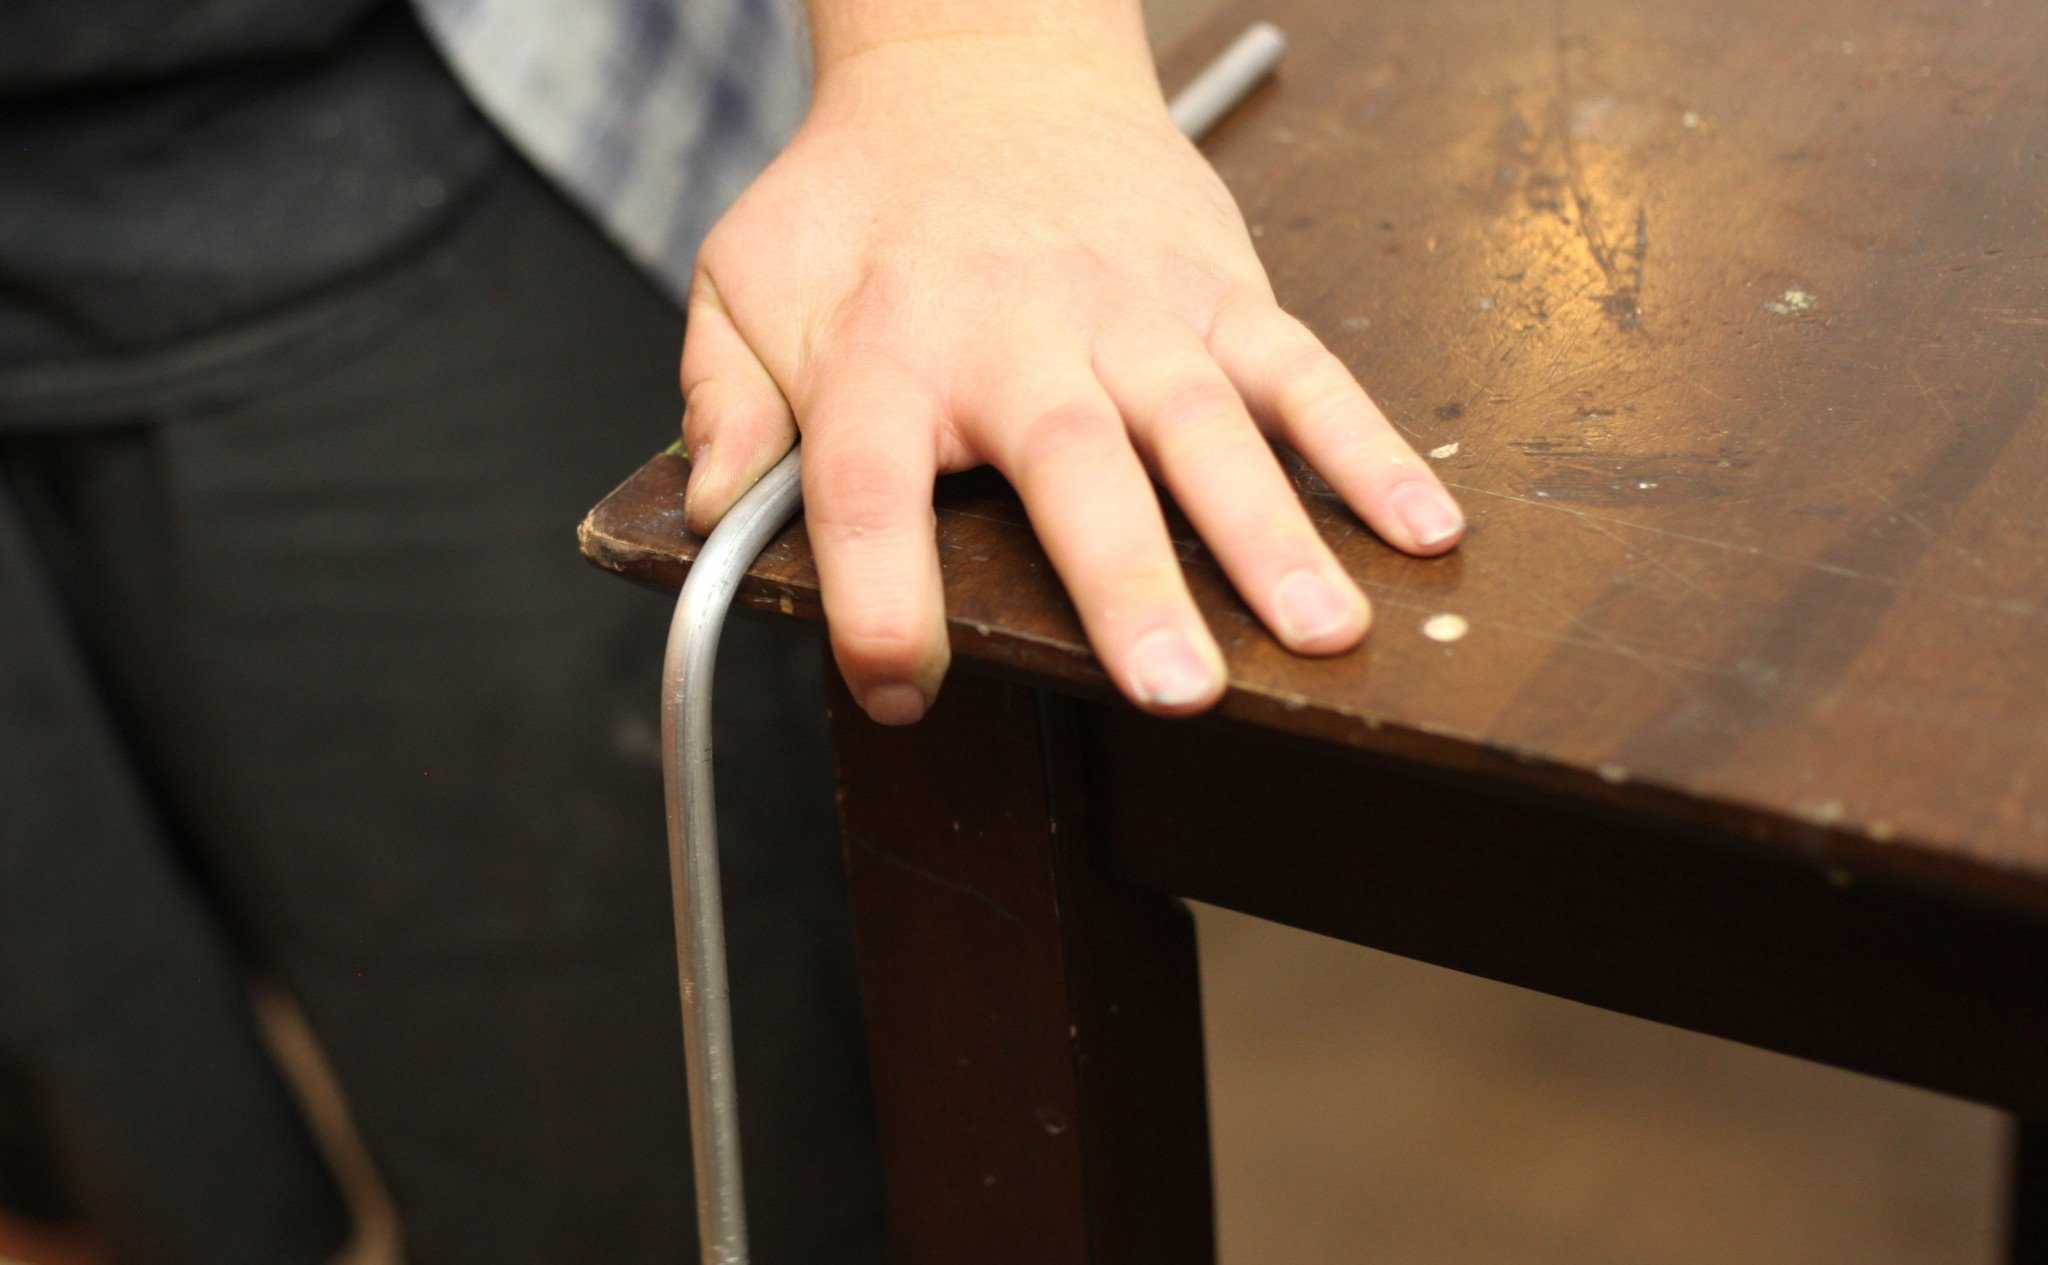
The second bend is definitely where the clamp comes in handy, because as you can see below we slid the end of our new L-shaped rod about 3-inches back into the clamp so that we can create a second bend. This will get the end of the rod into an S-shape, making it perfect for a handle.
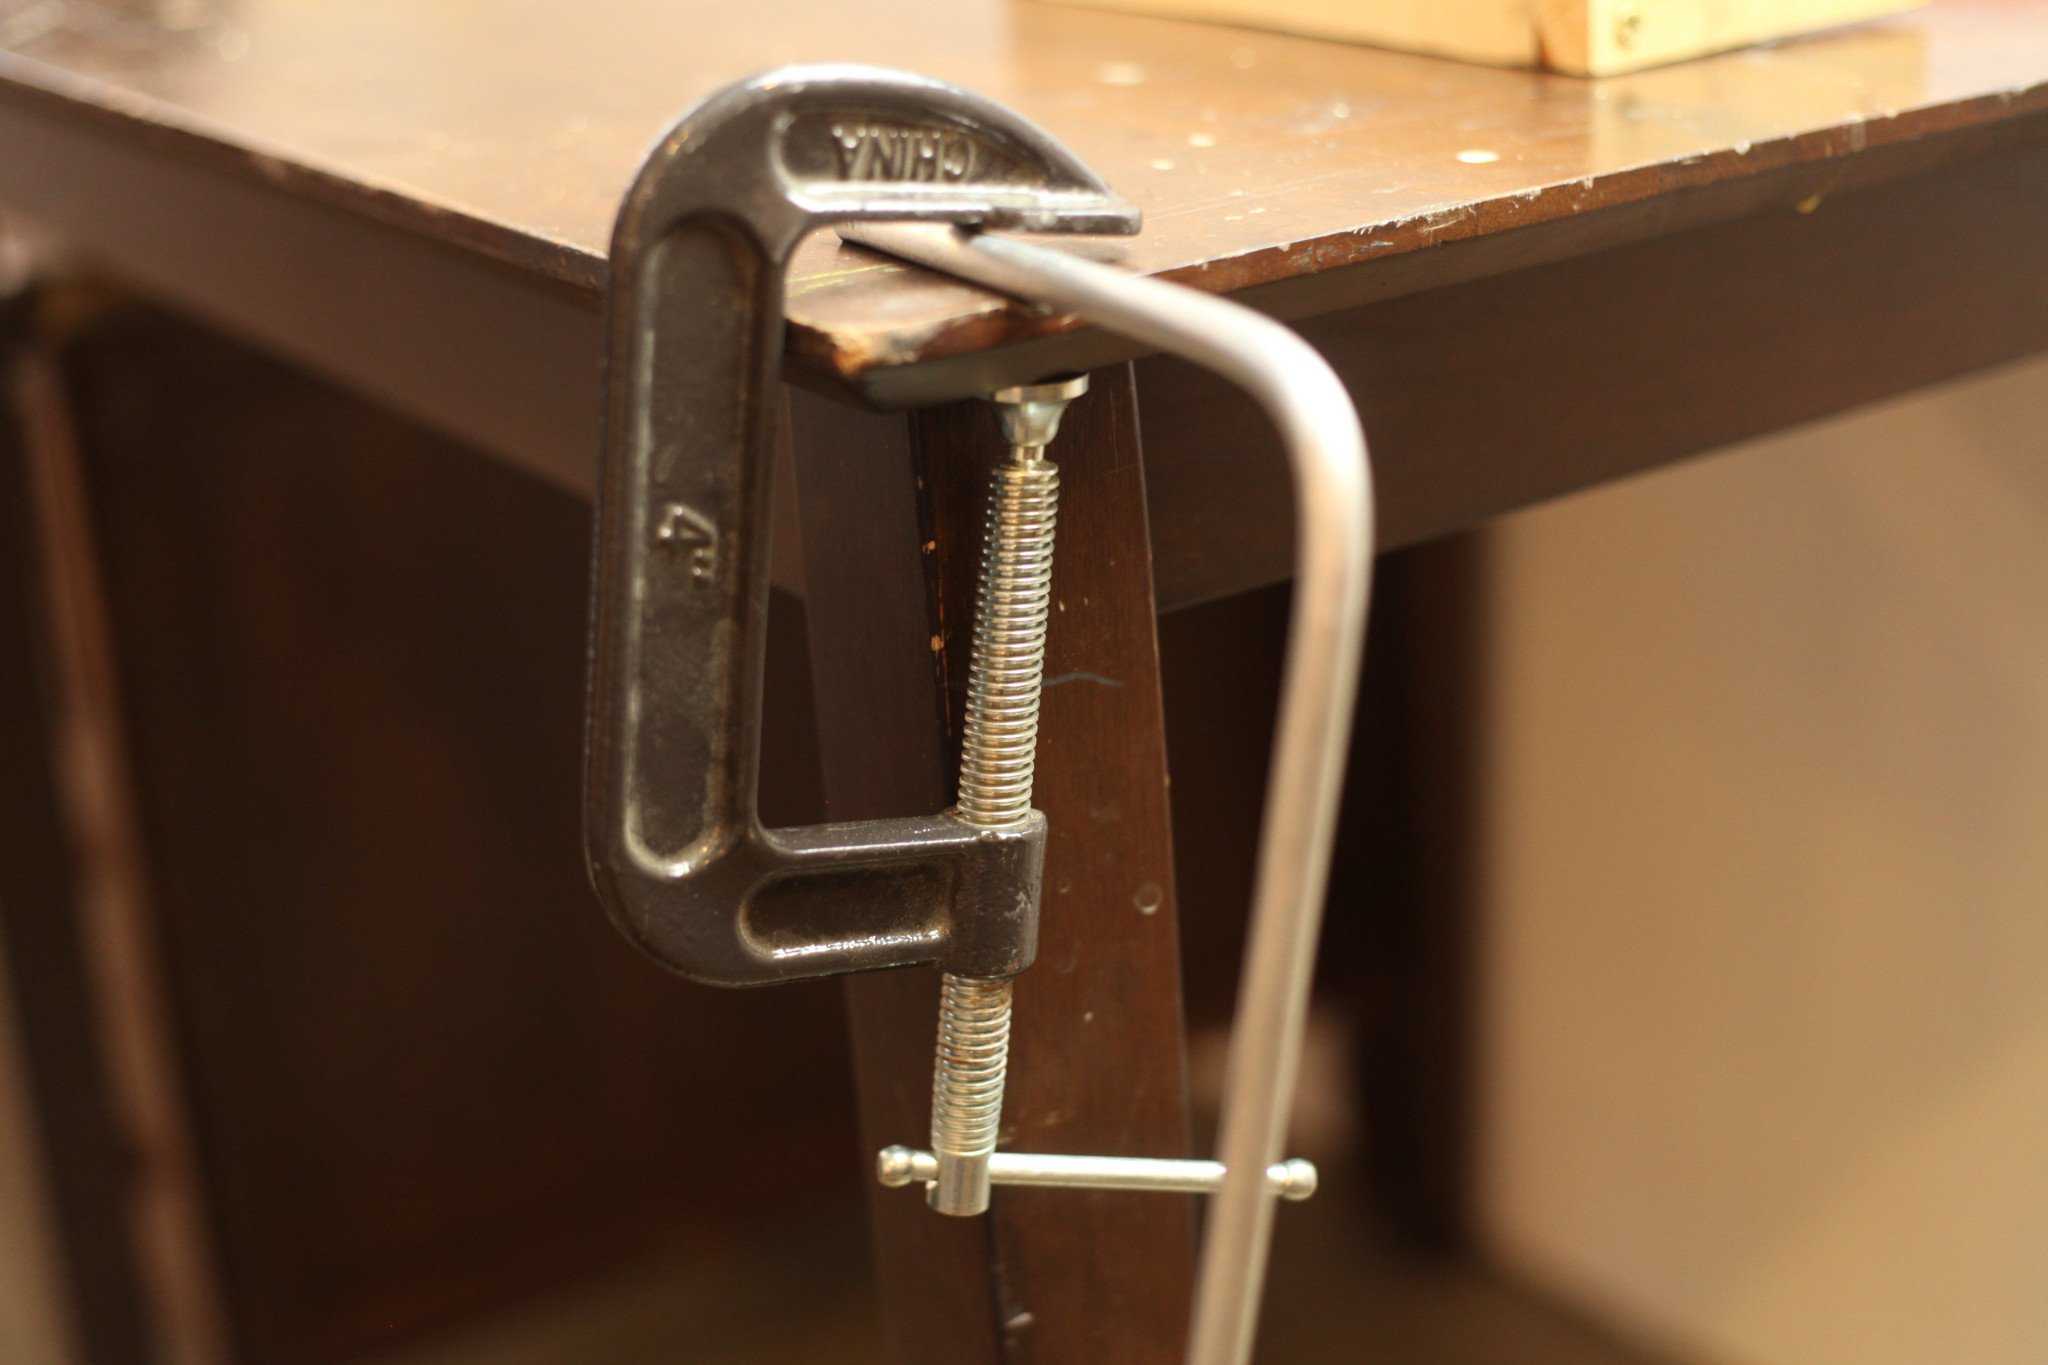
Once you’ve got the now L-shaped rod clamped down as shown, push that dude up so you have two bends towards the end that create an S.

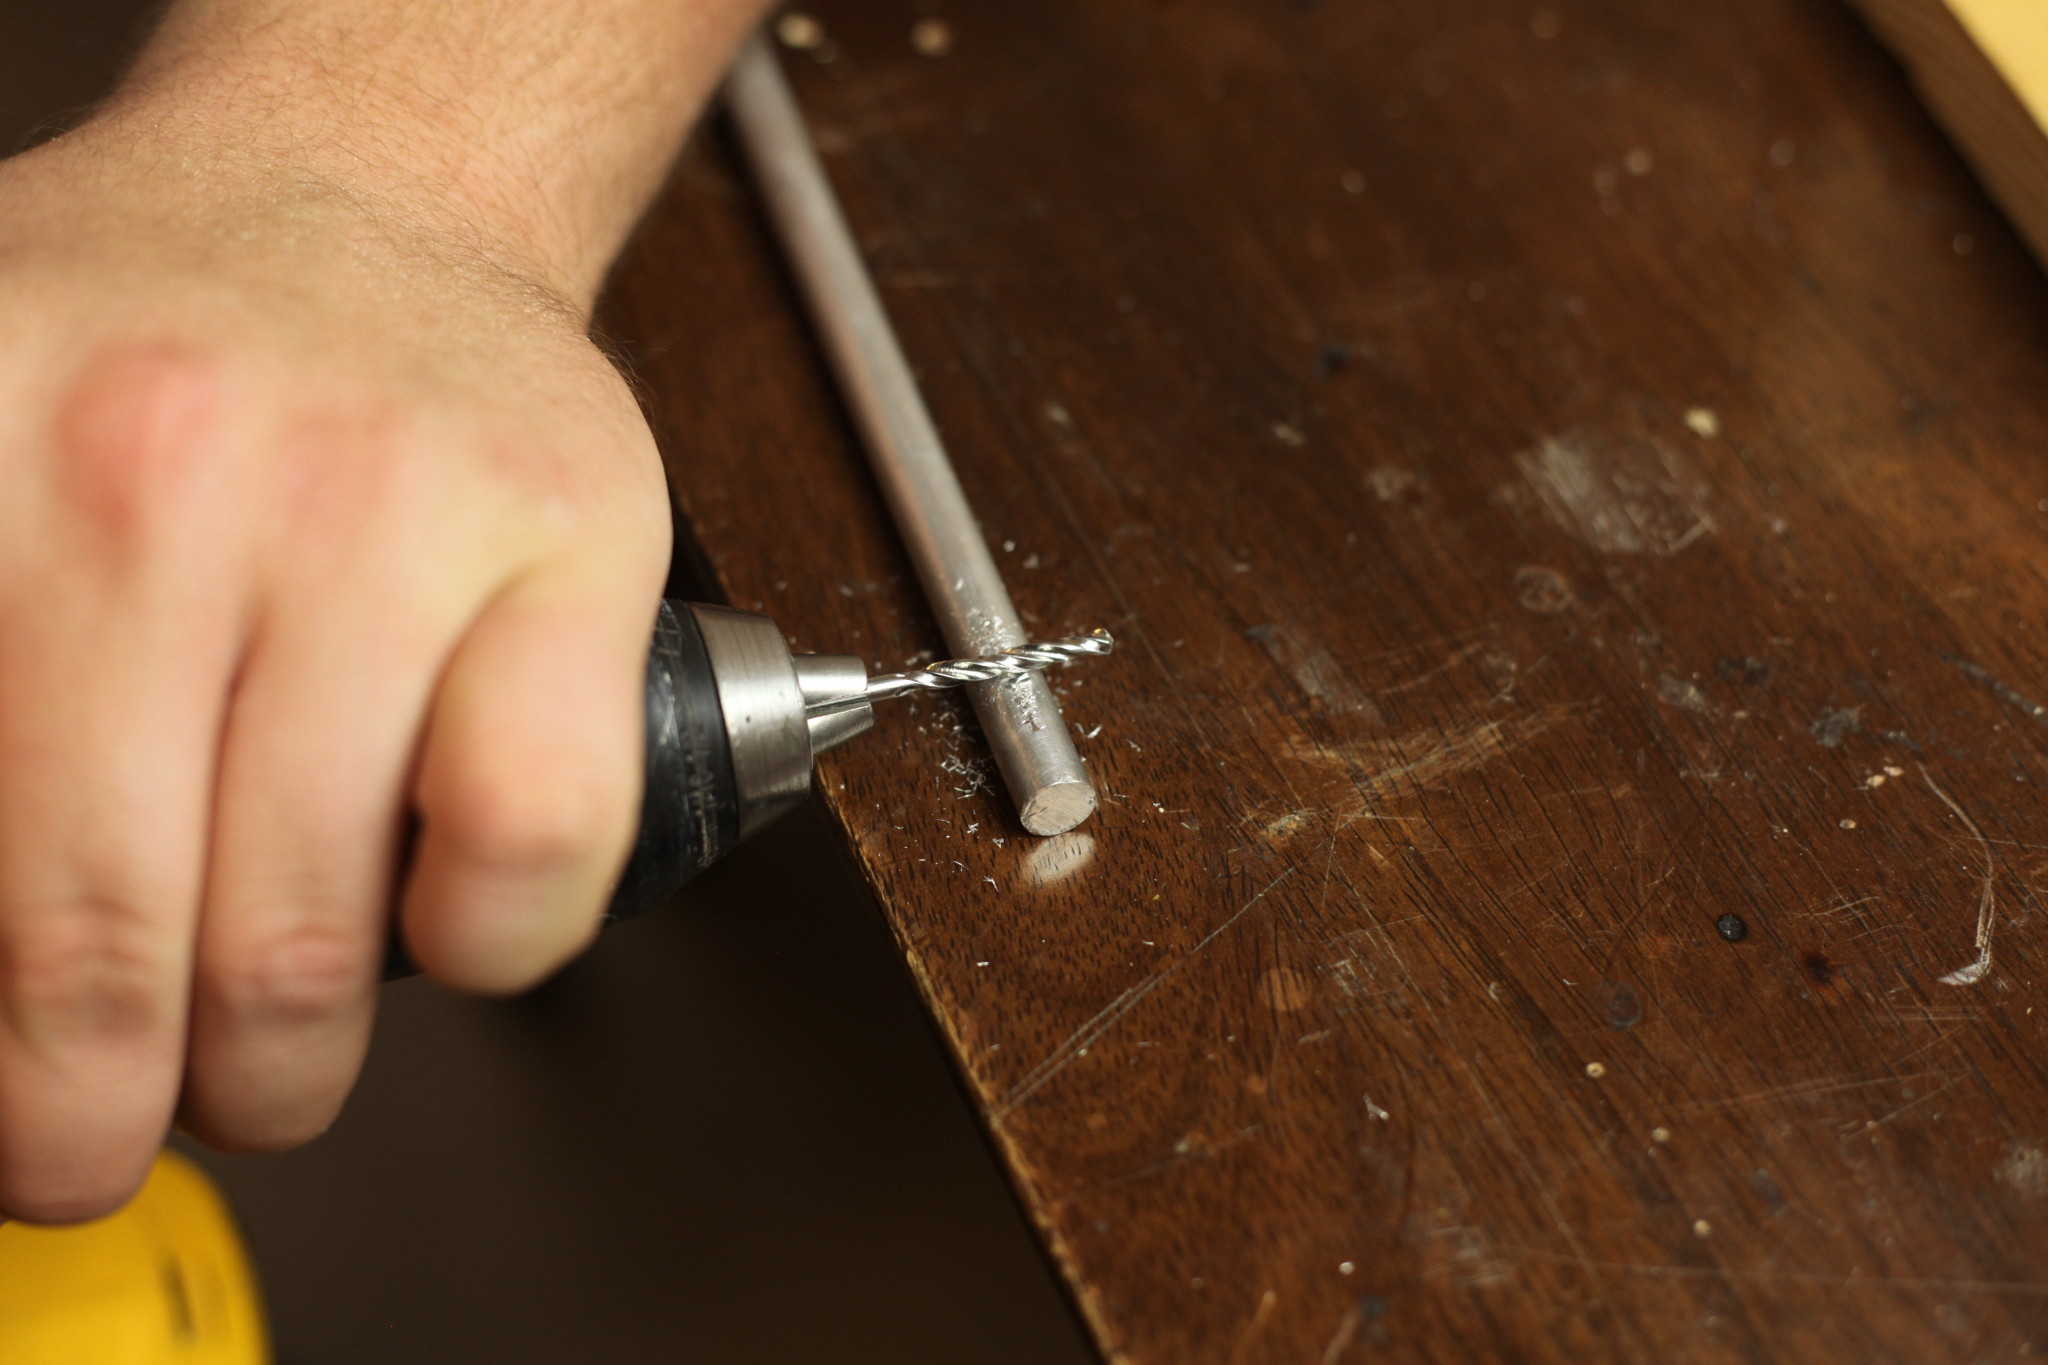
Step 8: Create a hole for your wire
Know we have our base and a rod shaped with a handle to spin it. So next up is to drill a point 1-inch from the end of the rod OPPOSITE the handle. This is where our jewelry wire will slide into and hold as we spin the rod to make the coils that become our jump rings (it’s all coming together for you now, isn’t it?).

PRO TIP:
Having difficulties drilling into the round rod? Turn your drill horizontally flat and use the side of the bit to machine a flat area on the soft aluminum metal rod. Then carefully drill into the flat spot.
Step 9: Mounting the mandrel
Drill two pilot holes into your base about 1-inch in from either side. Then secure your new jump ring mandrel to your work table or wherever else you plan for it to live. You want it affixed to something as you need two hands to operate the mandrel once it is in use.
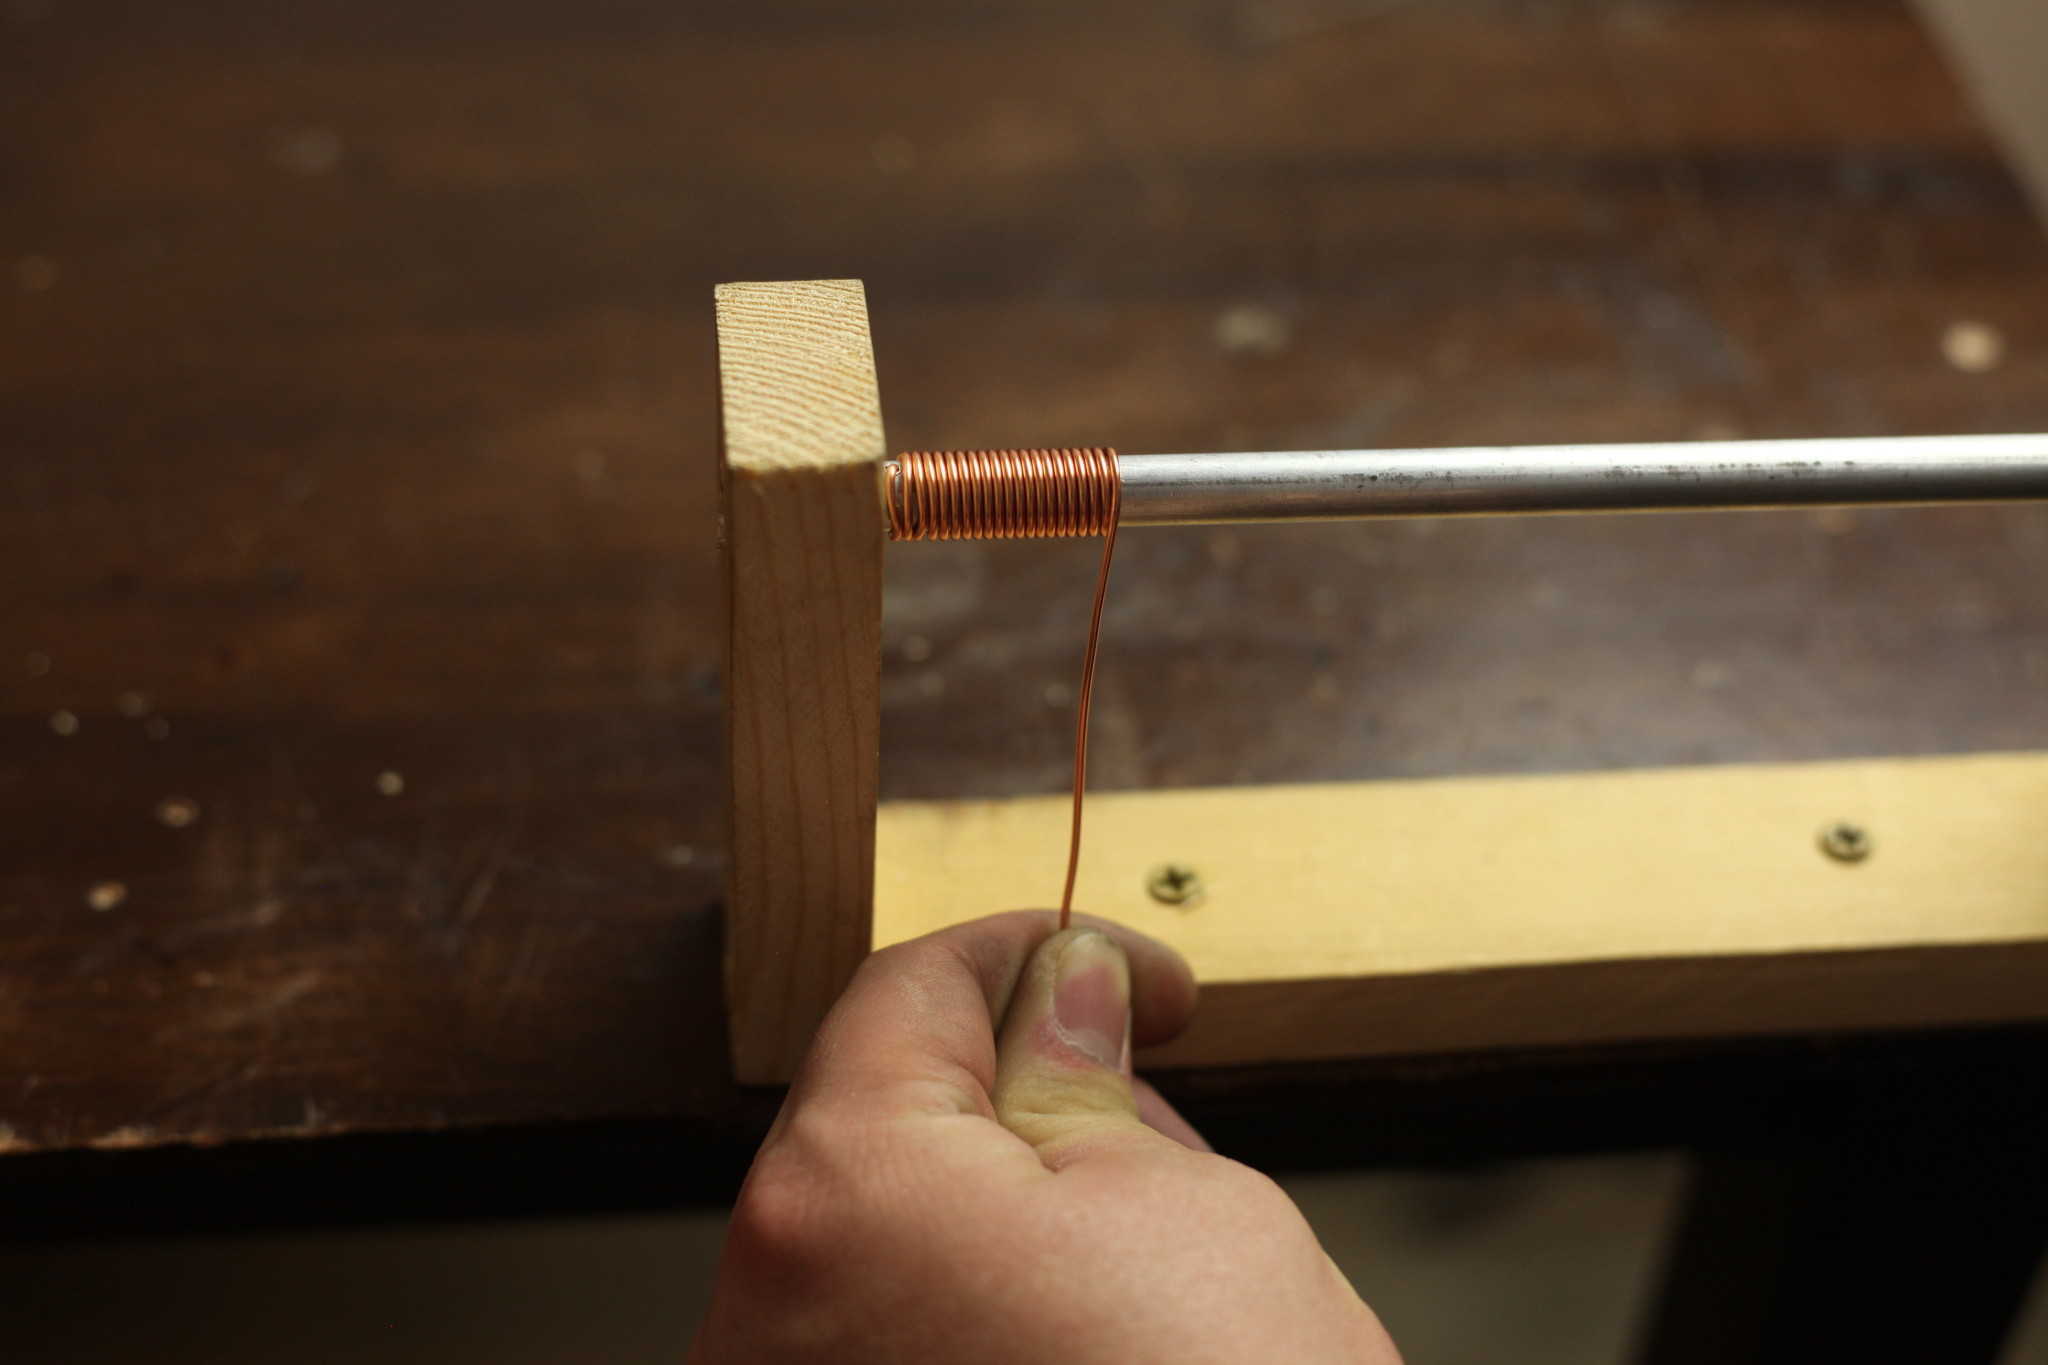
Step 10: Thread the mandrel
Now that you have your finished jump ring maker, time to start turning out your coils. Place one end of your jewelry wire in the small hole that you drilled so that the wire almost (but not quite) comes out the other end. Then turn the rod slowly with your other hand using your most awesome handle. Take it slow and keep pressure on the wire, holding it back a little so the wire is at a little angle behind the point it is being turned, as this will keep your coil tight and make sure your jump rings stay universal in size when you cut them later. As they always say, practice makes perfect.

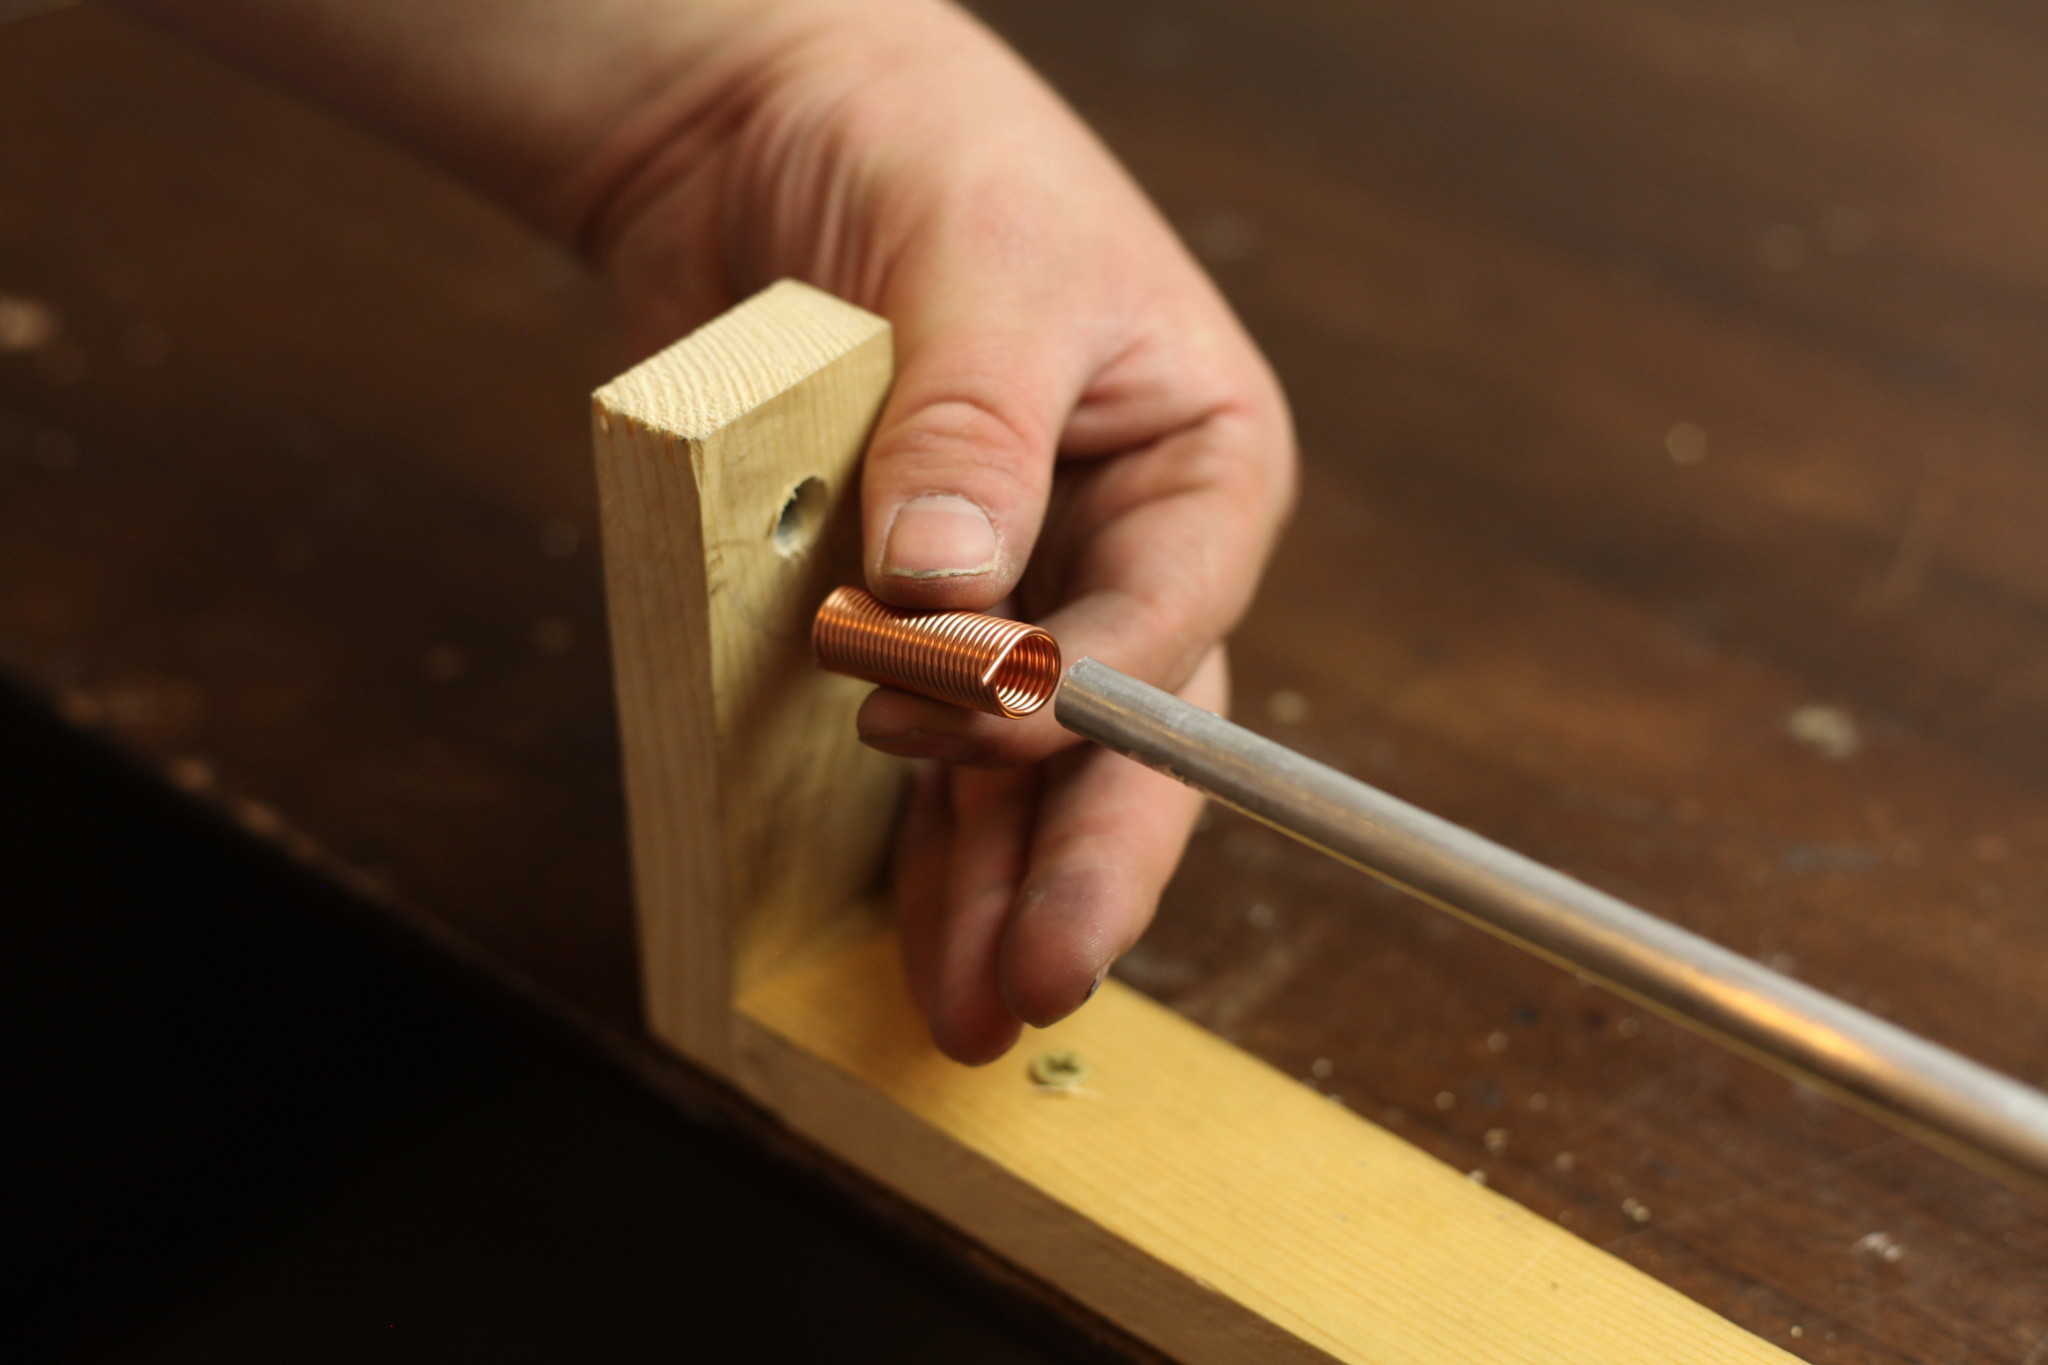
Step 11: Remove your coils
Once you have the coil length you need for all your rings, clip away the small section of wire that is currently affixed through the hole in your rod.
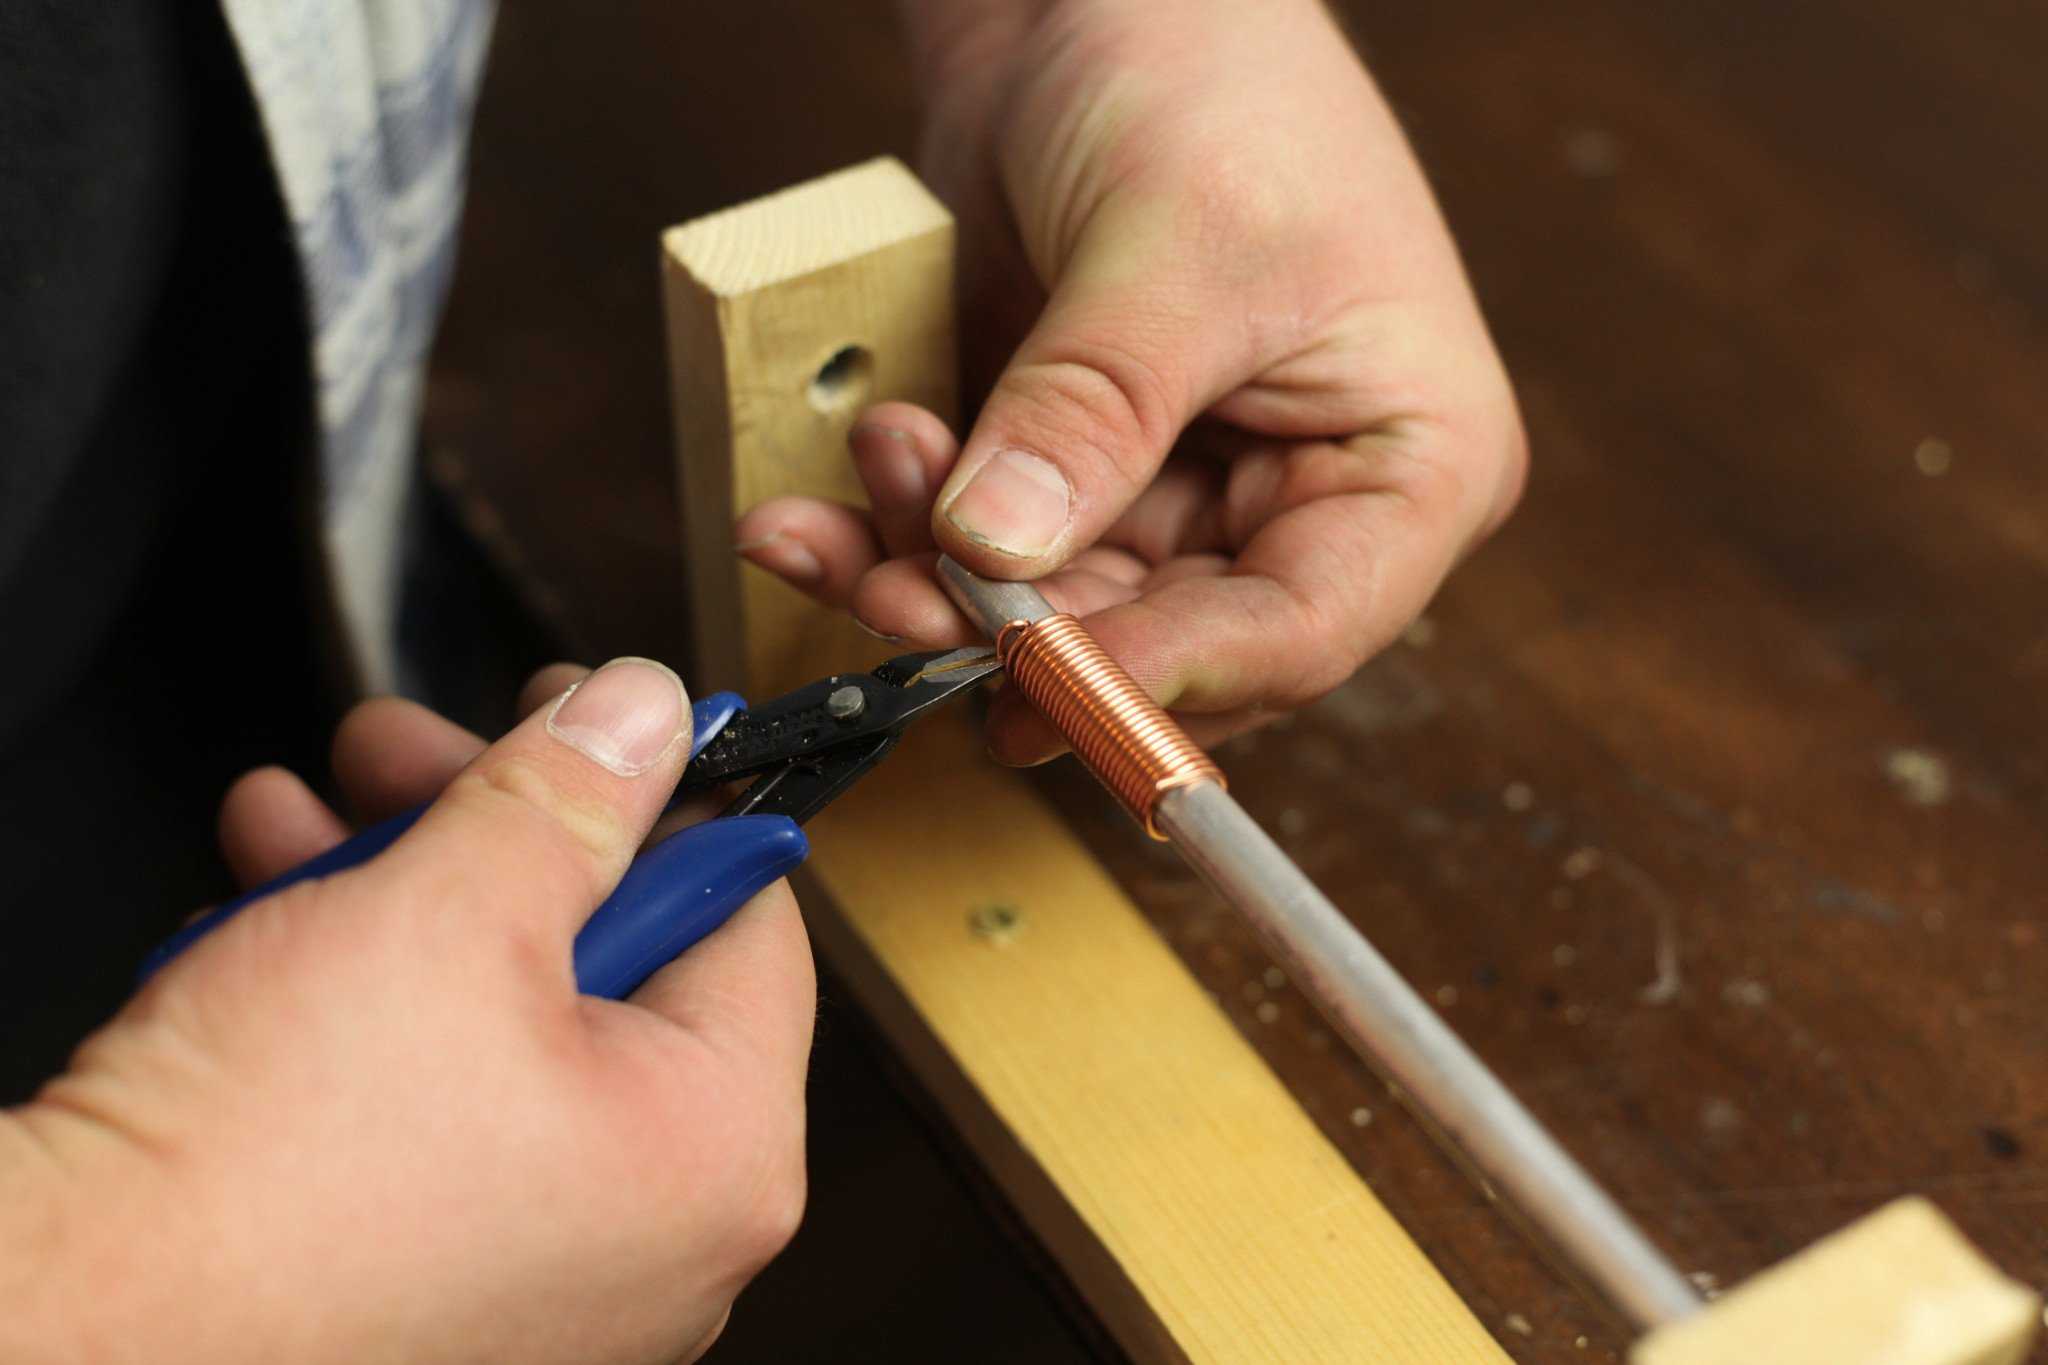
Step 12: Clip your rings
Now that you have a big coil, take your clippers and begin clipping off your jump rings from the coil.


BONUS VIDEO!!!
How to use your Jump Ring Mandrel
Below you will find a short video we shot to clearly show how to use your new Mandrel. The video also shows how you can alternately use a clamp to secure it to your worktable instead of with screws.
https://www.youtube.com/watch?v=yY2WWtTYafA
Like this post?
Check out another great jewelry tutorial:
DIY Metal Stamping Jewelry |Metal Stamped Cuff