


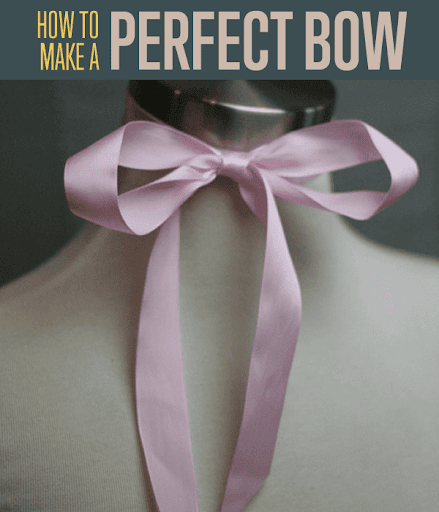

At a Glance: How to Tie a Perfect Bow
- Bows are easy to make for packages, hair, or dresses.
- Cut plenty of ribbon and practice on a can or chair back to master the tension.
- Create the first “bunny ear” loop, wrap the top tail to make a “tunnel,” and push a second loop through.
- Tighten the knot, fluff the loops with your fingers for symmetry, and trim the tails at an angle.
Bows are so easy to make,they can be used to wrap up packages, decorate your hair, wrap around a dress to cinch the waist, and accent your latest accessories. Knowing how to make your own bow will be a useful skill that you will use all of the time. I have included a guide to making a bow out of satin ribbon, you can also view our tutorial on how to make a bow out of wired ribbon here, which is more ideal for decor and packages.
Inside this guide:
How to Make a Simple Bow
How to Make a Double Bow
Infographic
How to Tie a Perfect Bow Video
How to Make a Bow Out of Ribbon |Tie a Perfect Bow
Supplies You Need to Make a Perfect Bow:
- Ribbon! Any kind will do. (this tutorial shows a satin ribbon)
Here’s a quick guide to some of the many ribbons you will find at a local or online craft store:
Wire ribbon will hold its shape and allows you to create bows with lots of volume
Satin ribbon is a smooth fabric ribbon, use this for a classic result
Acetate ribbon has a plastic feel, often used in packaging
Curling ribbon a crimped ribbon that will curl when pulled over a sharp edge - Scissors to cut the ribbon
Here’s where I got my pastel ribbon:

- Soft Pastel Rainbow Set: Includes 6 rolls of pastel satin ribbon pack in gentle spring-inspired...
- 1 Inch x 60 Yards Value Pack: The 1 inch width is easy to use for wrapping, tying and decorating...
(As an Amazon Associate, we earn from qualifying purchases.)
How to Make a Simple Bow Out of Satin Ribbon
Step 1: Cut ribbon
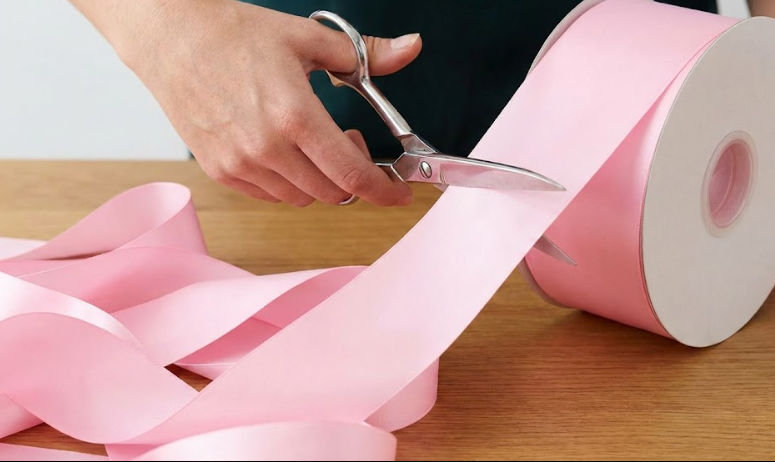
Cut out a lot of ribbon to give yourself plenty to work with. Since we’re using a thick, wide ribbon for this tutorial, you’ll need extra length to ensure the bow looks full and proportional. I’m practicing on a mannequin here, but feel free to practice on a large can, a chair back, or a vase to help you get the tension right.
Step 2: Cross the ribbon
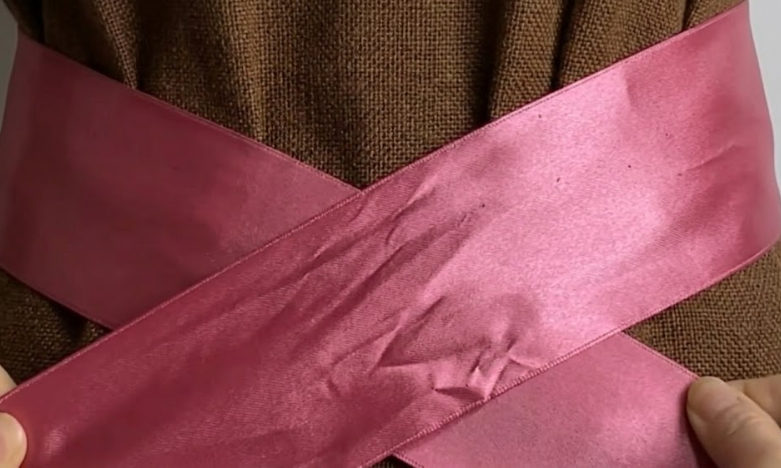
Bring both ends of your ribbon around to the front of your object. Take the ribbon end in your left hand and cross it over the top of the ribbon end in your right hand to form an “X”. As you cross them, keep the ribbon flat and smooth against the surface to prevent the fabric from bunching up.
Step 3: Create the base knot
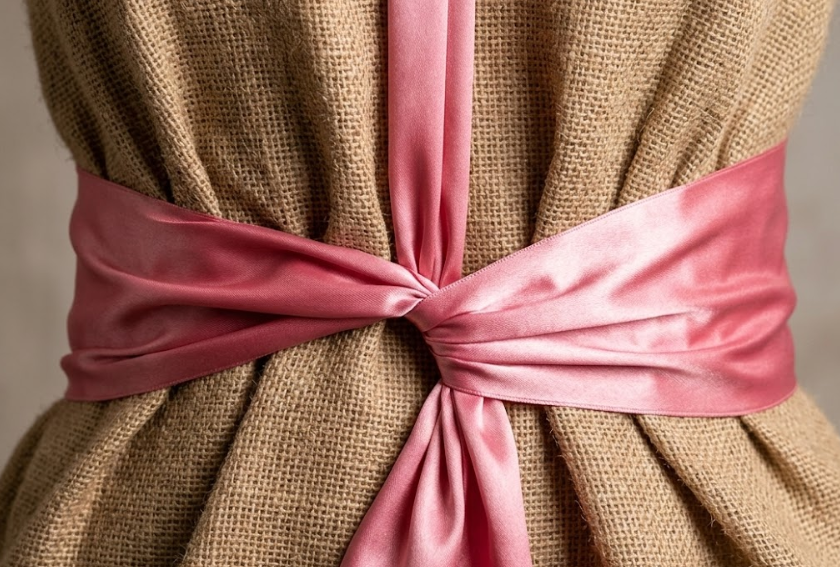
Take the right tail of the cross you just formed and tuck it under the left tail, pulling it through the center opening. As you tighten this knot, you should see the ribbon extending in four directions: the two tails pointing sideways and the remaining ones pointing straight up and one pointing straight down. This “four-way” tension ensures the final result sits perfectly straight.
Step 4: Form the first “bunny ear”
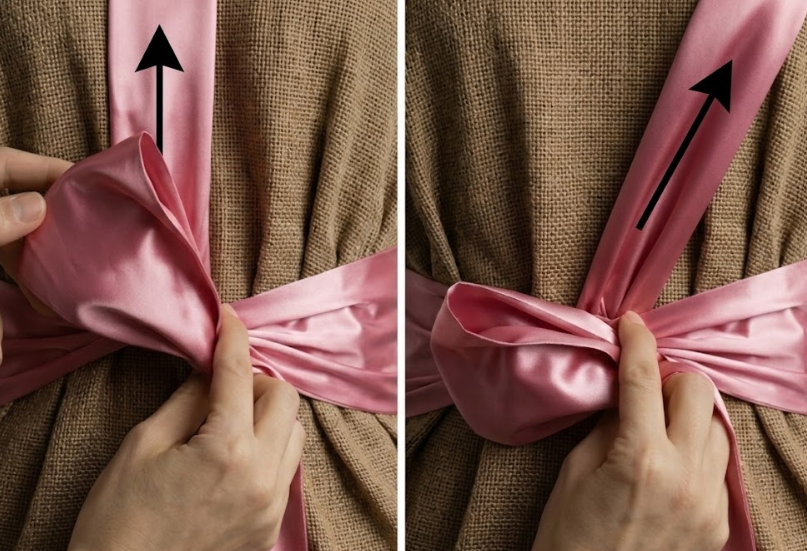
Take the tail that is pointing straight down and fold it upward to create your first loop that looks like a “bunny ear”. Hold this loop horizontally across the center of your knot with your thumb.
Step 5: Wrap the upper tail to create a “tunnel”
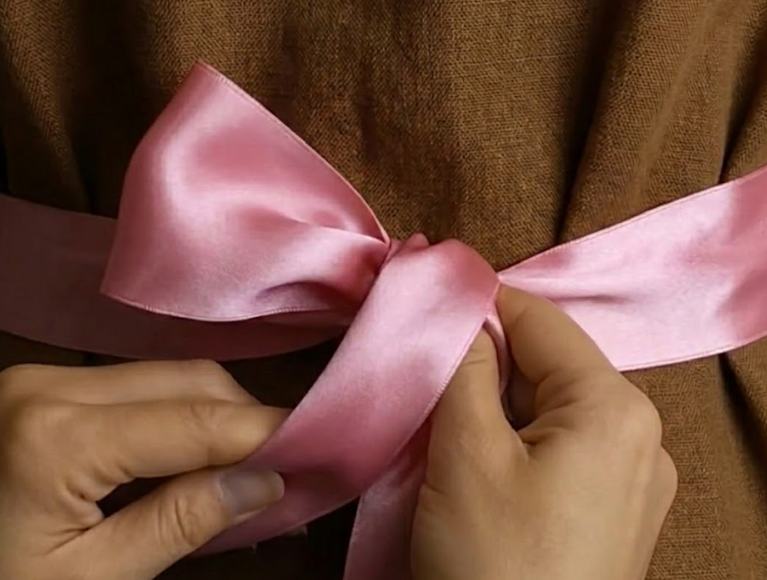
Take the upper long tail or the one pointing straight up and bring it down over the front of your first loop. As you wrap the ribbon around the base, keep it snug against your thumb. This movement naturally creates a small opening or “tunnel” tucked right behind the center wrap.
Step 6: Push the second loop through
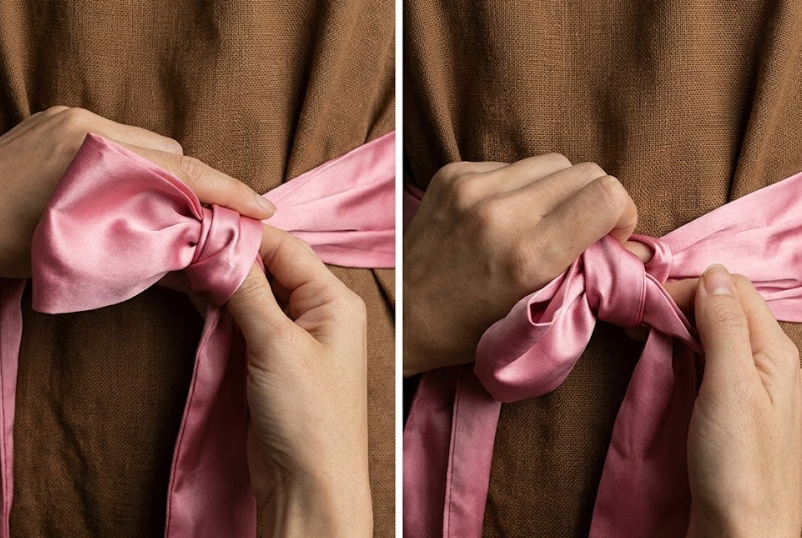
Instead of pulling the entire tail through, fold a section of that same ribbon to create the second loop or bunny ear. Use your finger to push this folded loop through the tunnel you just created, moving from the back toward the front. As it emerges on the other side, your second loop will form.
Step 7: Adjust and fluff
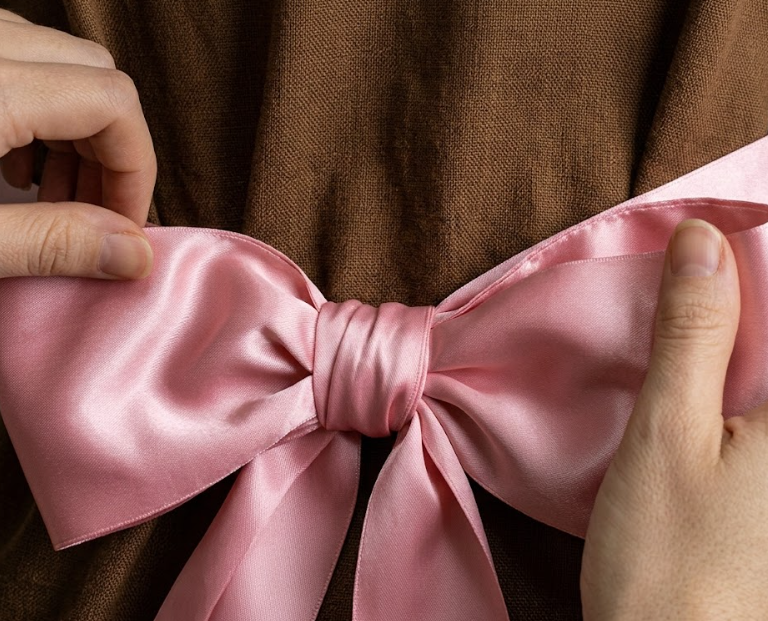
Once both loops are through, gently pull them apart to tighten the center knot. Stick your fingers inside the loops to “fluff” them out and make sure they’re symmetrical. Slide the knot slightly if needed to ensure the bow is perfectly centered.
Step 8: Trim the tails
For the final touch, pull the tails downward so they hang evenly below the loops. Use sharp fabric scissors to trim the ends at a 45-degree angle or a “V” notch to prevent fraying and give it that finished look.
How to Make a Double Bow
To make a double bow, perform the same steps as the single bow, but this time with 2 pieces of ribbon. Use this technique for a fuller looking bow. You can also add more color and dimension based on your choice of ribbon.
Measure out the amount of ribbon you would typically use for the single bow, but now double it over itself.
Step 1: Cut the ribbon in half
Once you have the desired amount of ribbon, fold it in half and cut it in the middle. Now you have two pieces of ribbon to work with.
Step 2: Loop ribbon
Just like we did with the single room, begin by forming a loop with your ribbon, keep your left thumb over where the ribbon crosses. The ribbon in your right hand should fall behind the loop.
Step 3: Bring ribbon over
Bring the ribbon in your right hand over the front of the loop, and around to the back.
Step 4: Push ribbon through opening to form bow
When you have brought the ribbon in your right hand around the other loop and it is in the front again, use your index finger to push it through the opening you just created in the front. Keep the ribbon folded under as pictured, this will be your second loop to form the bow.
Step 5: Pull ribbon through front
Pull this new loop tight. Your ribbon should now resemble a basic bow.
Step 6: Adjust bow
Pull at the loops and the tails until you are happy with the shape of your bow. Make sure you like the way both layers of ribbon fall. Maybe you want one to stick out more?
Step 7: Clip tail of bow
Clip your bow’s tail with the scissors. Cut the ends at an angle, this creates a crisp finish and prevents any loose fibers from unraveling.
Free Infographic from DIYProjects.com
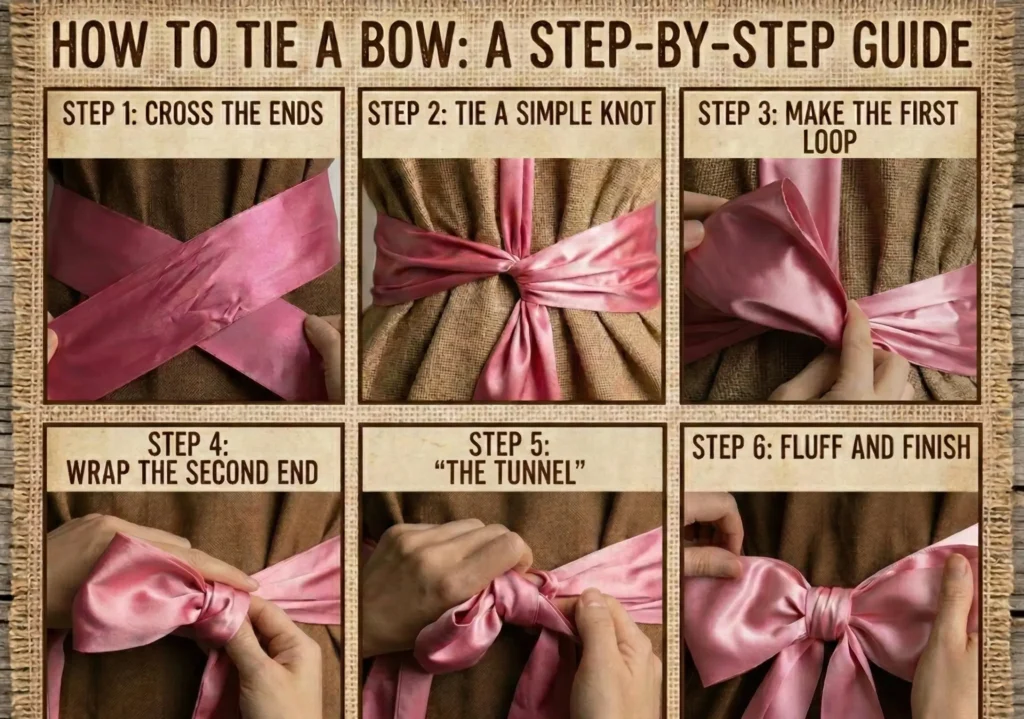
Enjoy the simple art of tying bows, and all the new variety they will bring to your life!
Check out this YouTube Shorts on How to Tie a Perfect Bow:
FAQs: How to Make a Perfect Bow
How to make a perfect bow every time?
The secret to a perfect bow lies in two things: consistent tension and the “fluffing” stage. Start with a firm, flat base knot so your bow doesn’t rotate. When you reach “The Tunnel” (Step 5), ensure you pull both loops with equal pressure. Once tied, don’t just leave it. Tug the loops and tails until they are symmetrical, and use your fingers to open up the loops for that high-end, voluminous look.
Is this DIY ribbon bow technique suitable for gift-wrapping?
Absolutely. This is the go-to method for gift-wrapping because the central knot is secure enough to hold even on slippery satin or grosgrain ribbons. It works beautifully on boxes of all sizes. For a professional touch, “V-cut” the ends of the ribbon tails after you’ve finished fluffing the loops.
Can I use this DIY satin ribbon bow for dress sashes or hairdos?
Yes! This is actually the classic technique used for formal dress sashes and back-ties. Because this method creates a sturdy knot, the bow won’t sag or come undone as you move. If you are using it for hair ribbons, just ensure your ribbon is double-sided so the “finished” side of the fabric shows on both loops.









