

So you want to know how to cut glass bottles at home? How to cut wine bottles and turn them into drinking cups? Maybe you would like to turn those soda bottles into cool storage containers?
With the right materials and know-how, this task is as simple as drinking the beverage itself…well, almost.
Follow along for these three simple methods to repurpose any glass bottle into a great container.
3 Ways To Cut Glass Bottles:
Before you begin:
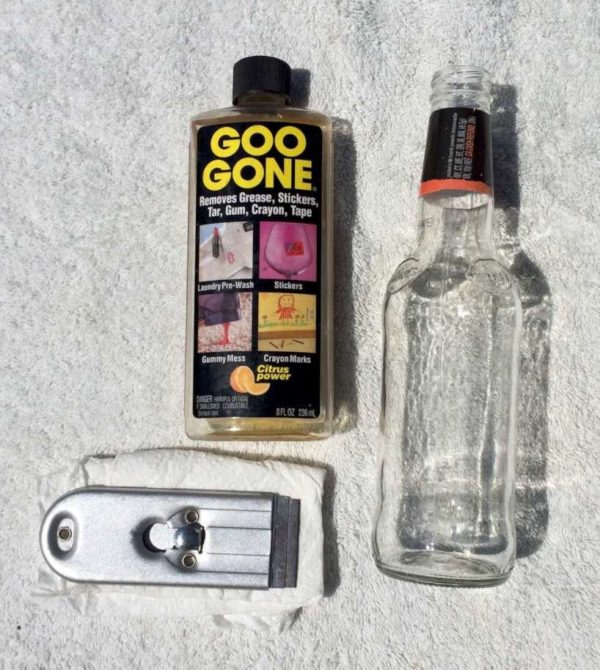
Start with a clean, empty bottle. Wash out all remaining liquid and peel off as much of the label as you can. To remove the rest of the label residue, use a razor blade and an adhesive removing solvent (Goo Gone is a top brand name, but even lubricating solvents like good ol’ WD-40 work great too!).
The solvent will help loosen the adhesive, so you can then use a cloth or paper towel to wipe off excess paper as you run a razor blade down the side. The razor blade will not hurt the glass, but be wary of your fingers.
Bottle Cutting Method #1:
How to Cut Glass Bottles With a String and Fire
Supplies:
Cotton String (or any string of NATURAL fiber)
Scissors
Lighter Fluid Or Nail Polish Remover (Acetone)
Lighter Or Matches
Bucket Or Large Bowl
Small Bag of Ice
A Small Block Of Wood (A foot or so long, optional)
2x Sand Paper (Both Heavy & Fine Grit)

Step 1:
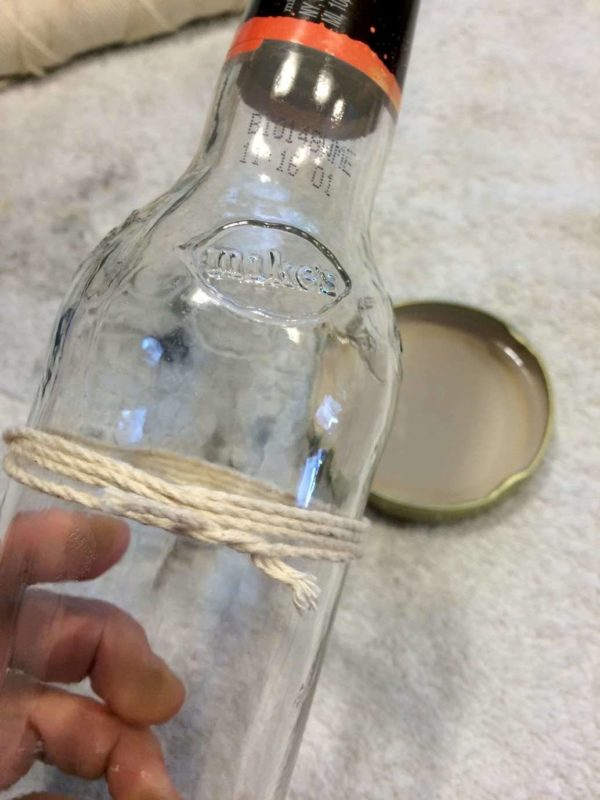
To make a bottle into a cup using the string method, first tightly wrap the string 3 times around the bottle and cut the string so you can tie a simple overhand knot around the bottle with only a half-inch or so of excess string.
Step 2:
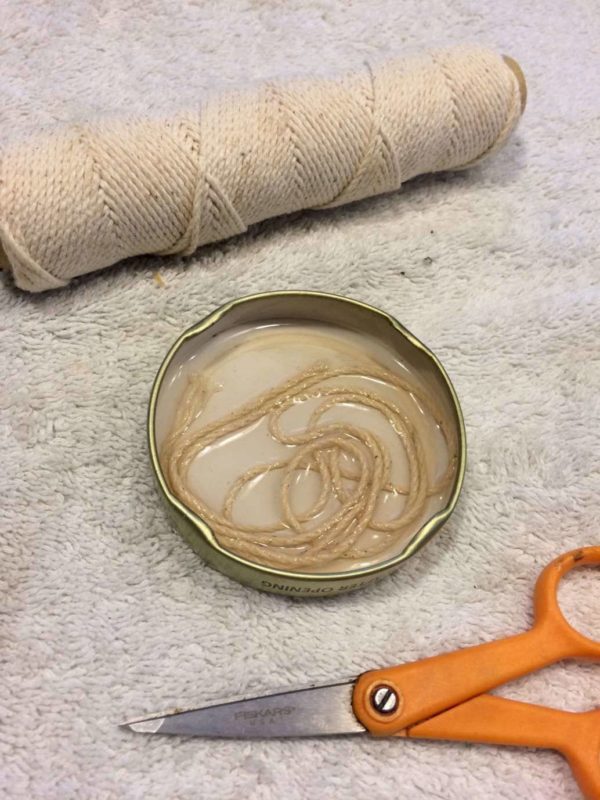
Take the string you just cut off the bottle and dip it in the nail polish remover. Let it soak for just a few seconds; it will absorb the liquid quickly. Wrap the wet string tightly around the bottle again and knot it with the simple overhand knot (you know, the one you start your shoelaces with).
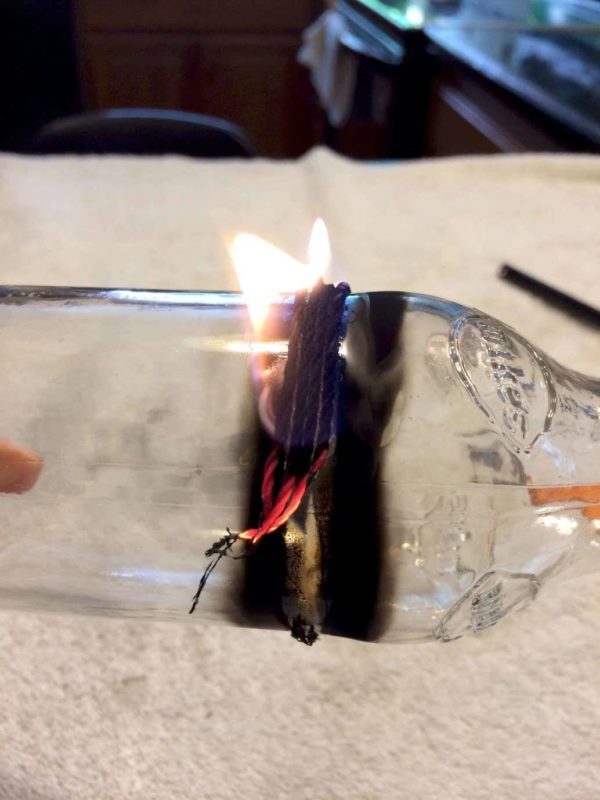
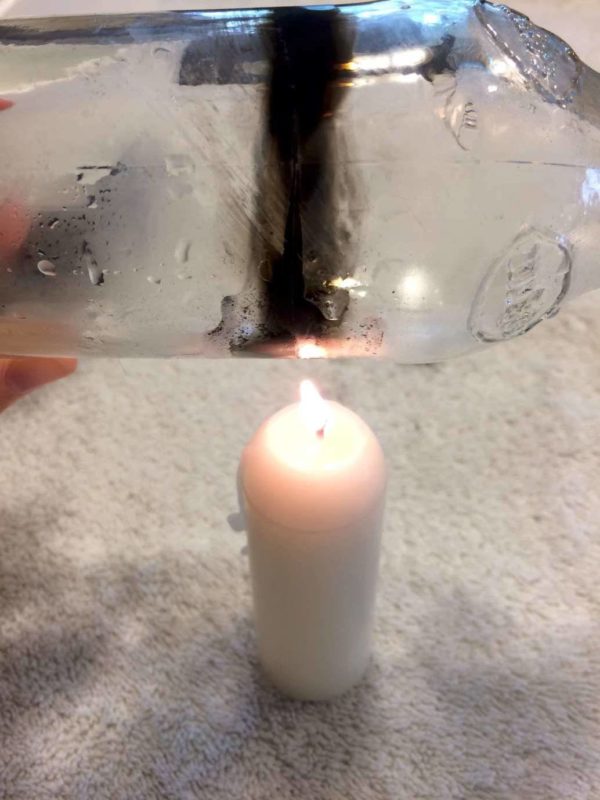
Step 3:
Light the string on fire. Rotate the bottle slowly so the string burns evenly. It goes without saying that you want to do this in a space that is safe; i.e., outside or on a concrete/marble/non-flammable floor.
You can hold the bottle with your bare hands as the glass will not get hot.

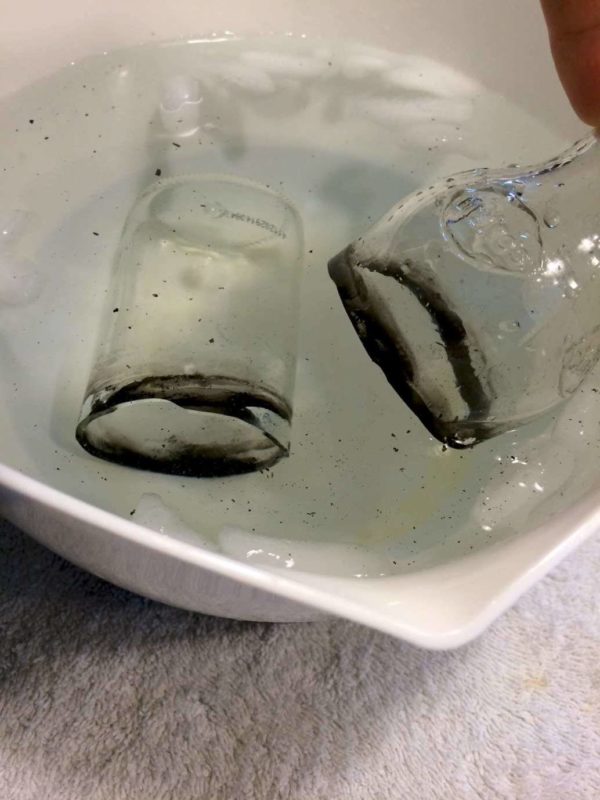
Step 4:
Throw your ice in the bucket with enough water to dip the bottle in. Dunk in the bucket and gently tap the bottle against the side of the bucket until the glass splits in two. If the glass did not split, repeat steps 1-4.
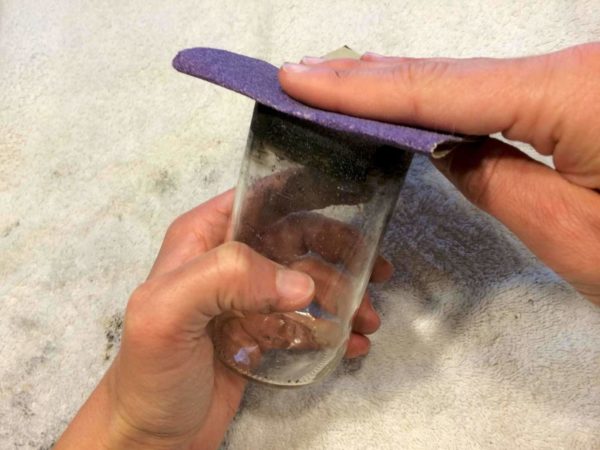
Step 5:
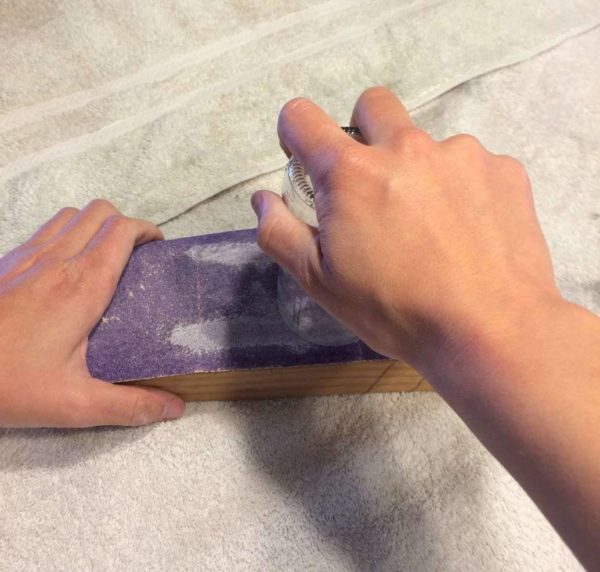
Place your heavy sandpaper on the block of wood and hold it with one hand. Place the newly broken bottle face down on the sandpaper and rub the bottle back and forth for 3-to-5 minutes. Then flip the cup over and use the fine-grit paper to smooth out the rim and give it a nice, rounded look.
You should be able to achieve the surface you want in another 3-to-5 minutes.
Bottle Cutting Method #2:
How to Cut Bottles With A Glass Cutter and Flame

Supplies:
Glass Cutter
Bottle Of Cutting Oil (Available At Any Hardware Store)
Rubber Band or Masking Tape
Candle
Lighter Or Matches
Bucket Or Large Bowl
Small Bag of Ice
A Small Block Of Wood (A foot or so long, optional)
2x Sand Paper (Both Heavy & Fine Grit)
Step 1:
To prepare the bottle for cutting, snap a rubber band around where you want the cut line to be, or use masking tape wrapped a couple of times evenly around the bottle. This will serve as your cutting guide. If you use tape, make sure the ends meet and the tape completely overlaps.
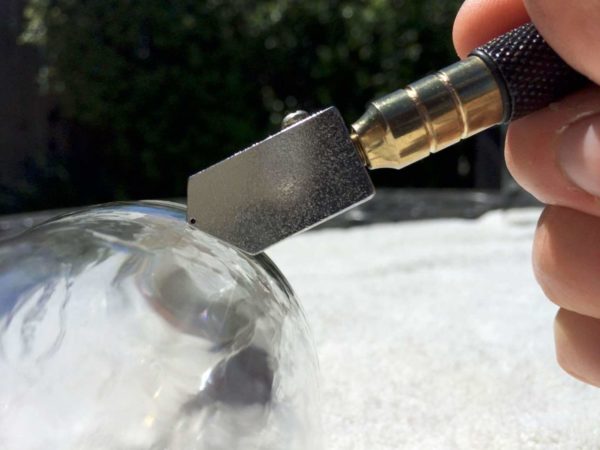
Step 2:
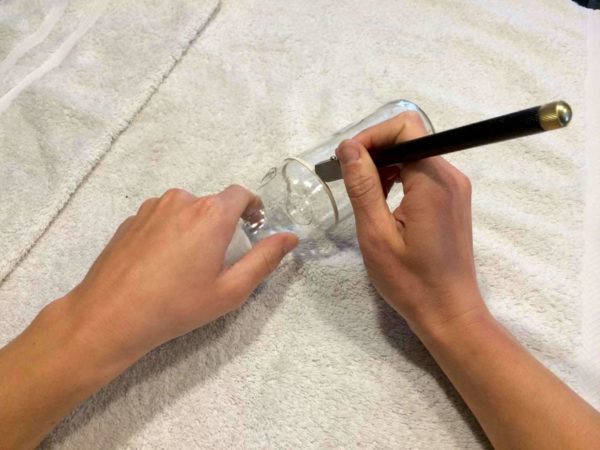
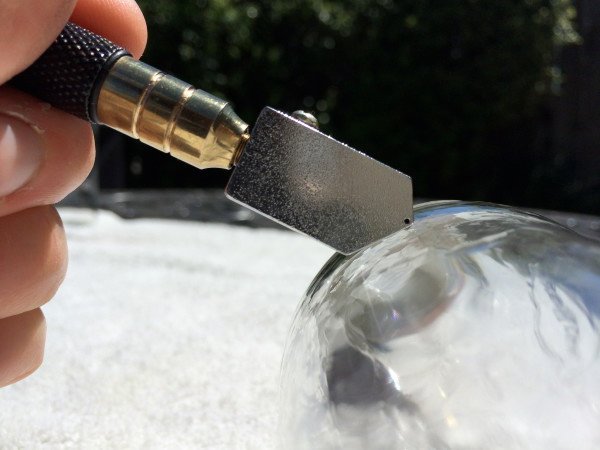
Score the bottle with a glass cutter. Prepare the glass cutter by either filling the hollow center with cutting oil or dipping the cutting blade in the oil as you go. If you use the dip method, be sure to wet the blade every time you cut.
Carefully score the bottle completely around in a straight line. Never go over the same line twice.
Step 3:
Light the candle and heat the bottle over the flame, directly over the score line. Rotate the bottle slowly so it burns evenly, and keep doing so for at least 3 minutes.
Step 4:
Dunk the bottle in cold water and then gently tap the bottle against the side of the bucket or bowl you are using. Repeat steps 2 & 3 until the top breaks off.
Step 5:
Sand the rim of your new cup. You can use the block method described in the string tutorial above, or just hold the glass in one hand while you use the heavy grit to make the rim even. Spend about five minutes doing this and then switch to the fine grit to smooth out and round the edges (about another five minutes).
Bottle Cutting Method #3:
How to Cut Glass Bottles With A Glass Cutter and Boiling Water

Supplies:
Glass Cutter
Cutting Oil (Available At Any Hardware Store)
Rubber Band Or Masking Tape
Pot of Boiling Water or Tea Kettle
Bucket Or Large Bowl
Small Bag Of Ice
A Small Block Of Wood (A foot or so long, optional)
2x Sand Paper (Both Heavy & Fine Grit)

Step 1:
Prepare the boiling water in a pot with a handle that you can hold onto easily. A tea kettle will also work for this step.
Step 2:
This is the same scoring step described in the previous method. To prepare the bottle for cutting, snap a rubber band around where you want the cut line to be, or use masking tape wrapped a couple of times evenly around the bottle. This will serve as your cutting guide.
If you use tape, make sure the ends meet and the tape completely overlaps.
Prepare the glass cutter by either filling the hollow center with cutting oil or dipping the cutting blade in the oil as you go. If you use the dip method, be sure to wet the blade every time you cut.
Carefully score the bottle completely around in a straight line. Never go over the same line twice.
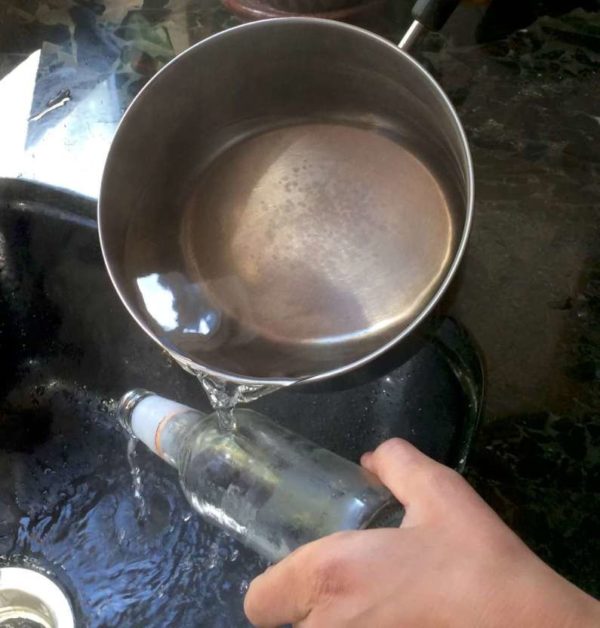
Step 3:
Pour a stream of the hot water over the score line of the glass bottle. Take your time, pour slowly, and heat all the way around the bottle. Don’t burn off your fingers (gloves might be a good idea).
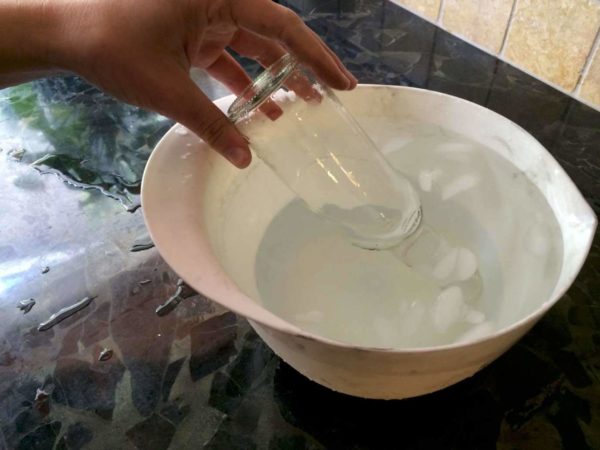
Step 4:
Dunk the bottle in cold water and then gently tap the bottle against the side of the bucket or bowl you are using. Repeat steps 2 & 3 until the top breaks off.

Step 5:
Sand the rim of your new cup. You can use the block method described in the string tutorial above, or just hold the glass in one hand while you use the heavy grit to make the rim even.
Spend about five minutes doing this and then switch to the fine grit to smooth out and round the edges (another five minutes).
Congratulations, you did it!
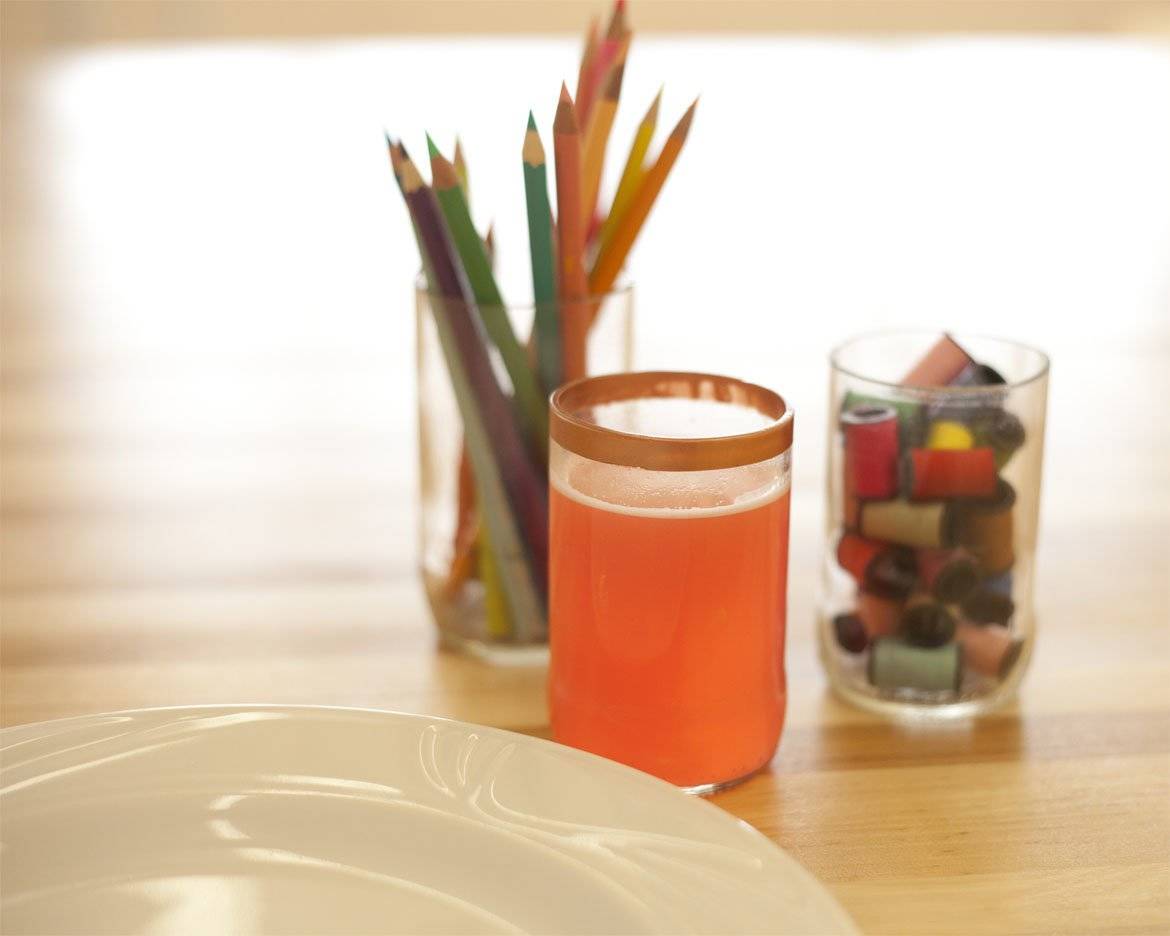
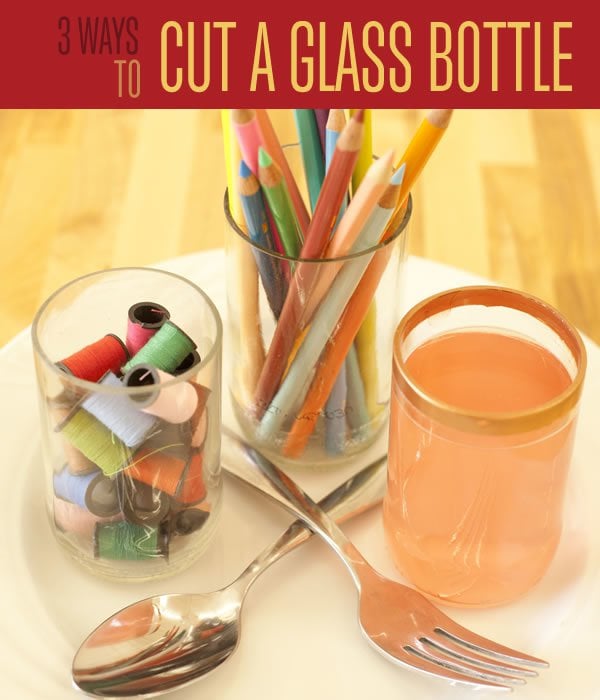
Now you will never run out of cups at a party again! Or better, use these upcycled bottles as more than just cups: use them as vases, votives, utensil holders, and more!
With the right tools, you can turn your glass recyclables into all sorts of vessels for your home.
Love this post? Pin it and follow DIY Projects on Pinterest
Pin:


