

Feeling crafty but short on time? Looking for last-minute homemade Thanksgiving decorations that can easily be put together a few hours before the big event? Fret not! I have the answer to your problem. You can stay poised under pressure even if you are putting things together in the eleventh hour. You don’t need to buy new Thanksgiving home decor, coz you can recycle some decor you have at home. Read on and learn a hack or two on homemade Thanksgiving decorations.
At a Glance: Last-Minute Homemade Thanksgiving Decorations
- Three fast decorations you can make the day before Thanksgiving using easy-to-find materials.
- Mason jar candle holders, wood slice placemats, and gold leaf pumpkins each add a quick boost to your table or entryway.
- Clear costs, simple steps, and safety notes make every project doable, even on a tight schedule.
3 Quick and Easy Homemade Thanksgiving Decorations
When the day before Turkey Day arrives, and you still want your space to feel more festive, these three stunning projects are the answer. This section gives you three simple builds with clear costs, materials, steps, and safety notes so you can jump in and create seasonal décor even on a time crunch.
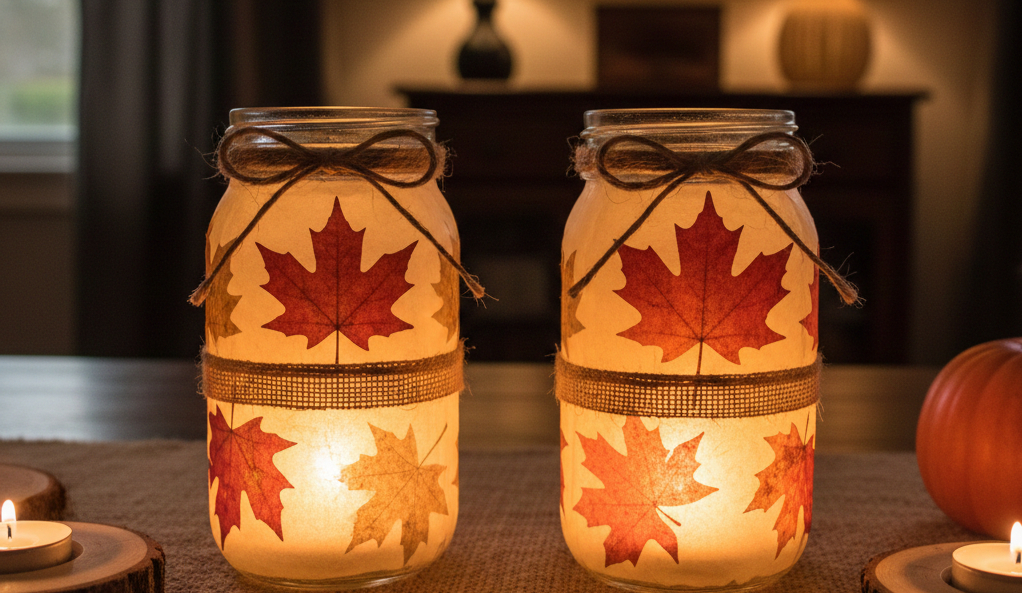
Mason Jar Candle Holders
Cost
- $5–$12 per candle holder
Materials
- Clean mason jars
- Gold spray paint or gold acrylic paint
- Painter’s tape or adhesive stickers
- Twine or ribbon
- LED tealights or small candles
Steps
- Clean each mason jar with soap and water and dry the containers completely.
- Apply painter’s tape or stickers directly onto the outside surface of each jar to form the desired design.
- Cover the jar exterior with gold spray paint or gold acrylic paint and coat evenly across all taped areas.
- Allow the painted jars to dry fully before handling them.
- Remove the tape or stickers from each jar to reveal the clear patterned sections.
- Tie twine or ribbon around each jar rim to finish the decoration.
- Place one LED tealight or candle inside each completed jar.
Safety Notes
- Use spray paint only in a well-ventilated outdoor or open-air workspace.
- Keep open flames away from flammable decor and monitor candles at all times.
- Choose LED tealights for kid-friendly or pet-friendly setups.
DIY Wood Slice Placemats
Cost
- $3–$6 per wood slice
Materials
- Pre-cut wood slices
- Sandpaper (120–220 grit)
- Gold acrylic paint or a gold leaf paint pen
- Optional stencil
- Clear wood sealer (polycrylic or food-safe finish)
Steps
- Sand the top and bottom surfaces of each wood slice using 120–220 grit sandpaper until both sides feel smooth.
- Wipe each wood slice with a clean cloth to remove all sanding dust.
- Apply gold acrylic paint or a gold leaf paint pen directly to the outer rim of each slice to create a decorative edge.
- Position a stencil at the center of each slice and apply paint if you want to add a design or monogram.
- Brush a thin layer of clear sealer over the entire top surface of each wood slice to protect it from moisture.
- Allow every placemat to dry completely before placing dishes or décor on the surface.
Safety Notes
- Wear a dust mask and eye protection during sanding to avoid inhalation and irritation.
- When using wood sealer, work in a ventilated area to avoid fume exposure.
- Keep wood slices stable on a flat surface to prevent slipping during sanding.
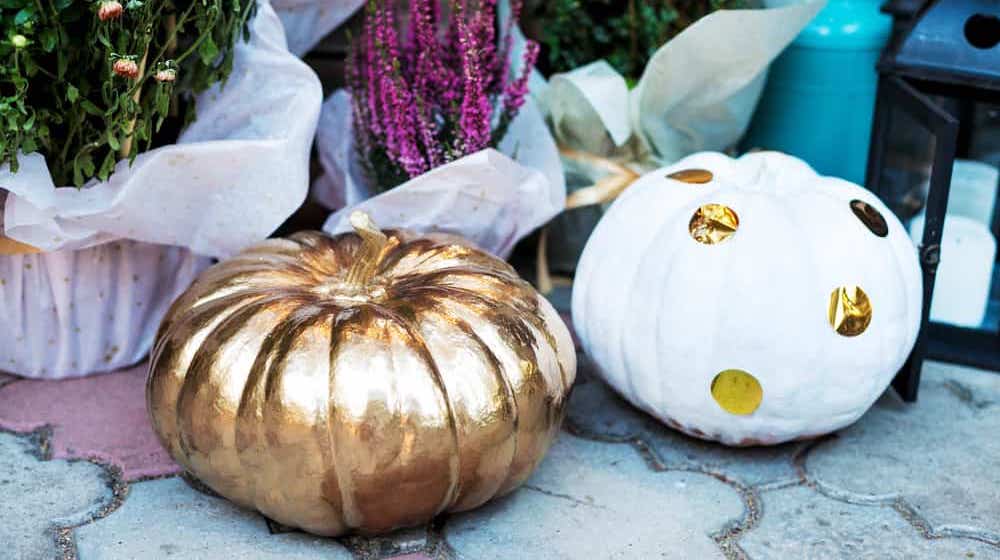
Gold Leaf Pumpkins
Cost
- $1–$4 per pumpkin
Materials
- Mini pumpkins (real or foam)
- Gold leaf sheets or flakes
- Gold leaf adhesive (sizing glue)
- Soft application brush
- Optional acrylic base-coat paint
Steps
- Clean the exterior of each pumpkin with a damp cloth and dry the surface thoroughly.
- Apply a coat of acrylic paint to each pumpkin if you prefer a white or black base color.
- Brush gold leaf adhesive onto the specific pumpkin areas selected for gilding.
- Allow the adhesive to reach a tacky state according to the product instructions.
- Press gold leaf sheets or flakes onto the adhesive sections using a soft brush.
- Use the brush to gently press the leaf into curves and remove all loose excess.
- Apply a light protective clear coat over the gilded areas for extra durability.
Safety Notes
- Keep gold leaf flakes and adhesive away from children and pets.
- Protect work surfaces with paper or plastic due to adhesive stickiness.
- Wash your hands after handling adhesives or sealing products.
It’s not too late to give your Thanksgiving space a more welcoming feel. Try one or make all three projects to beautify your table or entryway setup. However you style these ornaments, may they make your home warmer and bring joy to everyone around the table.
Have your own homemade Thanksgiving decorations or holiday projects you’d like to share? Let us know in the comments section below! Comments = community = even more creativity.


