


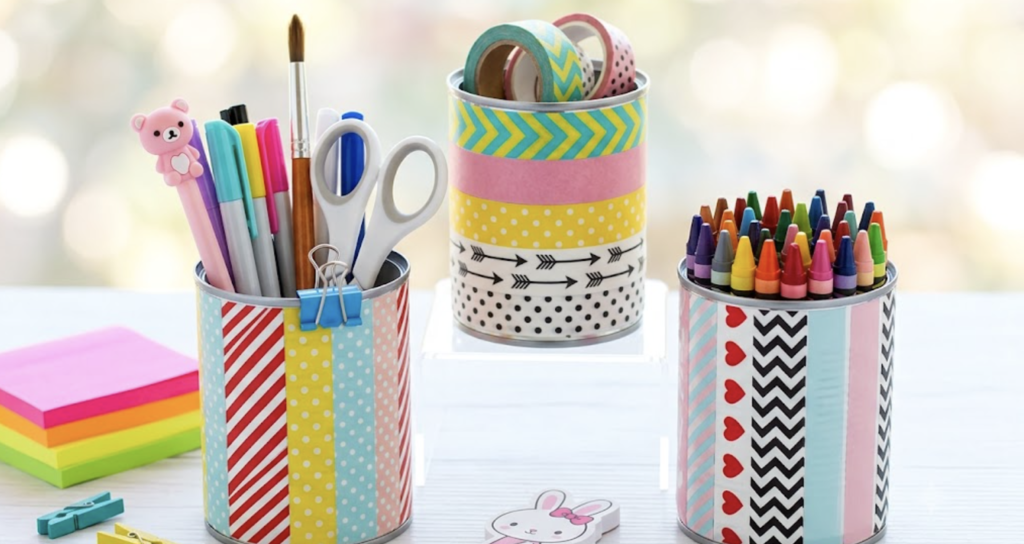

Key Takeaways
- Eco-Friendly Organization: Upcycling tin cans minimizes waste and provides a virtually free storage solution.
- Kid-Driven Customization: Washi tape is mess-free and allows kids to completely personalize their desk space.
- Improved Focus: A tidy, dedicated spot for school supplies eliminates the distraction of lost pencils.
Safety Reminder: Wear PPE (gloves, safety glasses) when handling raw metal edges. Use sharp tools responsibly. When upcycling metal cans for this project, adults must handle the sharp interior edges to ensure they are safe. Work in a well-lit, ventilated space; minimize waste with eco-friendly upcycling practices.
Back-to-school season brings excitement, but it also means desk clutter and mysteriously disappearing school supplies. Nothing derails homework time faster than hunting for a sharpened pencil. Building a customized washi tape pencil holder addresses this perfectly. It provides a dedicated, highly visible home for supplies, drastically reducing the mess.
Materials & Tools List
This project is all about taking simple, everyday items and transforming them with structural precision.
| Item | Quantity | Description/Eco Note |
| Tin Cans | 3-4 | Empty, clean (soup, vegetable, or coffee cans). Eco Twist: Reclaimed materials reduce environmental impact. |
| Washi Tape | 3+ Rolls | Multiple rolls in varying patterns (floral, geometric, solid). |
| Dish Soap | 1 bottle | Mild soap for cleaning cans. |
| Pliers | 1 pair | Needle-nose pliers or a metal file (Adult use only). |
| Sealant (Opt.) | 1 can | Low-VOC clear matte sealant spray for durability. |
Measurements:
- Can Prep: Standard soup can (Approx. 4.25″ tall x 3″ diameter).
- Tape Strips: Cut washi tape to roughly 10″ lengths per wrap to allow for a 0.5″ overlap at the back seam.
- Coverage: A standard can requires about 7 to 9 horizontal strips of standard 15mm (0.6″) washi tape.
How to Make a DIY Washi Tape Pencil Holder
Step 1: The Great Clean-Up (Surface Prep)
Remove the paper labels from your tin cans. Wash the cans thoroughly inside and out with warm, soapy water to remove any sticky food residue or glue. Dry them completely. Precision tip: Any remaining oils will prevent the tape from adhering properly.
Step 2: Smooth the Edges (Adult Collaboration Required)
Tin cans often have a sharp inner lip after being opened. An adult should take needle-nose pliers and firmly pinch the sharp metal rim down flat against the inside of the can. Work your way around the entire circumference.
Step 3: Plan the Schematic
Have your kiddo lay out their washi tape rolls and map out their pattern. You can alternate thick and thin strips, mix floral patterns with stripes, or create color-blocked sections.
Step 4: Application & Joinery
Starting from the bottom rim, carefully apply the first 10″ strip of washi tape horizontally around the can. Keep the tape as level as possible, overlapping the ends slightly at the “back” of the can for a clean, uniform seam.
Step 5: Smooth and Stack
Press the tape down firmly with your thumb to remove any air bubbles. Repeat this process, stacking the tape rows flush against each other (or leaving precise 1/8″ metallic gaps for a ribbed effect) until the can is completely covered.
Step 6: The Final Finish
For extra durability, take the finished holder outside and apply a quick, even coat of low-VOC clear matte sealant spray. Let it cure for 1 hour to lock the tape in place and prevent edge-peeling.
FAQs
What is the best way to remove sticky label residue from the cans?
Soaking the cans in warm, soapy water usually does the trick. For stubborn glue, rub a mixture of baking soda and cooking oil over the sticky spot, let it sit, and scrub it away.
Will washi tape stick to plastic or glass containers?
Yes! Washi tape adheres wonderfully to smooth surfaces like plastic cups, glass mason jars, and cardboard.
How do I stop the washi tape from peeling at the edges over time?
Ensure the container is completely clean before applying the tape. Press the seams down firmly. A light coat of clear acrylic sealer spray over the finished project will permanently lock it down.
Can I use regular clear tape or duct tape instead?
Duct tape works great and is highly durable, though it can be harder for young kids to tear. Regular clear tape doesn’t offer patterns, but you could use it to laminate colored paper instead!
How long does this project take?
Including washing and drying the cans, this craft takes about 20 to 30 minutes from start to finish.









