


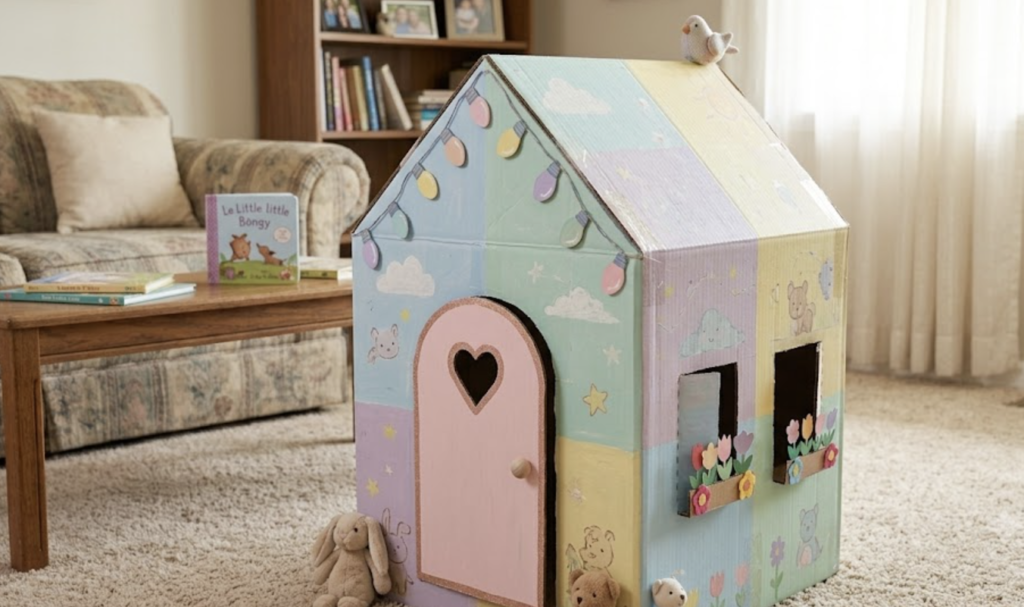

As a parent, I know the back-to-school season has two sides. On one hand, it’s a fresh start, with new supplies and big smiles. On the other, it’s a mountain of cardboard boxes from every new backpack, computer, and book shipment, all taking up precious space. And then there’s the biggest problem of all: as soon as the excitement of the first day wears off, kids are stuck inside, often looking at screens. What if you could solve both issues?
This cardboard box playhouse project is the perfect answer. We are going to transform that discarded shipping mountain into a creative oasis. It’s a low-cost, high-impact collaboration that gets kids building and imagining instead of scrolling, while you cleverly recycle. It addresses the parent’s need for constructive play and the kid’s desire for a secret hideout.
Safety First: When working with boxes this large, use caution. For cutting, ADULTS MUST OPERATE box cutters or precision blades. Kids can use a dull ruler for scoring and safe scissors for light cutting under supervision. For any hot glue, use a low-temperature gun to avoid burns. Ensure the final playhouse is set up on a stable surface and has adequate ventilation (the door and window help!). Keep all finishing products (paints, etc.) low-VOC and non-toxic for a healthy play environment.
The entire build process is a simple, two-phase operation, as detailed in our comprehensive plans:
- Phase 1: Preparation (The Flat Plan): We will unfold our box, map out every single cut and score line, and prepare all our features (door, window, gables) before folding anything up.
- Phase 2: Assembly (The Finished Build): Once prepared, we’ll fold the walls up, secure the joints, and form our structural roof.
Materials and Tools
This project is built from standard household recyclables, making it very eco-friendly. Suggest localizing for specific materials: “For the sturdiest box, Perry, try asking local appliance stores in Round Rock, TX, for an unwanted refrigerator or washing machine box; these large, double-wall boxes minimize seams and are built to last!”
| Materials | Quantity | Eco Note |
| Very Large Cardboard Box (e.g., a 30″x30″x30″ cube) | 1 | Best to source locally from large appliance shipments to reduce waste. |
| Smaller Cardboard (from school supply boxes) | As needed | For creating bracing and decorative shingles. |
| Scrap Cardboard for reinforcing corners | As needed | |
| Finishing & Decorating | Varies | Use low-VOC or milk paints; reuse wrapping paper or fabric for wallpaper. |
| Tools Needed | Kid-Friendly Collab? | Safety Note |
| Precision Blade / Box Cutter (with fresh blades) | NO | Adult use only! |
| Tape Measure or Long Straight Edge | Yes | Use safely. |
| Marker or Pencil | Yes | |
| Dull Edge (e.g., bone folder, old key, ruler) | Yes | For perfect scores. |
| Heavy-Duty Craft Glue or Low-Temp Glue Gun | Yes (Adult for glue gun) | Parent supervison for glue gun. |
| Clear Packing Tape | Yes | |
| Fine Sandpaper | Yes (Light use) |
How-To Make Cardboard Box Playhouse
The entire project is guided by our detailed, blown-up diagrams in image_1.png.
Precise Dimensions (Using a 30-inch Cube Box for Scale):
Example measurements; adjust for your box size.
- Box: A square 30″x30″x30″ cube is ideal. All vertical walls are 30″ tall by 30″ wide. Top and bottom flaps are also 30″.
- Doorway (Front):
- Vertical side cuts: 20″ tall, 15″ wide (placed 7.5″ from each side edge).
- Scored arch top: A perfect semi-circle with a 7.5″ radius, starting from the 20″ vertical point.
- Window (Left Side): 12″x12″ square cut-out with a cross divider (creates four 6″x6″ panes).
Step 1: Preparation (Unfolded Flat-Pack)
This entire phase is done with the box lying flat.
Sub-step A: Map the Walls (ADULT & KID COLLAB)
- Unfold: Carefully detach any factory tape and unfold the large box until it is a single flat strip with all four main walls connected, and all eight top/bottom flaps extending.
- Assign: Clearly mark the inside faces of the four large panels as: FRONT WALL, LEFT WALL, RIGHT WALL, BACK WALL.
- Define Top/Bottom: Label the flaps as TOP FLAPS and BOTTOM FLAPS (or ‘discard’).
- Draw All Lines (Kid Collab): Using a straight edge and marker, map out all the lines seen in Figure 1, paying careful attention to the different line types:
- RED SOLID LINES: These are CUT ALL THE WAY THROUGH operations.
- BLUE DOTTED LINES: These are SCORE ONLY (cut through top layer only for folding) operations.
Sub-step B: Create the Gables (ADULT OPERATION – BLADE)
- Front & Back Flaps: Go to the FRONT WALL TOP FLAP and the BACK WALL TOP FLAP.
- The Gables (as seen in Figure 1): Draw a diagonal line from the two top corners of the flap down to the center-base of the same flap. Label the outer triangles to be discarded.
- The Cut (Adult Only): Use the precision blade to cut along these diagonal lines, discarding the excess. This forms your front and back gabled walls.
Sub-step C: Prepare the Door and Windows (ADULT TASK – BLADE)
- Front Wall Doorway:
- Draw and Cut Door: Draw the doorway on the front wall as measured. Cut only the two vertical lines all the way through. Do NOT cut the arch.
- Score and Fold Awning: SCORE the arched dotted line along the top of the door. The flap of the door itself can now open, and the top-arch section can be pushed out and up at the score line, creating the awning. Label it “Scored Awning Door.”
- Heart Cut-out: Draw a heart shape (e.g., a 4″ circle radius for the top) and have the adult cut it out.
- Side Walls (Windows): Measure and cut the multi-pane window in the LEFT WALL.
Step 2: Phase 2 – Assembly (Finished Build)
Now the fun of seeing the form rise!
Sub-step A: Raise the Walls and Secure (ADULT & KID COLLAB)
- Vertical Scores: Score along all the vertical creases where the four walls connect to ensure they fold up smoothly.
- Raise: Stand the four walls up, forming a square cube. Secure the main corner joint where the factory seam was using glue and/or tape.
- Secure Base (Optional): You can fold the bottom flaps in and glue them to create a floor, or simply tape them flat against the outside of the box for stability.
Sub-step B: Form the Gabled Roof (ADULT & KID COLLAB)
- Gable Up: Stand the front and back gabled peaks vertically.
- Roof Planes: Score along the top edge of the LEFT WALL and RIGHT WALL themselves (where they connect to their top flaps). Note from WoodWizard: Our plan uses the left/right flaps for the roof planes, differing slightly from a standard build, to minimize seams.
- Fold and Interlock: Fold the LEFT WALL TOP FLAP and RIGHT WALL TOP FLAP over the front and back gables until they meet at the peak. Secure the seam where they overlap with clear tape. If the box is not a perfect cube, your roof might be slightly pitched or flat, but it will be stable! (Our diagram shows a stable, flat-top roof from interlocking flaps).
Finishing Touches (KID TASK)
- Sand: Lightly sand any rough edges for safety.
- Bracing: Use smaller cardboard scraps to create corner blocks or reinforce any flexible roof areas.
- Decorate: This is the creative step! Have kids paint (low-VOC), add wallpaper, or draw features like a chimney or mailbox.
A Creative Oasis from Waste
This cardboard box playhouse project not only addressed the mountain of boards and the need for imaginative, screen-free play, but it also provided a fantastic opportunity for you and your kid to collaborate on a fun build. They get a secret hideout that they helped design and create.
FAQs: Cardboard Box Playhouse Edition
- Q: Can I use multiple, smaller boxes instead of one very large appliance box?
- A: Yes! You can absolutely tape or glue multiple smaller boxes (like standard moving or shipping boxes) together to create larger walls and more complex playhouses. This approach lets you get even more creative with the layout. The key is to secure the internal joints with strong tape or reinforcement strips from smaller cardboard pieces.
- Q: How can I make the cardboard playhouse water-resistant for occasional outdoor use?
- A: Finishing is key. Cardboard is inherently prone to water damage. While we suggest low-VOC and non-toxic for indoor use, you can apply a exterior water-based polyurethane or a marine varnish on the exterior only to create a waterproof barrier.
- Q: What are some alternative designs we can try, building on this template?
- A: The possibilities are endless. You can easily add more architectural details. Try cutting a circular window, creating a faux stone facade with crumpled paper bags, adding a chimney, or building a small “porch” awning using the discarded cardboard from the gables. We chose the awning and multi-pane window from the user’s photo to perfect, but you can iterate!
- Q: How safe are typical low-VOC paints and markers for kids?
- A: Very safe. The standard craft supplies (like tempera, acrylic, and water-based markers) that are labelled low-VOC (volatile organic compounds) or non-toxic are designed for child use. They minimize fumes and are safe to touch and be around. Always work in a well-ventilated space and ensure the finishes cure completely. Avoid oil-based products which have higher VOC levels.
- Q: We don’t have enough space to keep it assembled. How can I make it fold flat for storage?
- A: Design for Flat-Pack assembly. This is brilliant! To make it flat-pack capable, do not glue or permanently tape the corner joint (Step 2, A:2). Instead, use Velcro strips or heavy-duty binder clips to secure that final wall connection. For the roof, design it to use slots or interlocks that can be taken apart without tools. Your preparation is already the perfect first step for this!









