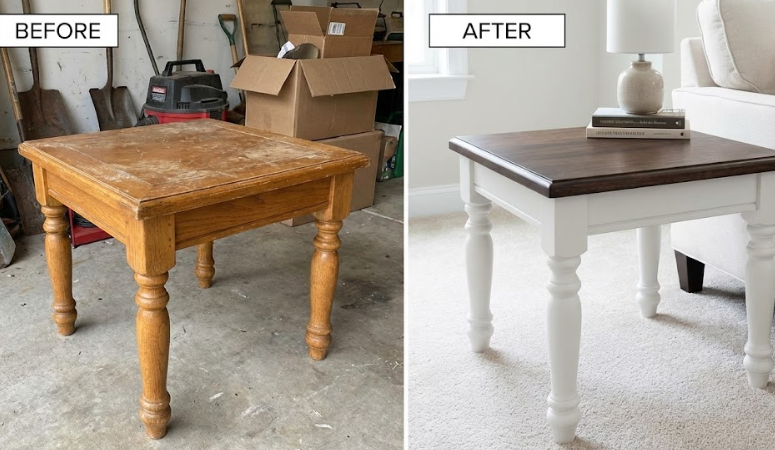


Do you have a thrift-store find that needs a glow-up, or a family heirloom that’s seen better days? Learning how to stain wood furniture is one of the most rewarding ways to breathe new life into old pieces while staying resourceful.
This guide answers common questions about how to correctly stain wood furniture. Whether you want to go dark and moody or light and airy, we have the “pro-finish” blueprint to help you feel accomplished and skilled.
Is It Better To Stain Wood Furniture Or Paint It?
Choosing whether to paint or stain wood furniture depends on whether you want to highlight the natural wood grain or cover it completely. Generally, staining is the better option for real wood because it is often cheaper and won't chip or peel like paint often does over time. If you’re working on a budget and want a high-end look that’ll stand the test of time, choosing to stain wood furniture is your best bet.
- What lasts longer, stain or paint? Stain typically lasts longer on high-touch furniture because it soaks into the fibers rather than sitting on top.
- What protects wood better, paint or stain? Paint provides a thicker barrier against moisture, but stain offers superior durability against chipping and peeling.
- Is it cheaper to stain or paint wood? Staining is often more budget-friendly as it requires fewer coats and no expensive primers.
Which Product Is Best To Stain Wood Furniture?
The “best” product depends on your workspace ventilation and how much time you have to finish the project. Oil-based stains are widely considered the best wood stain for interior wood because they offer a richer color and a longer “working time,” making them more forgiving for beginners. On the other hand, water-based stains are ideal for indoor projects where low odor and fast cleanup are priorities. When you decide to stain wood furniture, picking the right base is the first step to success.
Advantages and Disadvantages of Oil-Based Stain
- Pros: Provides a rich, deep color and won't raise the wood grain.
- Cons: High odor and requires a long dry time, often needing mineral spirits for cleanup.
Advantages and Disadvantages of Water-Based Stain
- Pros: Low odor, eco-friendly, and easy soap-and-water cleanup.
- Cons: They dry very quickly, which can cause “lap marks,” and they often “raise the grain,” requiring an extra fine-sanding step.
Can I Stain Wood Furniture Without Sanding?
While you can technically use specialized products like Gel Stain to cover an existing finish, it is generally not recommended to stain wood furniture without sanding first. Sanding is essential because it removes the old varnish or wax that acts as a shield and allows the new stain to penetrate the wood pores. To stain wood furniture successfully, use a light “scuff sand” with 220-grit sandpaper to give your new stain “tooth” to grab onto.
- The Verdict: Always sand the surface before you stain wood furniture to ensure proper adhesion.
- What happens if you don't sand before staining?: The pigment will sit on top of the old finish and result in an uneven, tacky mess that won't cure properly.

- THICK, NO-DRIP FORMULA: Less mess than traditional wood stains and applies smoothly on horizontal...
- LOW ODOR, WATER BASED GEL STAIN: Comfortably complete projects indoors including furniture, doors...
(As an Amazon Associate, we earn from qualifying purchases.)
Is It Better To Stain Wood Furniture With A Rag Or A Brush?
The choice between a rag and a brush depends on the shape of your furniture and the level of color control you desire. Rags are generally better for large, flat surfaces because they allow you to wipe the stain on and off with precision, while brushes are necessary for getting into deep carvings and tight corners. Using a combination of tools is often the most efficient way to stain wood furniture for a factory-smooth finish.
- The Rag Method: Best for flat surfaces and controlling the intensity of the color.
- The Brush Method: Essential for interior wood with intricate details or spindle legs where a rag can't reach.
- The Pro Detail (Master Airbrush): Use a Master Airbrush to mist a fine layer of color into corners. This prevents the “pooling” of dark stain that often ruins the professional look you crave.

- Precision Airbrush: Professional air brush painting set features a Master Airbrush G...
- Air Compressor System: Airbrush with compressor kit equipped with a premium Master Airbrush 1/5 HP...
How To Stain Wood Furniture Darker
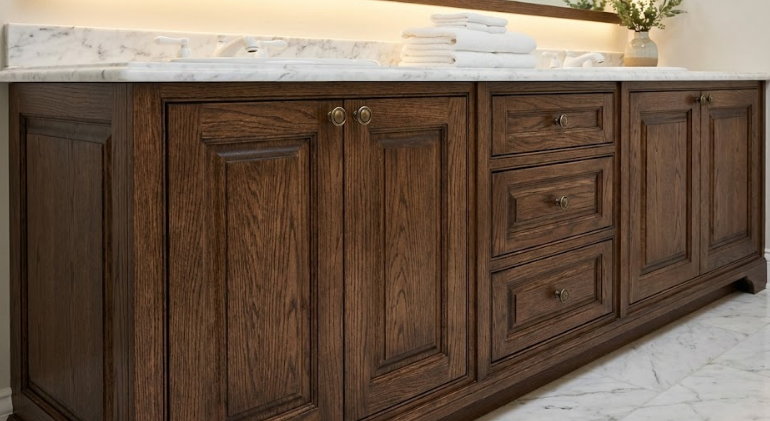
Achieving a deep, moody, and luxurious wood tone is all about building layers and allowing the pigment enough time to settle. To stain wood furniture darker, you must sand thoroughly to open the wood's pores, apply a pre-stain conditioner to avoid blotchiness, and carefully time your “wipe-off” process.
Steps for a Darker Wood Stain:
- Preparation: Sand the wood in the direction of the grain using 120-grit sandpaper, followed by 220-grit for a smooth finish.
- Conditioning: Apply a pre-stain conditioner to the surface to prevent “blotchiness,” a common problem when staining porous woods.
- Application: Use an oil-based stain to achieve maximum depth and a rich color.
- The Wait: For a dark finish, wait 5 to 15 minutes to allow the pigment to penetrate.
- The Wipe: Wipe off all excess stain with a clean rag. If you don't wipe the excess, it will remain tacky and uneven.
- Optional Second Coat: If you want a deeper tone, apply a second coat after the first layer is completely dry to make the furniture darker.
How To Stain Wood Furniture Lighter
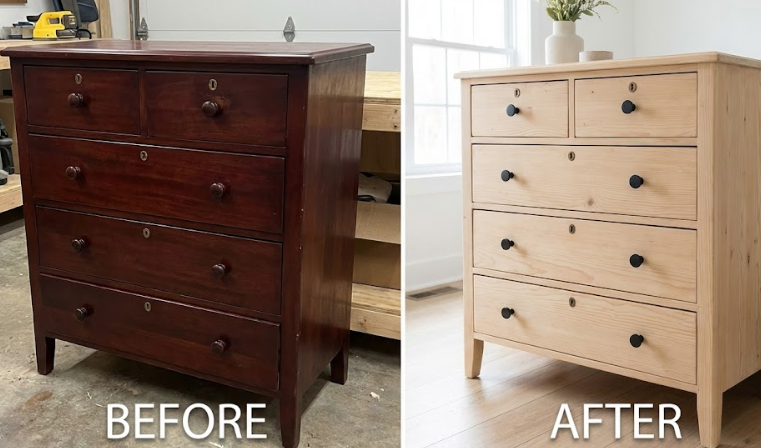
Lightening dark wood furniture requires a complete “reset” of the wood's surface to create a bright, airy aesthetic. Because you cannot simply put light stain over dark, you must remove the existing finish entirely through stripping or heavy sanding before you stain wood furniture with a white-wash or pickling stain.
Steps for a Lighter Wood Stain:
- Total Strip: Remove every trace of old dark pigment and the original finish until you reach the raw, bare wood.
- Neutralize (Optional): If the natural wood is still dark or red, apply wood bleach to create a neutral “blank canvas” for the lighter stain.
- Pickling or White-Wash: Apply a white or light gray water-based stain to the raw wood.
- Wipe Fast for Clarity: Timing is critical; wipe off the stain within 1 to 3 minutes to keep the grain visible and avoid a heavy, “painted” look.
- Master Airbrush Detailing: Use an airbrush to mist a very thin layer of “white toner” over the piece to even out the color without hiding the wood's natural character.
- Ideal for use on all interior wood projects: furniture, cabinets, doors, trim and paneling
- One-coat coverage, fast-drying oil based formula
What Happens If You Stain Wood Furniture And Leave It Too Long?
If you leave the wood stain on the surface too long before wiping, the excess pigment will start to dry and result in a thick and gummy finish. This happens because the pigment is supposed to penetrate the wood, and any leftover “puddles” on the surface will never fully harden. If you stain wood furniture and run into this issue, you can fix it by “re-wetting” the surface to lift the excess paint.
- The Fix: Apply a fresh layer of pigment over the gummy area to “re-wet” it, then immediately wipe it clean with a rag dampened with mineral spirits.
Common Mistakes When You Stain Wood Furniture
Most DIY furniture failures come down to rushing the preparation phase or ignoring the natural properties of the wood. Common staining mistakes include skipping the sanding process, which leads to peeling, and failing to wipe off excess stain, which leaves the surface sticky. When you stain wood furniture, following a few simple rules will ensure your project looks professionally made.
- Skipping the Sanding: Leads to poor adhesion and a finish that easily peels.
- Working in Direct Sunlight: Causes the stain to dry too quickly, creating permanent streaks.
- Ignoring the Grain: Always sand and apply product with the direction of the wood fibers to avoid visible scratches.
How Long Does Stained Wood Furniture Last?
A properly applied and sealed wood stain can last 10 to 20 years on interior furniture. The longevity of your finish depends entirely on the topcoat; without a layer of polyurethane or wax, the color will eventually fade, water-spot, or wear away from daily use. To stain wood furniture for the long haul, never skip the final protective layer.
Are you ready to stain wood furniture and impress others with your handmade creations? Let us know which project you’re tackling first in the comments!
Frequently Asked Questions
How long should wood stain sit before wiping off? For interior wood furniture, stain should typically sit for 5 to 15 minutes to achieve a deep color. If you are applying water-based stains or want a lighter tone, wipe the excess off within 1 to 3 minutes to keep the natural wood grain visible. Leaving stain on for too long can result in a gummy, tacky finish that will not cure properly.
How do you fix a wood stain that turned out blotchy or uneven? To fix a blotchy finish, apply a second coat of a darker stain to help blend and uniform the uneven areas. Blotchiness is a common staining mistake often caused by skipping a pre-stain conditioner. For severe unevenness, you may need to lightly sand the area back to raw wood and re-apply a conditioner before you stain wood furniture again.
Do you need to sand between multiple coats of wood stain? No, you generally do not need to sand between coats of stain as the pigment needs to penetrate the wood fibers. However, if you are using a water-based stain that has “raised the grain” (making the surface feel fuzzy), a light scuff sand with 220-grit sandpaper between coats can help maintain a smooth, professional feel.
What happens if you leave wood stain on too long without wiping? If you leave wood stain on too long, the pigment dries on the surface instead of penetrating the wood, creating a thick and gummy finish. This tacky layer will never fully harden, causing it to attract dust and eventually peel off. You must always wipe off the excess to ensure the stain cures correctly.
Is it better to use a solid or semi-solid stain for wood furniture? It is better to use a semi-solid or penetrating stain if you want to highlight the natural character and grain of the wood. Solid stains act more like a thin paint and can completely hide the wood's beauty. Semi-solid options are preferred for interior furniture to achieve a high-end, professional aesthetic.