Life gets hectic, doesn’t it? Between early mornings, late nights, and endless to-do lists, finding time for yourself often feels impossible. But what if self-care was just a few steps away? Instead of booking a pricey spa appointment to feel pampered, you can create a luxurious DIY home spa that rivals any high-end retreat.
Imagine fizzing bath bombs, fragrant candles, and soothing scrubs—all hand-made by you. These easy-to-follow projects help turn your bathroom into the ultimate sanctuary. So grab your comfiest robe because you deserve this moment to unwind.
Your At-Home Spa Day Awaits
With a few simple ingredients, you can turn your bathroom into a tranquil spa experience. From calming candles to skin-softening scrubs, get ready to treat yourself to some well-deserved self-care. Let’s explore how to make moments at home feel like a getaway.
Set the Mood with DIY Scented Candles
Every spa experience begins with ambiance. Candles are the perfect way to set a calming tone. Their soft, flickering glow and inviting scent can transform any space into an oasis. Even better, you can make your own candles and choose scents that reflect your mood.
Materials You’ll Need
- Soy wax or beeswax: Both are clean-burning and long-lasting.
- Pre-waxed wicks with tabs: These are easy to assemble and reliable.
- Heat-resistant jars or tins: Mason jars, decorative tins, or recycled glass containers work beautifully.
- Essential oils: Scents like lavender, eucalyptus, or sandalwood create a soothing atmosphere.
- Dried herbs or flowers: Optional, but they add a decorative, elegant touch.
Step-by-Step Instructions
- Melt the wax in a double boiler to ensure even heating. If you don’t have one, use a heat-safe bowl over simmering water.
- Stir in 15–20 drops of essential oil once the wax is fully melted. Stir gently to distribute the scent evenly.
- Attach the wick to the center of your jar using a dab of hot glue or melted wax.
- Carefully pour the melted wax into the container. Leave about half an inch of space at the top.
- Let the wax cool and set for at least 24 hours. Trim the wick to about ¼ inch before lighting.
Once your candle is ready, light it and let its warm glow and soothing scent fill the room. For more candle-making tips and scent inspiration, visit the National Candle Association.
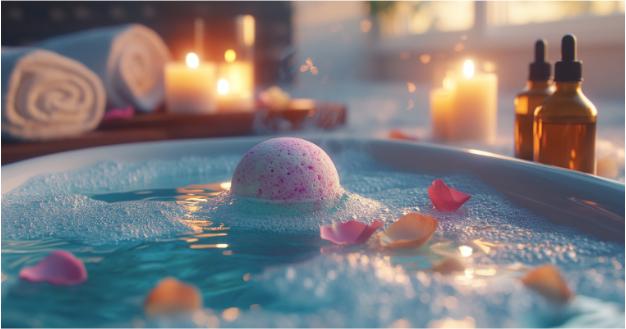
Craft Fizzy Bath Bombs for a Relaxing Soak
Bath bombs make time in the tub magical. They fizz, release mesmerizing colors, and leave your skin feeling silky soft. You can control the ingredients and customize the experience by crafting your own bath bombs.
Materials You’ll Need
- 1 cup baking soda: The key ingredient for that signature fizz.
- ½ cup citric acid: Helps create the bubbly reaction.
- ½ cup cornstarch: Adds a smooth, luxurious texture.
- ¼ cup Epsom salts: Relieves muscle tension and promotes relaxation.
- 3 tablespoons melted coconut oil: Moisturizes and softens skin.
- 1 teaspoon water: Helps bind the mixture.
- 15–20 drops essential oils: Choose scents like rose, peppermint, or ylang-ylang for ultimate indulgence.
- Food coloring: Optional, but it adds a fun, colorful twist.
- Bath bomb molds: Metal molds or silicone cupcake molds work perfectly.
Step-by-Step Instructions
- Mix the dry ingredients—baking soda, citric acid, cornstarch, and Epsom salts—in a large bowl.
- In a separate bowl, whisk together the melted coconut oil, water, essential oils, and food coloring (if using).
- Slowly add the wet mixture to the dry ingredients. Stir constantly to avoid premature fizzing.
- Once the mixture reaches a damp sand-like consistency, press it firmly into your molds.
- Allow the bath bombs to dry for 24 hours. Afterward, carefully remove them from the molds.
The next time you need a relaxing soak, drop one into your tub. As it fizzes and releases its fragrant magic, watch your stress melt away. Curious about the benefits of Epsom salts?
Whip Up a Skin-Softening Sugar Scrub
Exfoliation is a key part of any spa experience. A homemade sugar scrub gently removes dead skin cells and leaves your skin smooth and radiant. Best of all, it’s quick to make and fully customizable.
Materials You’ll Need
- 1 cup granulated sugar: Brown sugar works too, especially for sensitive skin.
- ½ cup coconut oil: Provides deep hydration and nourishment.
- 15–20 drops essential oils: Citrus scents like grapefruit or lemon add an invigorating twist, while vanilla offers a warm aroma.
- Optional extras: Honey for additional moisture or lemon zest for a brightening boost.
Step-by-Step Instructions
- Combine the sugar and coconut oil in a bowl. Mix until the texture feels smooth and even.
- Add essential oils to enhance the scent. Stir thoroughly, ensuring all ingredients are well incorporated.
- Scoop the mixture into an airtight jar or container for storage.
Use the scrub in the shower or bath. Massage it onto damp skin in gentle, circular motions, then rinse with warm water. Your skin will feel soft, refreshed, and radiant.
Sip Cucumber Water and Apply a DIY Face Mask
No spa day is complete without pampering your face while staying hydrated. As your bath bomb fizzes and your candle flickers, indulge in a cooling face mask. Pair it with a glass of cucumber water to create the full spa effect.
DIY Face Mask Recipe
- 2 tablespoons plain yogurt: Hydrates and soothes your skin.
- 1 tablespoon honey: Locks in moisture and promotes a natural glow.
- 1–2 slices mashed cucumber: Cools the skin and reduces puffiness.
Mix all the ingredients in a small bowl until smooth. Apply an even layer of the mask to your face, avoiding the eyes. Leave it on for 10–15 minutes, then rinse with warm water. Enjoy your mask with a refreshing glass of cucumber water for a truly indulgent experience.
For more face mask recipes using natural ingredients, check out Healthline’s guide.
Why a DIY Home Spa Is the Ultimate Relaxation
A DIY home spa doesn’t just save you money—it creates a personal retreat tailored to your needs. Whether you’re lighting a custom candle, soaking in a fizzy bath, or exfoliating with a sugar scrub, these small acts of self-care bring big rewards.
Take time for yourself. Light that candle. Drop in a bath bomb. Let the soothing aromas and soft textures remind you how important it is to recharge. Your home spa is waiting for you—so start creating your oasis today!
Let’s Hear From You!
Have you tried creating your own DIY home spa? Which project did you enjoy most? Share your thoughts in the comments below! Your tips and experiences might inspire someone else to start their self-care journey.
FAQs
Q: Can I substitute coconut oil in these recipes?
A: Yes! Try olive oil, almond oil, or jojoba oil for similar benefits.
Q: How long do homemade bath bombs last?
A: Store them in an airtight container, and they’ll stay fresh for up to six months.
Q: Are these projects kid-friendly?
A: Absolutely! Kids love making bath bombs and customizing colors and scents.
Q: What if I don’t have a bathtub?
A: Use the sugar scrub and face mask for a relaxing shower experience instead.
Q: Can I reuse old jars for candles?
A: Yes, just make sure they’re clean and heat-safe before adding the wax.
Q: Will the sugar scrub clog my drain?
A: It’s unlikely, but rinse with warm water to ensure no residue is left behind.
Q: Are these items good for gifting?
A: Definitely! Package them in pretty jars or boxes, and they make thoughtful, homemade gifts.