

Looking for a creative way to add personality and warmth to your bedroom? DIY dream catchers are an ideal project! These intricate, handmade decorations aren’t just visually stunning—they’re also steeped in cultural significance and full of personal meaning. Whether you want to relax with a fun craft or transform your space into a bohemian haven, this DIY project is perfect. Let’s explore the steps, tips, and creative possibilities to help you design your own dreamy masterpiece!
Why DIY Dream Catchers Are the Perfect Bedroom Decor
Dream catchers are more than decorations; they carry a meaningful history. Originating from the Ojibwe people, dream catchers were traditionally hung above beds to protect sleepers from bad dreams while letting positive energy and good dreams pass through.
Today, dream catchers combine their spiritual roots with artistic expression to make them an excellent addition to modern bedrooms. Their delicate webs, flowing ribbons, and soft feathers create a calming, bohemian aesthetic. Best of all, making your own DIY dream catcher gives you the freedom to design it exactly the way you want. From muted tones to vibrant hues, dream catchers can suit any decor style.
Curious to learn more about the cultural origins of dream catchers? Visit Smithsonian Magazine for an in-depth exploration of their history.
Materials You’ll Need to Create Your Dream Catcher
The beauty of DIY dream catchers lies in their simplicity. You don’t need a huge list of supplies—just a few basic materials that you can customize to your heart’s content.
Here’s What You’ll Need:
- Embroidery hoop or metal ring: The sturdy frame for your dream catcher.
- Yarn, twine, or string: For weaving the intricate web design.
- Ribbons, lace, or fabric strips: Adds soft, flowing accents for a boho vibe.
- Feathers: Essential for a traditional dream catcher look.
- Beads, charms, or shells: For unique, decorative touches.
- Hot glue gun or fabric glue: Keeps everything secure.
- Scissors: To trim your materials.
Most of these items are inexpensive and easy to find at craft stores like Michaels. Don’t be afraid to get creative by using what you already have at home, including old jewelry, fabric scraps, or decorative trinkets.
Step-by-Step Guide: How to Make a DIY Dream Catcher
Making a dream catcher can seem intimidating, but it’s actually a simple process if you follow these steps. Don’t worry about the imperfections in your creation along the way. They are what give it a handmade charm!
1. Prepare Your Hoop
Start by wrapping your embroidery hoop or metal ring with yarn or ribbon to conceal the frame and add texture to your design. Secure the ends with a dab of hot glue to keep everything in place.
2. Weave the Dream Web
Tie one end of your string to the top of the hoop, then begin weaving the web. Create loops by evenly wrapping the string around the hoop. Move inward as you work, forming a pattern that grows smaller toward the center. For a touch of detail, thread beads onto the string as you weave. Pull the string taut to keep the web firm and neat.
3. Add Cascading Ribbons and Lace
Cut your ribbons, lace, or fabric strips into varying lengths. Tie these to the bottom half of the hoop, letting them dangle freely. Experiment with layers and textures for a dynamic, boho-chic look.
4. Attach Feathers and Charms
Secure feathers to the ends of your ribbons with glue or tie them directly to the web. Add beads or charms for extra personality. Think moons, stars, or even small crystals for a mystical touch.
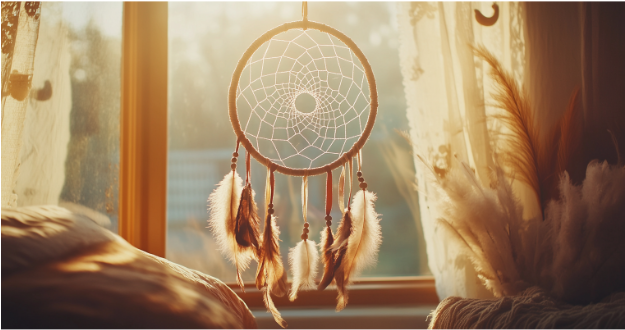
5. Display Your Dream Catcher
Find the perfect spot to hang your creation! Traditionally, dream catchers are hung above beds, but they also look beautiful near windows where sunlight can highlight their details.
Tips for Personalizing Your DIY Dream Catcher
Dream catchers are endlessly customizable. Here are some ideas to make yours stand out:
- Set the Mood with Color: Use soft pastels for a calming look or bold, vibrant shades for a dramatic flair.
- Incorporate Natural Materials: Add twigs, dried flowers, or small crystals for an earthy feel.
- Experiment with Unique Shapes: Go beyond the circle by using star, triangle, or heart-shaped frames.
- Upcycle Materials: Repurpose old jewelry, fabric scraps, or broken necklaces to create sustainable designs.
For even more inspiration, browse handmade dream catchers on Etsy.
Why You’ll Love Crafting a DIY Dream Catcher
Making your own dream catcher is more than just a craft project—it’s a calming, creative experience. The process of weaving, tying, and layering materials promotes mindfulness and allows you to express your individuality.
Plus, a handmade dream catcher carries sentimental value. It’s a unique piece of decor that reflects your personality and creativity. If you’re looking for a meaningful gift, a custom dream catcher is a thoughtful option for housewarmings, birthdays, or baby showers.
Make Bedroom Chic with DIY Dream Catchers
When you create a DIY dream catcher, you’re not just crafting decor—you’re weaving meaning, creativity, and charm into your space. Dream catchers bring a timeless bohemian flair and offer a fun, hands-on project that anyone can enjoy. Best of all, your finished piece will reflect your personal style and creativity.
So, gather your materials, follow the simple steps, and start crafting your own dream catcher. With a little effort and imagination, you’ll create a stunning boho-chic masterpiece that transforms your bedroom into a dreamy sanctuary.
Share Your Masterpiece!
Have you made your own dream catcher? What materials or techniques did you use? Share your experience in the comments below, as I’d love to see your creations and hear your tips! Let’s inspire each other to craft something truly magical.
FAQs
Q: What’s the easiest web pattern for beginners?
A: The simple loop design works best. Wrap the string evenly around the hoop, then tighten as you move inward.
Q: Can I use recycled materials?
A: Absolutely! Old fabric scraps, jewelry, or even twigs can add unique, eco-friendly details to your dream catcher.
Q: How long does it take to make one?
A: On average, it takes 1–2 hours, depending on the complexity of the design and your crafting speed.
Q: Where should I hang my dream catcher?
A: Traditionally, they’re hung above beds, but they also look great in windows, cozy corners, or even outdoor patios.
Q: What are alternatives to feathers?
A: If you prefer not to use feathers, try tassels, dried flowers, or fabric cutouts for a different look.
Q: Are dream catchers good gifts?
A: Definitely! Handmade dream catchers are thoughtful, personalized gifts for friends and family.


