

Last Updated: June 2026
TL;DR: Paracord Dog Collar Tutorial
- Walks you through how to make a custom paracord dog collar using durable 550 paracord, a buckle, and a D-ring.
- Shows how to measure your dog’s neck properly to cut the correct cord length with extra allowance for knots and weaving.
- Demonstrates the knotting pattern, typically the Cobra Weave, to create a strong, stylish, long-lasting collar.
- Explains how to securely attach the buckle and D-ring so the collar is both functional and safe for everyday use.
- Results in a lightweight, tough, and fully customizable collar, perfect for dogs of all sizes and far sturdier than many store-bought options.
RELATED: DIY Dog Crafts Man’s Best Friend Will Love
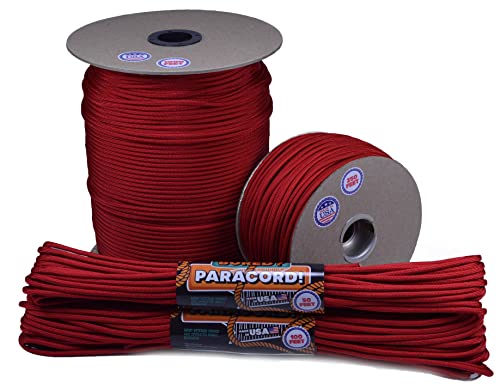
- SUPPERIOR STRENGTH: Bored Paracord brand paracord is TOUGH. All of our 550 paracord is rated for a...
- LONG LIFE AND DURABILITY: Whether it is snow or rain, Bored Paracord brand paracord is made to last...
(As an Amazon Associate, we earn from qualifying purchases.)
How to Make a Paracord Dog Collar
Creating your own paracord dog collar is an easy, budget-friendly way to give your dog a durable, custom accessory that’s built to last. Using strong 550 paracord, a secure buckle, and a simple knotting pattern, you can craft a collar that matches your dog’s size, style, and personality. This DIY method is perfect for beginners, incredibly sturdy for outdoor adventures, and far more customizable than store-bought options. Whether you want a survival-ready collar or a colorful everyday design, this tutorial shows you exactly how to make one from scratch.
What You’ll Need:
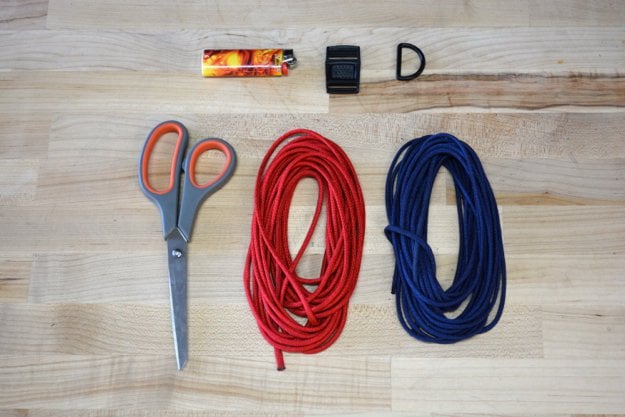
- 550 Paracord: 19ft one color, 19ft a second color (to make a 20″ collar)
- Plastic buckle (or metal, whichever you prefer)
- A D-Ring (metal or plastic)
- Lighter
- Scissors
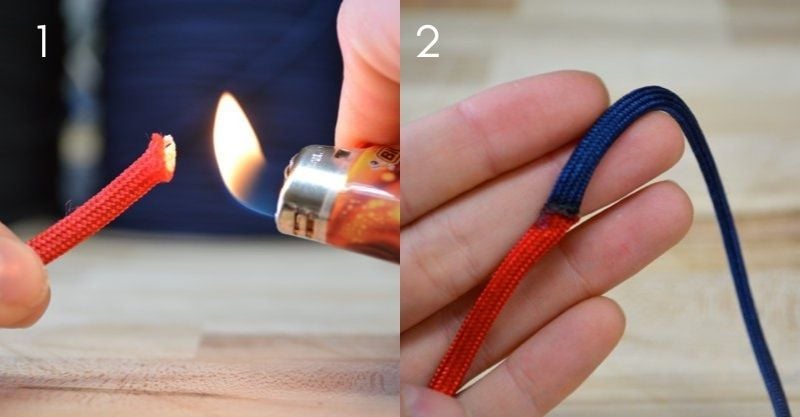
Step 1: Join Two Pieces of Cord
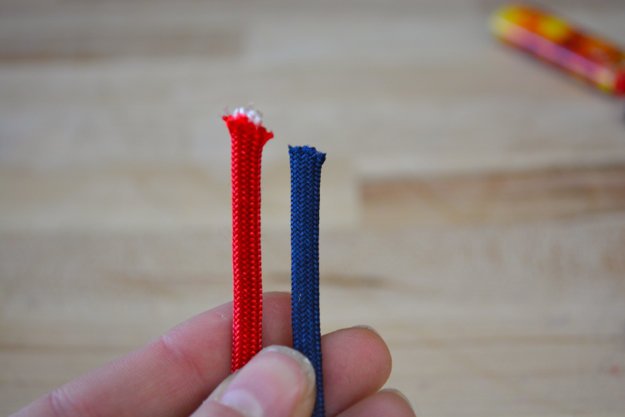
You are going to start out by joining both pieces of paracord to make one single cord. Trim one end of each cord at an angle.
First, trim an end of each color at an angle. Then use your lighter to melt the ends and press them together while they are still hot.
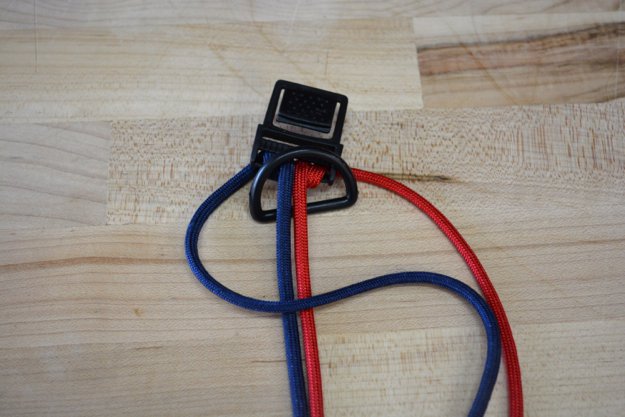
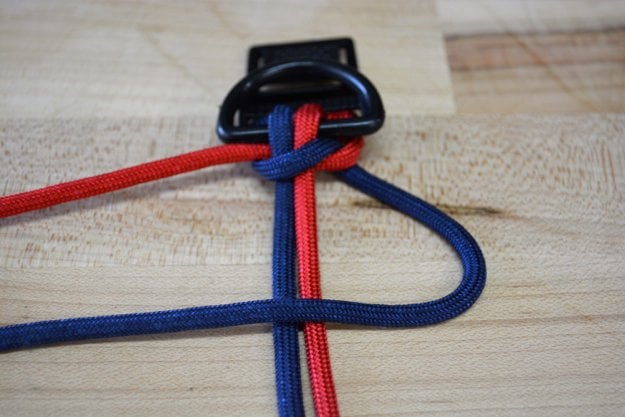
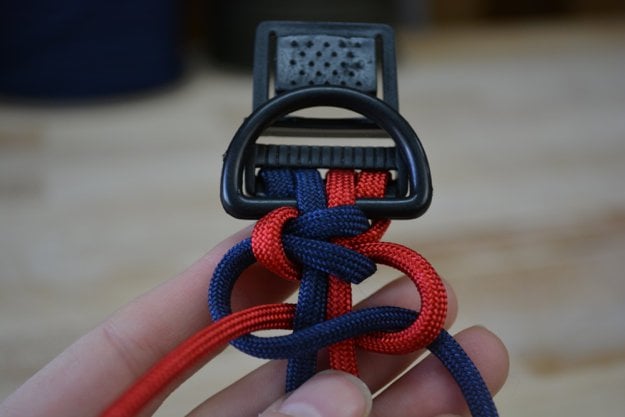
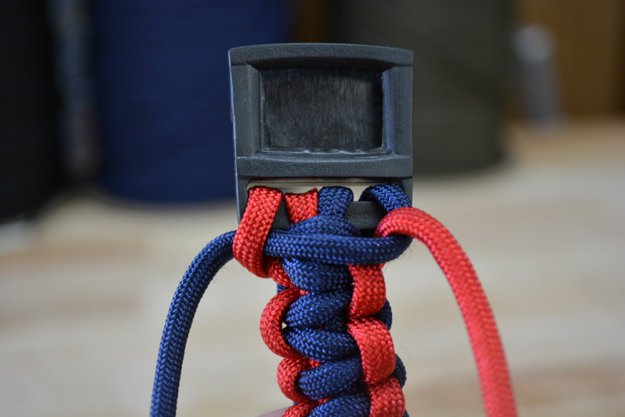
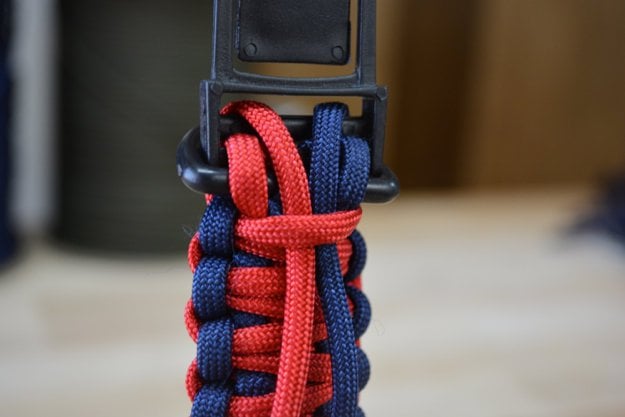
Step 2: Secure Cord to the Buckle
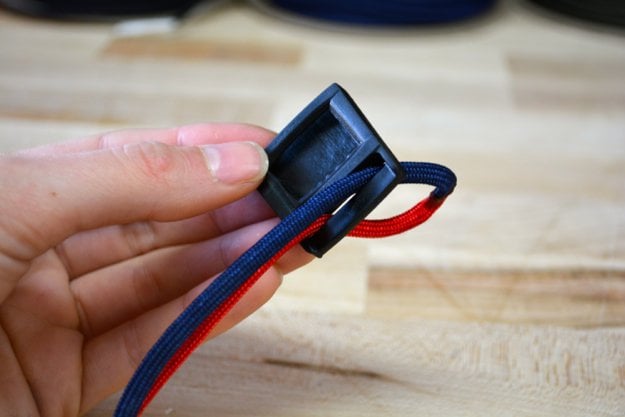
Fold the cord in half at the joint you just made. Thread the loop through the female part of your buckle.
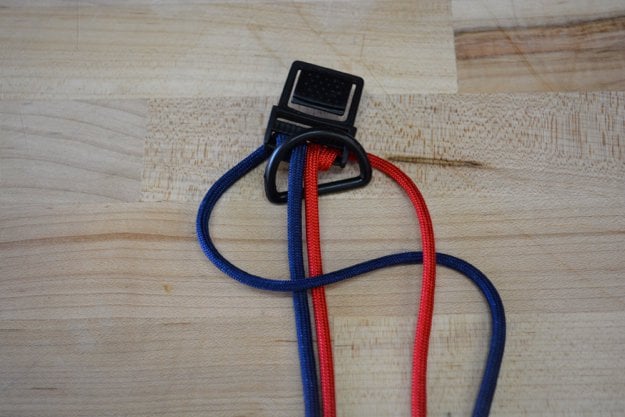
Secure the cord to the buckle by making a hitch knot:
Pull the cord through the loop you just made to secure the paracord to the buckle.
RELATED: Easy DIY No Sew Dog Jacket

- One 4-pack of BIC Classic Edition Multi-purpose utility lighters
- Safe, dependable, long-lasting lighters from America's No. 1 Lighter Brand
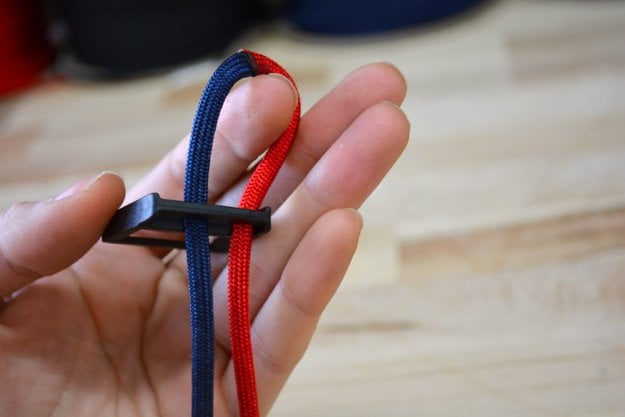
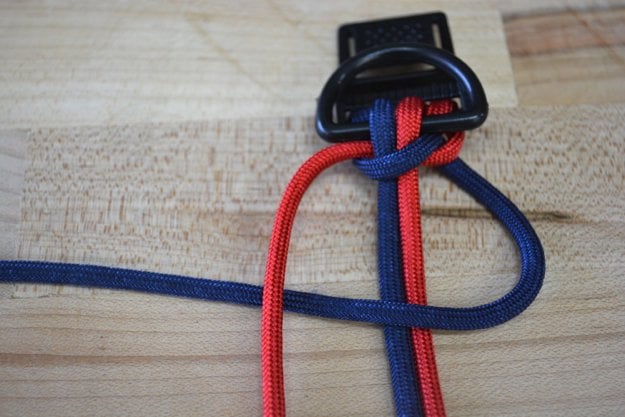
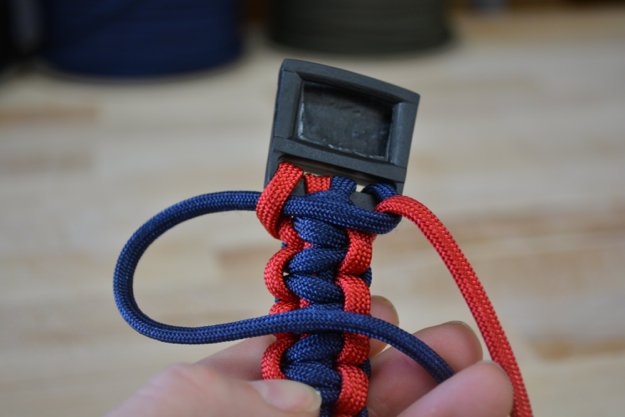
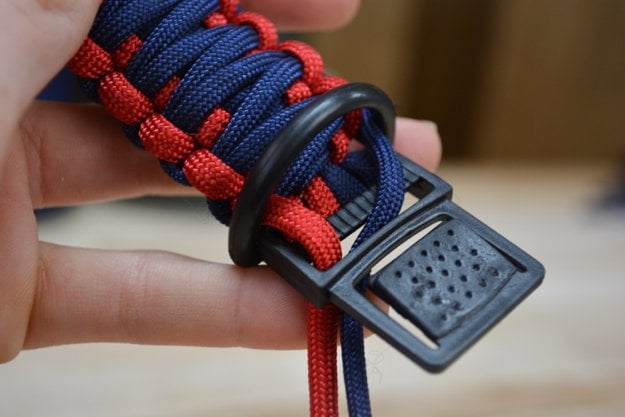
Step 3: Set the Length of the Cords
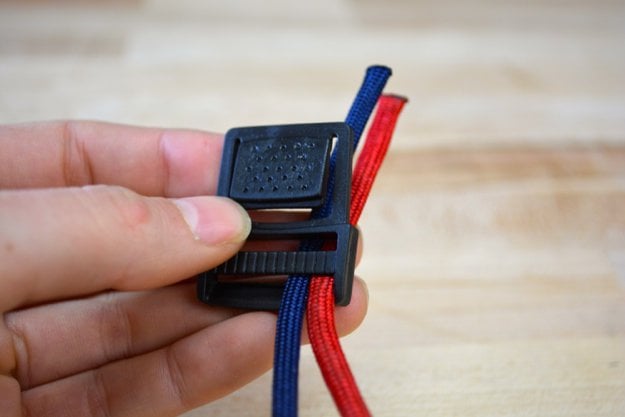
Thread the ends through the other buckle. Now we are going to set the size of the paracord dog collar and secure the other end of the buckle. Slide the buckle along with the cords until you get the correct length.
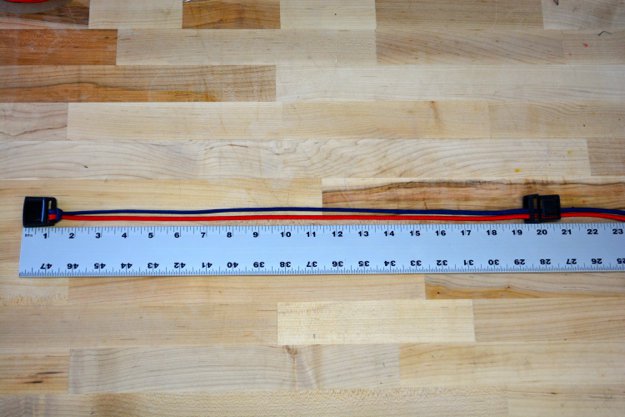
We are making our collar 20″ long.
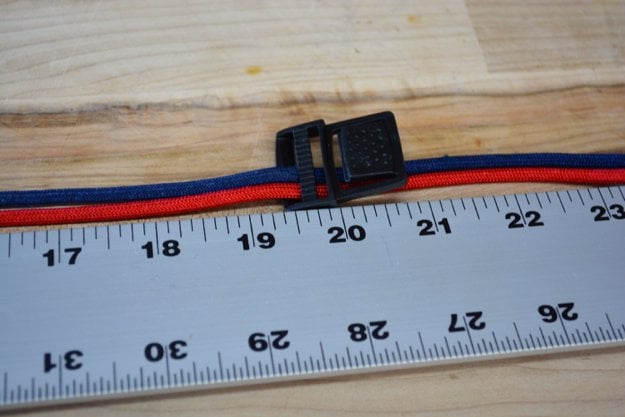
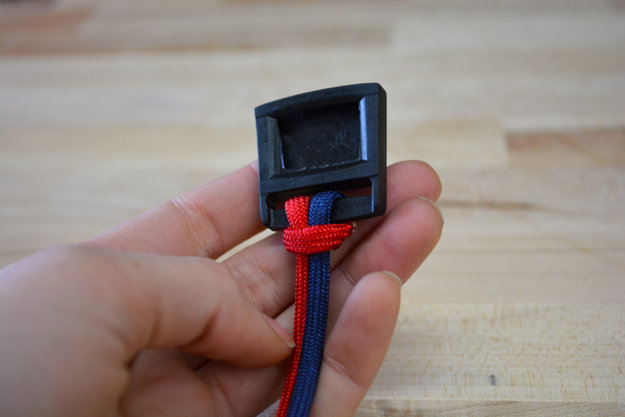
Once you measure, loop the ends around the buckle slot one more time to make it secure.
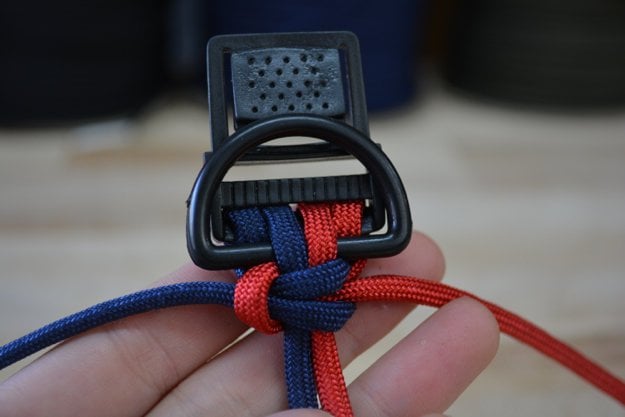
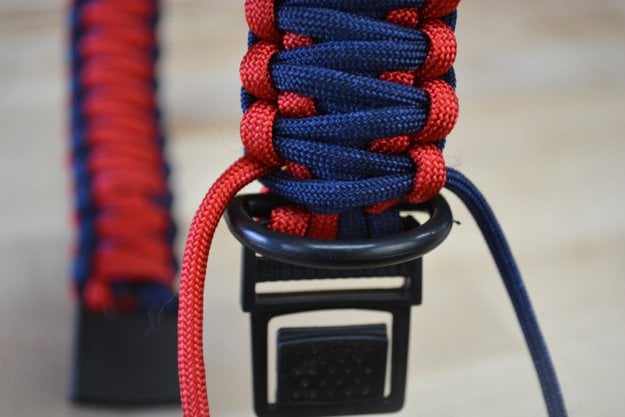
Step 4: Slide the D Ring

Slide the D-Ring on over the other end of the collar and up until it’s touching the buckle end you just attached. (the male piece)
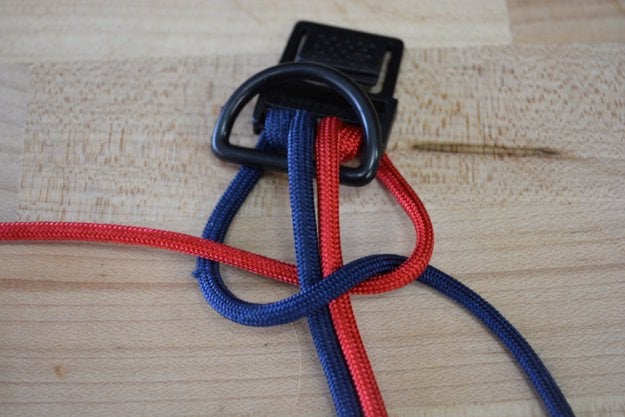
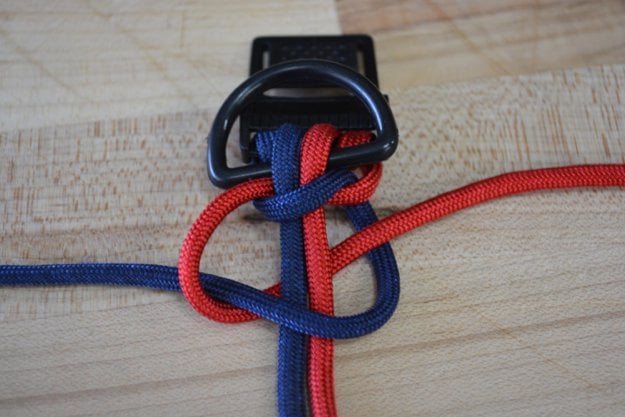
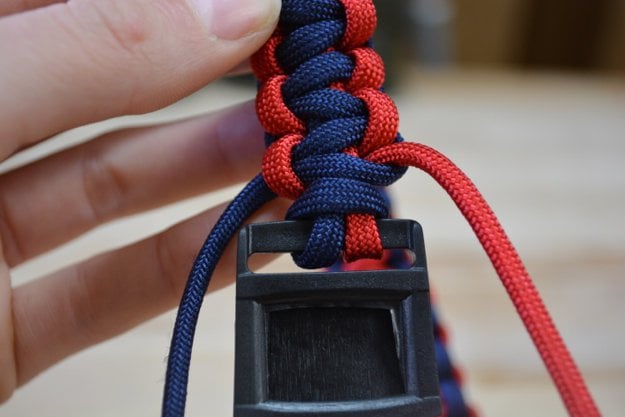
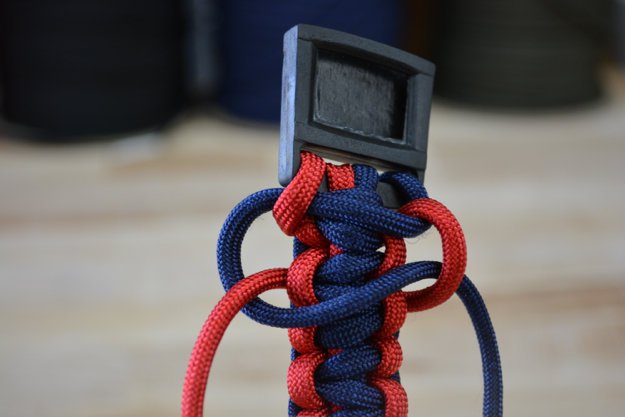
Step 5: Cobra Weave
Cobra Weave:
Take the blue strand over the core strands.
Now, let’s start with the standard cobra weave. Then weave the blue cord under the red cord
Loop the red cord behind the core and up through the loop created by the blue cord.
Push up with your thumb and pull both cords to tighten.
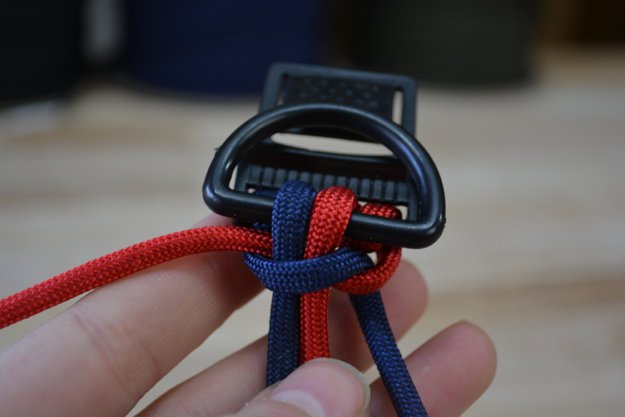
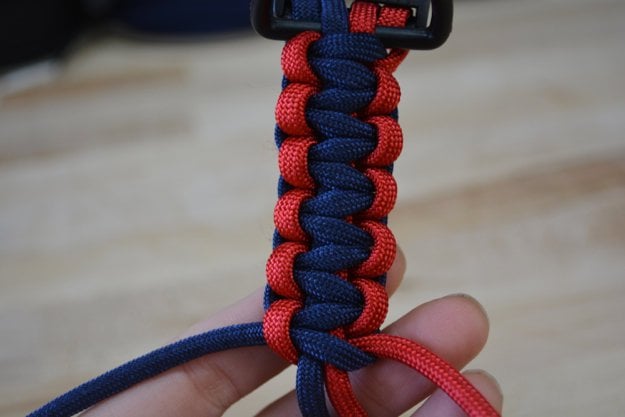
Repeat the step starting with the right side. Take the blue cord over the core.
Bring the red cord over the blue cord.
Loop the red cord under the core and up through the blue loop.
Push up with your thumb and pull the cords to tighten.
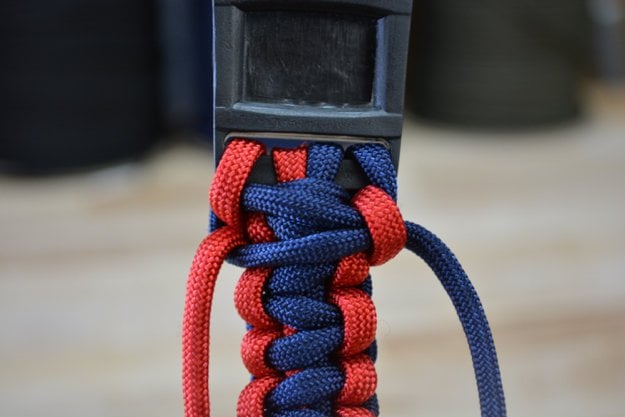
Repeat starting on the left side.
Continue on down, alternating left and right.
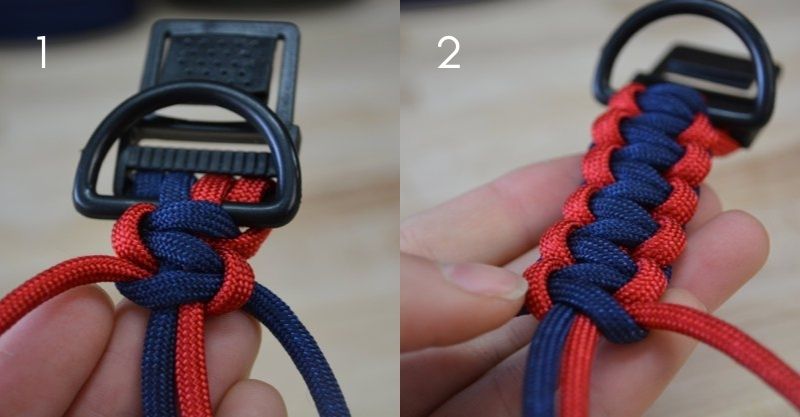
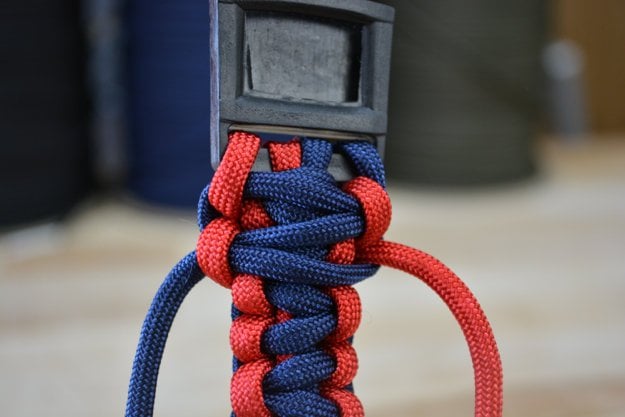
Your knots should look like this.
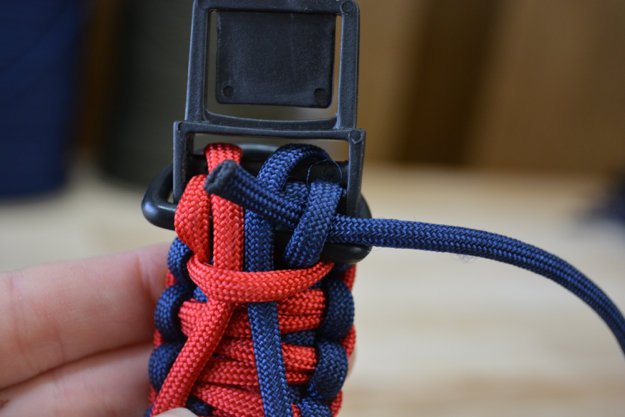
Step 6: Secure the Connection
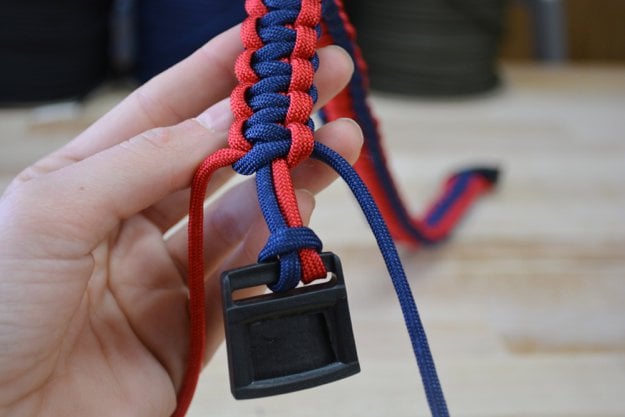
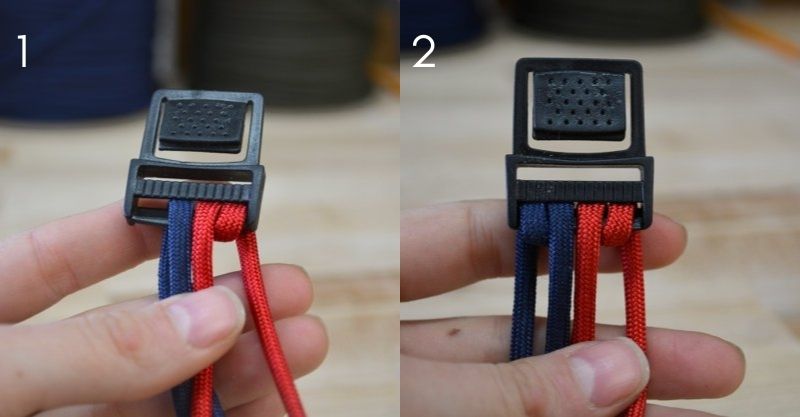
Continue on down until you reach the end of the collar. Turn the collar around and run the ends through the slot to make a more secure connection to the buckle.
Continue until you can’t fit another knot.
Turn the collar around and run the ends through the slot to make a more secure connection to the buckle.
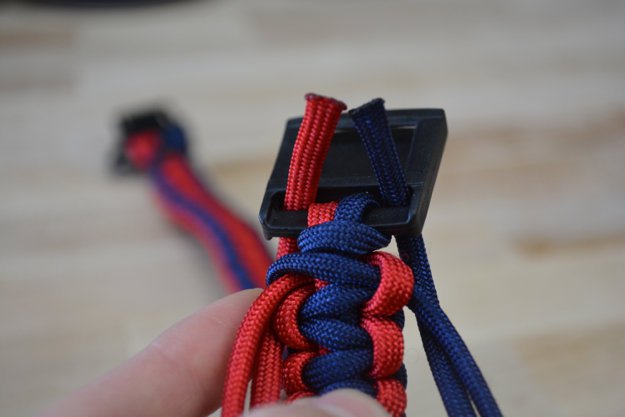
Pull the cords through.

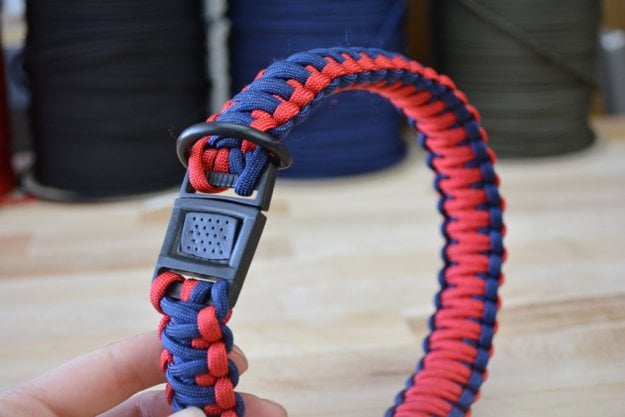
Step 7: King Cobra
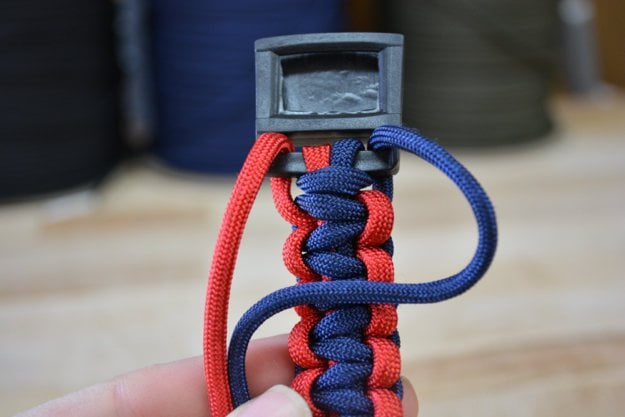
If you’ve been following our paracord projects, then you know the Cobra weave is one of the more popular weaves. For this paracord dog collar, we are going to take it one step further and do a King Cobra weave!
King Cobra: You weave it the exact same way as the regular Cobra. Start with the blue cord again. (Start with the same color cord you started with before to keep the color pattern consistent.)
This weave is super strong and even adds thickness and padding to the original cobra weave, making the collar more comfortable for pooches of all sizes. Loop the red cord under and through the blue loop.
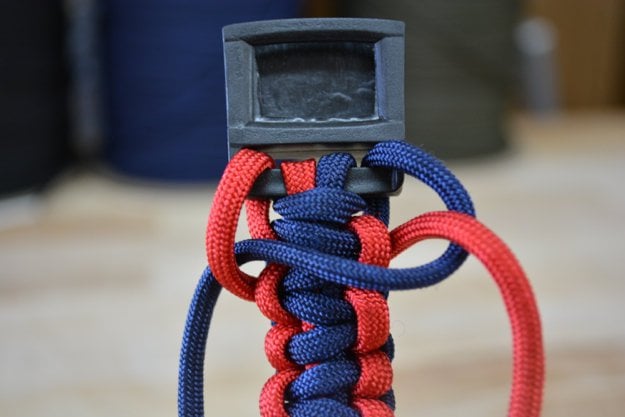
Keep tightening your paracord dog collar. You’ll feel it lock into place.
Tighten more.
Keep tightening.
Tighten! You’ll feel it lock into place.
It should look like this.
Continue on down.

Step 8: Continue All the Way Down
You’ve reached the end! Make sure you get as close to the D-Ring as possible.
Continue all the way down until you are back where you started. Get as close to the D-Ring as possible.
No products found.
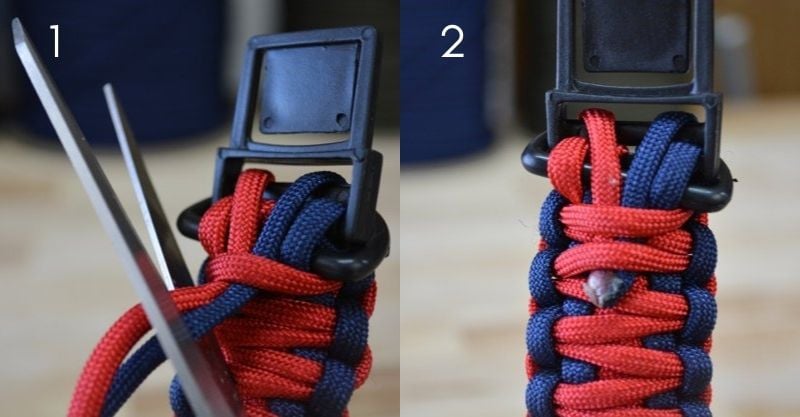
Step 9: Secure and Finalize
Pull the ends of the cord through the center of the D-Ring and through the open slot in the buckle.
This last step is where you will secure the cords and finalize the collar. Turn the collar over and thread the ends of the cord through a couple of the loops.
Go ahead and thread the cord through a couple more loops that are shown here. This will ensure your collar doesn’t come apart will you and Fido are romping through the woods.
Once you secure the ends, trim them with your scissors and seal them with your lighter.
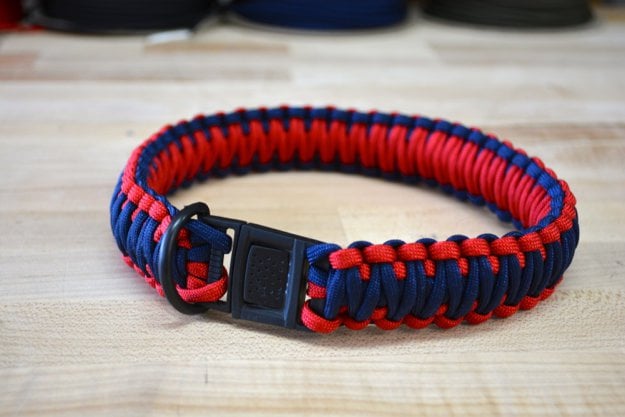
Check out your King Cobra Paracord Dog Collar!
What color will you make your paracord dog collar?
Other Paracord Tutorials
You can make other things using paracord. Check out all of our paracord posts here:
- Looking for a list of Cool Paracord Projects?
- Ever wonder how to make a snare trap?
- What about a monkey fist? How about a giant monkey fist?
- Here’s how to make a paracord keychain!
- You can even make belts with paracord!
- Also, just finished compiling our How To Make A Paracord Bracelet List!
Your Custom Paracord Dog Collar Is Ready for Adventure
By measuring correctly, choosing your favorite paracord colors, and following a reliable knotting pattern like the Cobra Weave, you can create a strong, stylish collar your dog can wear with pride. This DIY project saves money, reduces waste, and gives you total creative control over the final design. Plus, paracord is known for its strength, making it dependable for hiking, training, and everyday use.
Ready to take your paracord crafting to the next level?
👉 Experiment with multi-color weaves or add matching paracord leashes and accessories.
👉 Explore more DIY pet gear tutorials to customize your dog’s entire setup.
👉 Share your finished collar, your creativity may inspire other pet owners to try DIY too!
FAQ
1. What type of paracord should I use for a dog collar?
550 paracord is ideal because it’s strong, flexible, and durable enough for daily wear.
2. How much paracord do I need for one collar?
Most collars require 8–12 feet of paracord per inch of collar length, depending on weave tightness.
3. What’s the best knot or weave for a paracord dog collar?
The Cobra Weave is the most common, strong, comfortable, and beginner-friendly.
4. Is a paracord collar safe for dogs?
Yes. Paracord is strong and secure when properly woven. Always attach hardware (buckle + D-ring) firmly to ensure safety.
5. Can I make the collar adjustable?
Absolutely. Use a side-release buckle with a built-in adjustment slider to give the collar sizing flexibility.
6. How do I measure my dog’s neck correctly?
Wrap a soft measuring tape around the dog’s neck and add 1–2 inches for comfort, depending on your dog’s size.
7. Can the collar get wet?
Yes. Paracord is mildew-resistant and dries quickly, making it great for active or water-loving dogs.
8. Can I attach tags or accessories?
Yes, use the D-ring to attach ID tags, nameplates, or even small charms.
Check out this video on how to make DIY paracord dog collar for a medium and large dog:
The tutorial below is done for a large dog, so our collar ends up being a whopping 20″! If your pup is smaller, you can follow this simple rule to calculate the amount of paracord you’ll need: 1.5 feet of paracord for every 1 inch of your paracord dog collar.
QUICK POLL
Is matching your own jewelry to your dog’s collar “Bestie Goals” or just legit cringey?
Is this a cute bond or a cry for help? Let’s hear your hottest takes in the comments!


