

Want to know how to make a lamp? Here’s an awesome lighting idea that will certainly light up any room you have in your home. If you want to try your skill in a little wood craft then these wooden dowels will be the perfect thing to start with.
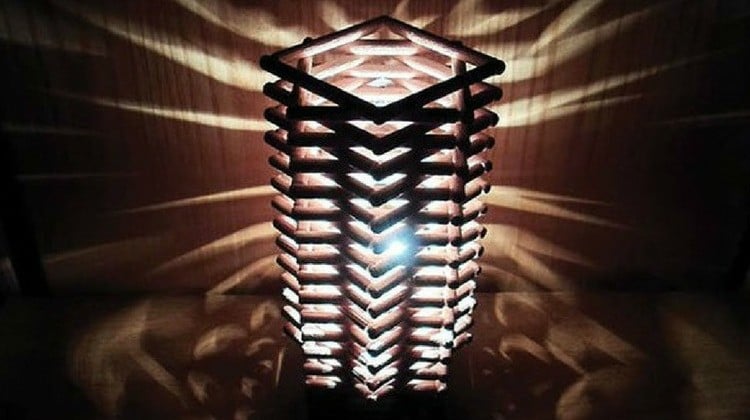
DIY Wooden Dowel Lamp
A Functional Home Decor For Your Bedroom
Wooden dowels have a lot of uses but normally, it’s used to provide support to furniture and other things. I really like this wood craft idea since it makes use of the wooden dowels on their own.
If you need a little DIY lighting in your room that serves as a great room decor, then this craft project will be just perfect. It’s so easy to make and I’m sure you’ll have a lot of fun in the process.
What you’ll need for this DIY lamp:
- 124 wooden dowels (3 inches long or bigger)
- A piece of cardboard
- Hot glue
- White glue
- Bulb holder and LED light bulb
- Ruler
- Scissors
Step 1: Create the dowel squares


Glue the tips of two dowels together with hot glue to form a right angle. Do the same with other two dowels, and join them to the first ones forming a perfect square. You can use white glue if you prefer, but it will take much longer for it to dry completely. Now make a total of 31 squares like the photo above.
Step 2: Cut a cardboard square

Measure you dowel square’s length. Draw one on a piece of cardboard, but make sure to draw it a little smaller than the actual size. Just a little bit smaller so that the edges will almost be invisible when you place it on a dowel square, but it must still be big enough for it to not fall into the hole in the middle.
Finally cut the square.
Step 3: Cut out the hole for your bulb holder


Take your bulb holder and trace its outline in the middle of the cardboard square. Cut out the circle. This is the hole that will hold the bulb holder inside the lamp.
Step 4: Compose the base


Glue three dowel squares one above the other using white glue. You can turn the middle square on the other side to give a different pattern to the base, but that’s not important. Finally glue the cardboard square on top of them to complete the base.
Step 5: Compose the lampshade


Glue another dowel square on top of the cardboard piece, just like you did for the base. Now the trick comes: you must glue another square on top, but instead of placing it like you did for the others, turn it 45 degress so that its angles face the other square’s sides and vice versa.
Step 6: Keep adding the other squares

The third dowel of your lampshade must be placed just like the first one. Turn the fourth one 45 degrees like the second one. Continue to glue all of your dowel squares this way, one above the other. Make sure to keep them as centered as possible.
Step 7. Insert bulb holder

When the glue is dry, insert your bulb holder in the cardboard hole from the bottom of the lamp and add a LED light bulb from the top.
And it’s done!

Did you like our tutorial on this DIY lamp? Let us know in the comments section below what your thoughts are on how to make a lamp. Do you have any other craft projects you’d like to share? Share it with us and we’ll give it a try.
Want more cool lighting projects and ideas to try? Check out How to Make a DIY Mason Jar Chandelier!
![]() Stay connected with us on Facebook, Twitter, Pinterest and Instagram!
Stay connected with us on Facebook, Twitter, Pinterest and Instagram!


