


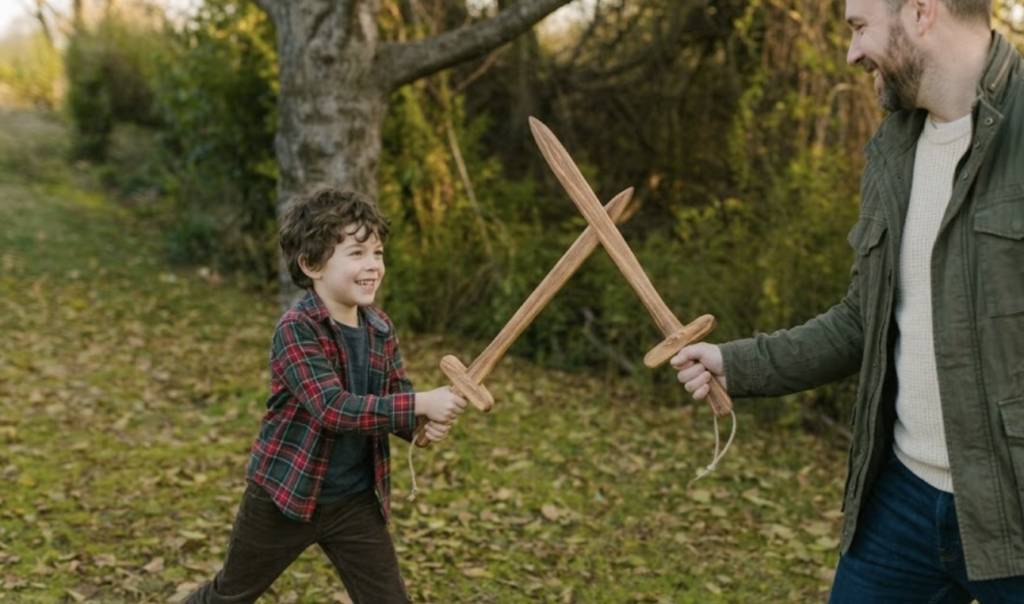

At a Glance: Wooden Sword Toy
- Skill Level: Beginner to Intermediate (Perfect for a parent-child collaborative build)
- Time Commitment: 3 to 4 Hours (plus glue drying time)
- What This Guide Features: A bulletproof three-piece sandwich design, kid-friendly step division, exact millimeter cut lists, and professional finishing tips.
⚠️ Safety First!
Safety Reminder: Wear PPE (gloves, goggles, ear protection, dust mask). Use sharp tools responsibly. For load-bearing projects (decks, sheds, barns), check local building codes (e.g., Round Rock, TX regulations) and consult pros. Work in ventilated spaces; minimize dust with eco-friendly practices.
Bringing Back the Magic of Pretend Play
Kids nowadays are constantly glued to their phones, tablets, and gaming consoles. The simple, imaginative magic of running around the backyard, defending kingdoms, and slaying imaginary dragons is becoming a lost art.
If you are looking for the perfect summer project, this is it. Building a classic wooden sword toy for kids will give you an incredible bonding experience with your little one. Passing down basic woodworking skills, teaching hand-eye coordination, and letting your little helper feel the pride of saying, “I helped build this!” is worth every bit of sawdust.
Let’s fire up the tools and make some memories!
🪵 Materials
- The Wood: 1 piece of 12 mm (approx. 1/2″) premium Baltic Birch plywood or a dense hardwood board (like Maple or Beech), roughly 20 cm x 80 cm.
- Pro-Tip: Baltic Birch plywood is highly recommended here. Its cross-laminated layers make it virtually indestructible, preventing it from splitting along the grain during epic backyard duels.
- Glue: High-strength, non-toxic wood glue (PVA).
- Fasteners (Optional): Two 15 mm brass escutcheon pins (small decorative nails) or 6 mm (1/4″) wooden dowel pins to lock the crossguards in place.
- Finish: Food-safe mineral oil, beeswax, or colorful non-toxic acrylic paints.
🛠️ Tools Needed
- Jigsaw, scroll saw, or a hand coping saw
- Drill with a 15 mm (or 5/8″) spade bit or Forstner bit (for perfect decorative notches)
- Clamps (at least 2 or 3)
- Sanding block and sandpapers (80-grit, 120-grit, and 220-grit)
- Pencil, ruler, and compass
The Complete Cut List
| Component | Qty | Dimensions (L x W x T) | Description |
| Main Blade & Hilt (A) | 1 | 740 mm x 35 mm x 12 mm | Includes 620 mm blade and 120 mm hilt |
| Crossguard Plates (B) | 2 | 150 mm x 30 mm x 12 mm | Sandwiches the blade at the hilt joint |
Step-by-Step Wooden Sword Toy Woodworking Project
Phase 1: Layout & Tracing (Zero Guesswork!)
Step 1.1: Tracing the Main Blade & Hilt
- 👨👦 Squire Task (Kids): On your wood panel, help the kids measure and draw a long, clean rectangle exactly 740 mm long and 35 mm wide.
- 👨👦 Squire Task (Kids): At one end, draw a smooth, rounded semi-circle for the tip of the sword. At the opposite end (the hilt), mark a line 120 mm up from the bottom. From this line down, taper the handle width slightly from 35 mm down to 25 mm at the base.
- 👨👦 Squire Task (Kids): Use a small coin (like a nickel) to draw two matching semi-circle notches on the left and right sides of the handle, right before the rounded end (as shown in the blueprint layout).
Step 1.2: Tracing the Crossguards
- 👨👦 Squire Task (Kids): On a separate section of your wood, draw two identical rectangles measuring 150 mm x 30 mm.
- 👨👦 Squire Task (Kids): Round off the outer ends of these rectangles. Use your coin to mark small decorative notches centered on the top and bottom edges near the rounded tips.
Phase 2: Cutting & Shaping
Step 2.1: Pre-Drilling the Decorative Notches
Pro Secret: Trying to cut tiny, perfect half-circles with a jigsaw can be incredibly frustrating. Instead, drill them first!
- 🛠️ Master Smith Task (Adult): Clamp the boards firmly. Use a drill with a Forstner bit or spade bit that matches the width of your notches. Center the bit directly on the edge of your pencil line and drill straight down through the wood. When you cut the outer profile later, you’ll be left with flawless, professional semi-circular cutouts.
Step 2.2: Cutting the Profiles
- 🛠️ Master Smith Task (Adult): Use a jigsaw or scroll saw to carefully cut out the main sword body and the two crossguard plates along your outer pencil lines.
Phase 3: Assembly & Customizing
Step 3.1: Assembly Alignment
- 👨👦 Squire Task (Kids): Spread a clean, even layer of wood glue on the center region of the sword body (where the blade meets the handle, exactly 120 mm from the bottom).
- 👨👦 Squire Task (Kids): Place one crossguard plate on the top side of the sword and the second plate directly underneath on the bottom side, sandwiching the blade.
- 🛠️ Master Smith Task (Adult): Clamp the assembly tightly together. Double-check that the crossguards are perfectly perpendicular to the blade. Wipe away any glue squeeze-out with a damp paper towel. Let it dry for at least 2 hours.
Phase 4: Edging, Sanding & Detailing
Step 4.1: Rounding the “Blade”
- 👨👦 Squire Task (Kids): This is where the magic happens! Give your helper some coarse 80-grit sandpaper wrapped around a wooden block. Have them sand down the square edges of the blade to give it a softened, chamfered “sword edge” look.
- 🛠️ Master Smith Task (Adult): Make sure the tip of the sword is completely rounded and blunt for safe playing!
- 👨👦 Squire Task (Kids): Switch to 120-grit and then 220-grit sandpaper, sanding the entire sword until it feels as smooth as silk.
Step 4.2: Applying the Protective Coat
- 👨👦 Squire Task (Kids): Wipe the wood completely clean of dust. Rub down the sword with a natural, kid-safe finish like beeswax or mineral oil to show off the gorgeous layers of the wood.
- Alternative: Let them paint the blade silver and the crossguard gold with non-toxic acrylic paint!
Since this project requires very little material, this is the ultimate workshop scrap buster! Dig through your off-cut bin first. Mixing different scrap species, like using a light maple for the blade and dark walnut off-cuts for the crossguards, creates an incredibly beautiful, high-contrast look without spending a single dime at the lumberyard!
FAQs Wooden Sword Toy
1. What is the best wood to use for a toy sword?
Premium Baltic Birch plywood is the absolute best choice due to its cross-laminated layers, which prevent the blade from splitting under impact. Dense hardwoods like Maple, Beech, or Oak are also fantastic. Avoid cheap construction pine or softwoods, as they splinter easily and won’t hold up to backyard play.
2. How do I ensure the sword is completely safe for children?
Safety is all in the sanding. Be sure to deeply round over the sword’s tip so there are no sharp points. Use sandpaper to chamfer (bevel) the blade edges so they look defined but feel completely soft and rounded to the touch.
3. Can we paint the sword, and what paint is safe?
Absolutely! If your kids want to paint their swords, use water-based, non-toxic acrylic paints or milk paints. Once the paint is dry, seal it with a kid-safe, water-based clear coat or a simple coat of natural beeswax paste to protect the finish.
4. Why use a three-piece sandwich construction instead of carving it out of one solid board?
When you cut a sword out of a single solid piece of wood, the crossguard grain runs perpendicular to the blade. This creates a massive structural weak point where the crossguard can snap off easily. Sandwiching separate crossguard plates over the central blade eliminates this weakness, making the joint incredibly tough.
5. What if I don’t have a Forstner or spade bit for the decorative notches?
No worries at all! You can easily skip the semi-circular notches. Instead, simply use your jigsaw or a hand file to round off or taper the corners of the crossguards and pommel for a sleek, streamlined look.









