

Last Updated: March 2026
At a Glance: 9 Washi Tape Ideas
- This post covers 9 washi tape projects ranging from 5-minute fixes to a full staircase makeover.
- You can use washi tape on gadgets like laptops and keyboards, small items like keys and cables, and even entire walls.
- Every project peels off clean with zero residue, so you can experiment without commitment.
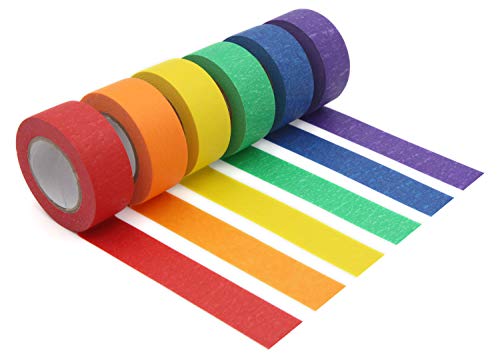
Washi tape DIY projects are fun and easy to make, so we've rounded up 9 creative uses for this tape for your own crafts!
RELATED: 4 Awesome Gift Wrapping Ideas | Gift Wrapping Tutorials
In this article:
Cable Labels | Mechanical Keyboard | Dot Wall | Cactus Mural | Toy Track | Light Switches | Laptop Skin | Mosaic Stairs | Key Covers
| Project | Time | Skill |
|---|---|---|
| Cable Labels | 5 min | Beginner |
| Keyboard Skins | 30 min | Intermediate |
| Polka Dot Wall | 45 min | Intermediate |
| Cactus Mural | 20 min | Beginner |
| Toy Tracks | 10 min | Beginner |
| Light Switches | 5 min | Beginner |
| Laptop Skins | 15 min | Intermediate |
| Mosaic Stairs | 60 min | Advanced |
| Key Covers | 5 min | Beginner |
What Is Washi Tape and Why Does Every Crafter Obsess Over It?
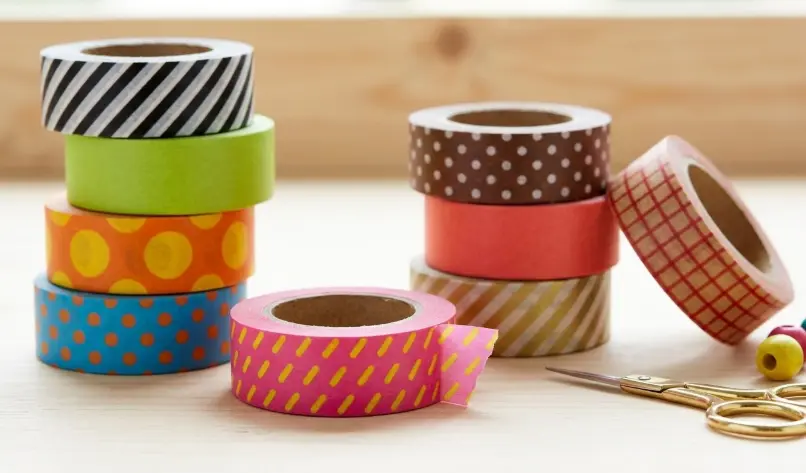
Washi tape is a decorative paper tape that originated in Japan. The “washi” part refers to traditional Japanese paper made from plant fibers. Unlike regular masking tape, it tears by hand, comes in thousands of patterns, and leaves zero residue when you peel it off.
That last part is the real selling point. You can slap it on rental walls, expensive laptops, and vintage furniture without committing to anything permanent. Also, don't be afraid of messing up, as you can just peel it off and start over.
Creative Uses for Washi Tape Ideas You'll Have Fun Working On
1. Color-Coded “Flag” Cable Labels

⏱️ Time: 5 Mins | 🛠️ Skill: Beginner
I spent ten minutes tracing a “dead” charging cable back to the wall last week. It was a total waste of time. Labeling your tech is the ultimate 2026 organization hack.
You’ll Need:
- Washi tape (distinct patterns per device)
- Fine-tip permanent marker
Steps:
- Clean the cable end with a dry cloth. Oily cables lead to peeling tape.
- Wrap a 2″ strip around the cord about an inch from the plug.
- Fold the tape over itself to create a “flag” shape.
- Label both sides so you can see it from any angle.
2. Custom Mechanical Keyboard Skins
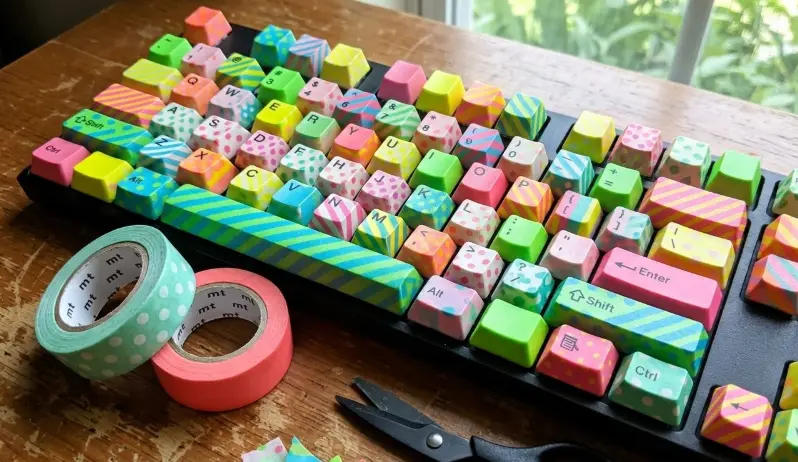
⏱️ Time: 30 Mins | 🛠️ Skill: Intermediate
I almost ruined a $200 keyboard using masking tape. The adhesive turned into a gooey mess within a week. Washi is the only residue-free solution for that custom “boutique” look.
You'll Need:
- Washi tape in assorted colors and patterns
- Hobby knife or precision scissors
- Keycap puller (optional)
- Fine-tip permanent marker (optional)
Steps:
- Pop off the keycaps with a puller or gently pry them off by hand.
- Cut a small strip and press it onto the top of the keycap, smoothing from center outward.
- Wrap the edges down the sides and trim the excess with your knife.
- Write the letters back on with a fine-tip marker, use alphabet stickers, or skip this if you touch type.
- Press the keycaps back into place and wrap the spacebar last.

3. Renter-Friendly Polka Dot Wall

⏱️ Time: 45 Mins | 🛠️ Skill: Intermediate
Changing wallpaper is a renter’s nightmare, but a plain white wall feels like a hospital. This is the only way to get a high-end polka-dot look that peels off in five minutes when you move out.
You’ll Need:
- 3 rolls of coordinating washi tape
- Small glass (for tracing)
- Precision shears
Steps:
- Trace your circles on the back of the tape. Tracing on the front will smudge the ink.
- Cut out 20 to 30 circles at once.
- Use a 12″ ruler to create a light “grid” on your wall.
- Apply the dots at the intersections for a professional, non-random look.
4. Minimalist Tape Wall Cactus Mural
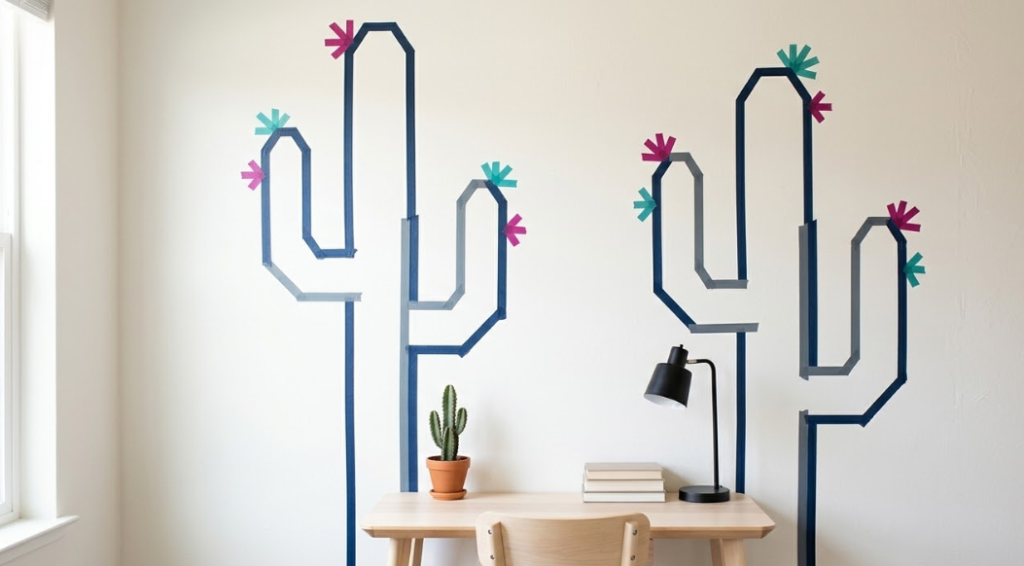
⏱️ Time: 20 Mins | 🛠️ Skill: Beginner
Minimalist “line art” is the 2026 aesthetic. If you can’t draw a straight line, let the tape do the work for you.
You’ll Need:
- Green washi tape
- Pink washi tape (for the “blooms”)
- Level or ruler
Steps:
- Use a level to place your first vertical “stalk” strip.
- Branch out with shorter strips at 90-degree angles.
- Add tiny pink “V” shapes at the tips to represent flowers.
- Pro-Tip: If it looks crooked, just peel it off and reset. No paint required.

5. DIY Toy Car Road Tracks

⏱️ Time: 10 Mins | 🛠️ Skill: Beginner
Here’s a parenting hack. Don’t buy those massive plastic roads for toy cars. Build custom highways using washi tape so you can just vacuum it over or peel it up by bedtime.
You’ll Need:
- Wide black washi tape
- White washi tape (skinny)
Steps:
- Lay long “highway” strips across your hardwood or tile.
- Cross the strips to create “T-junctions” and “Roundabouts.”
- Add 1-inch white dashes down the center for lane dividers.
- Build a “parking garage” under the coffee table for extra engagement.
6. Decorative Light Switch Covers
⏱️ Time: 5 Mins | 🛠️ Skill: Beginner
Nothing says “rental “unmaintained” like a yellowing plastic light switch. This 5-minute fix makes the whole room look curated.
You'll Need:
- Washi tape in 3 to 4 coordinating patterns
- Screwdriver
- Hobby knife
Steps:
- Remove the cover from the wall. Safety first.
- Apply your first strip diagonally from corner to corner.
- Alternate patterns as you work outward, overlapping edges slightly.
- Wrap the tape around the back edges for a clean finish.
- Cut out the switch hole from the back with your knife.
- Screw the plate back on for an instant designer touch.
7. Residue-Free Laptop Skins
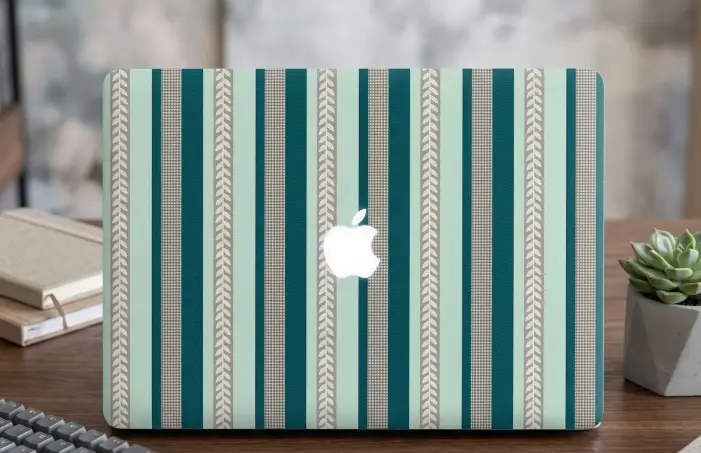
⏱️ Time: 15 Mins | 🛠️ Skill: Intermediate
I love stickers, but I hate the residue left behind when it’s time to resell my tech. Washi is the only way to personalize without devaluing your laptop.
You’ll Need:
- Assorted washi tape
- Clear laptop case (optional)
Steps:
- Start from the bottom edge of the laptop lid.
- Lay parallel strips and alternate colors for a “striped” look.
- Use your precision shears to trim exactly at the bezel edge.
- If you have a clear case, apply the tape to the inside of the case.
8. The “Mosaic” Staircase
⏱️ Time: 60 Mins | 🛠️ Skill: Advanced
The mosaic staircase is the ultimate “wow” factor for guests. Decorating the vertical risers of your stairs makes the whole entryway look like a custom art piece.
You’ll Need:
- Wide washi tape
- Measuring tape
- Squeegee or credit card
Steps:
- Measure the height of your stair riser. This is the vertical part.
- Cut tape strips to that exact length.
- Apply the tape horizontally, starting from the bottom of the riser.
- Use a credit card to “squeegee” out air bubbles for a paint-like finish.
9. “Polished” Color-Coded Keys

⏱️ Time: 5 Mins | 🛠️ Skill: Beginner
Fumbling with your keys in the dark is a special kind of annoyance. Color-coding them is great, but tape usually peels off in your pocket within a week. Here’s the fix.
You’ll Need:
- Washi tape
- Clear nail polish. This is the secret ingredient.
Steps:
- Wrap the “head” of the key in a bright pattern.
- Trim the edges so they don't snag inside the lock.
- Paint a thin layer of clear nail polish over the tape.
- Let it dry for 10 minutes to create a hard, permanent seal.
Learn how to make your own washi tape! Press play on this video by Fantasvale Art Lab:
Now you see there are plenty of things to do with washi tape! In fact, we're not done yet because we're still on the hunt for this tape's DIY crafts.
So if you have something going, we'd be delighted to know your creations, too.'
Join our community! Follow DIY Projects on YouTube, Instagram, Pinterest, and Facebook.
FAQs
What is washi tape?
Washi tape is a decorative paper tape from Japan made from plant fibers. It tears by hand, comes in thousands of patterns, and peels off without leaving residue.
Can I use washi tape to decorate my home?
Yes. You can apply it to walls, furniture, light switches, and stairs. It removes cleanly so it works great for renters or anyone who likes to switch things up.
Can I use washi tape on electronics?
You can use it on laptops, phone cases, keyboards, and cables. The adhesive is gentle enough that it will not leave gunk behind when you remove it.
QUICK POLL: Does washi-taping your laptop or phone make it look custom and artsy, or does it make gadgets look straight-up dirty?
Are you a maximalist tech decorator or a clean-gear purist? Let us know in the comments section below!