
At a Glance: Holiday Light Tunnel
- Two pipes, one tee, two stakes. That’s all one arch needs, and you repeat it down your walkway.
- Lights go on last. Anchor the arches first, then wrap them in warm white string lights.
- Plug into a safe outlet. Outdoor lights need a ground-fault outlet and an outdoor cord.
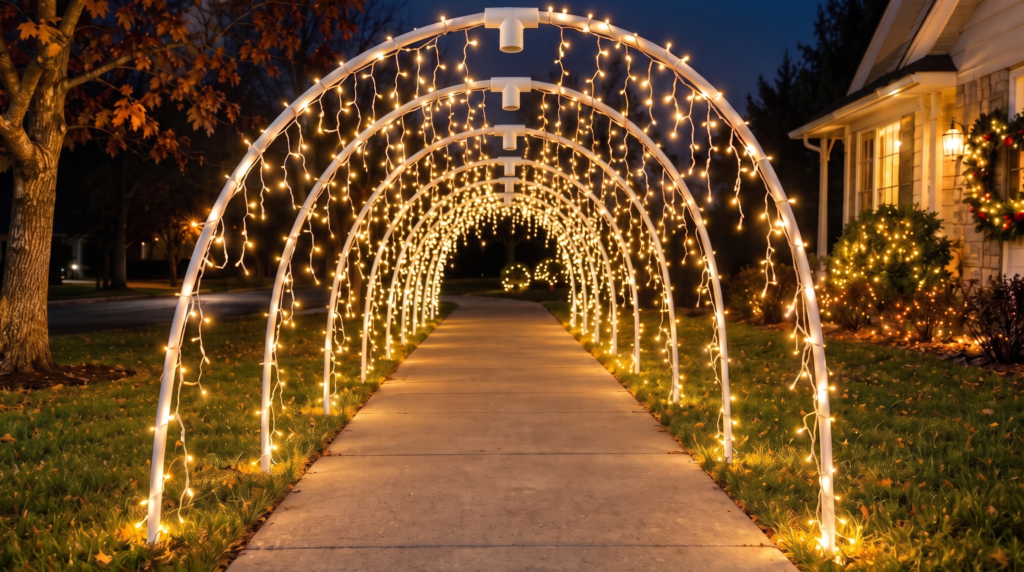
To build a holiday light tunnel, join two PVC pipes into an arch with a tee at the center top. Hammer rebar stakes into the ground on both sides of your walkway. Slide each arch onto its stakes and space the arches evenly. Then wrap every arch in outdoor string lights and plug in. Jump to the supplies or skip to the lights.
A holiday light tunnel looks like a big weekend job, but it’s one small unit repeated. Every arch is the same two pipes, one tee and two stakes. Start with three arches and add more once you see how it goes (a planning estimate).
What do you need to build a holiday light tunnel?
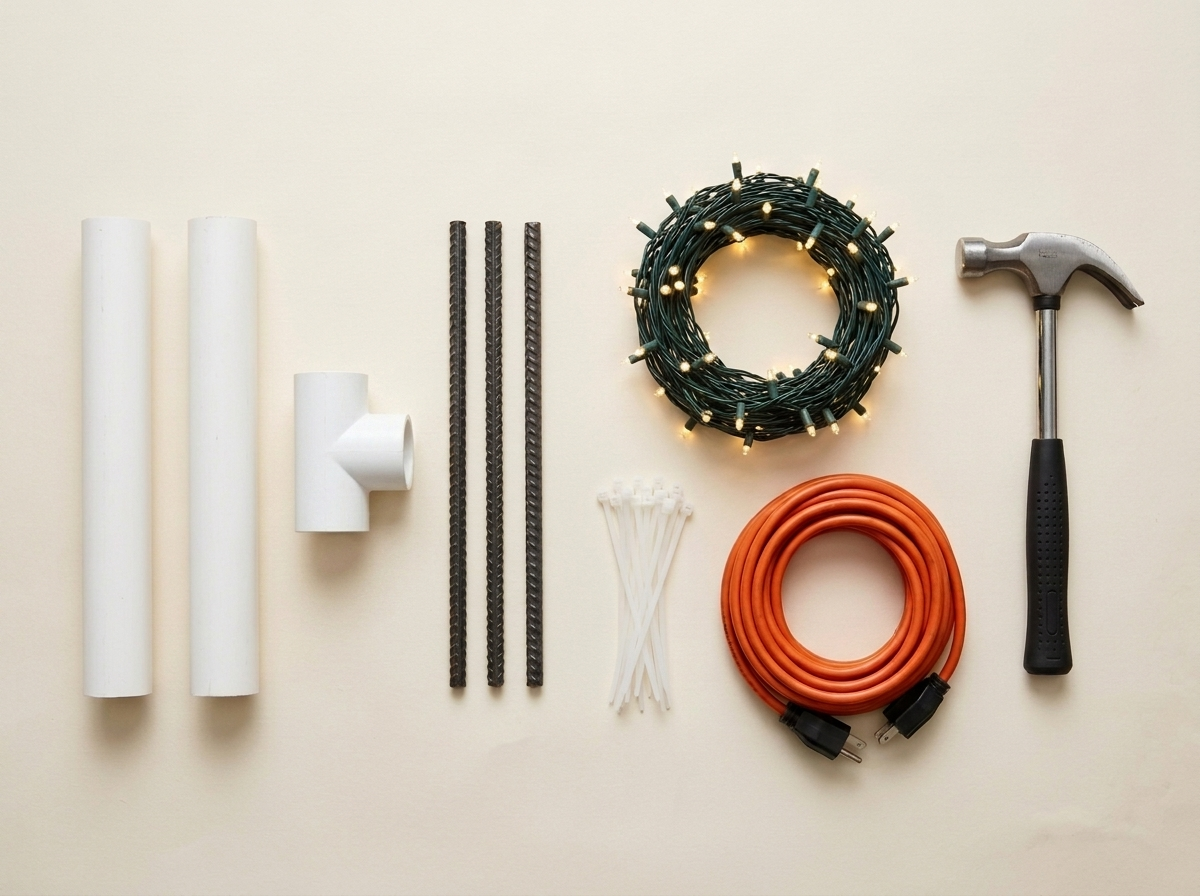
Makes a row of arches over a walkway. Numbers below are per arch.
- PVC pipe. Two pieces per arch. One published build used two 10-foot pieces of 1/2-inch pipe for each arch (our addition, the original project gives no size). Two short pieces are easier to carry home than one long one.
- PVC tee. One per arch, sized to match your pipe. It sits at the center top of the arch and joins the two pipes.
- Rebar stakes. Two per arch, one on each side of the walkway. That same build used 3/8-inch rebar cut to 2 feet (our addition). Pick rebar that slides inside your pipe with a little wiggle room.
- Outdoor string lights. Warm white and rated for outdoor use. The photo shows icicle-style strands. Plan on about 100 lights per arch, so one 300-light roll covers three arches (a planning estimate from one published build).
- Zip ties. They hold the lights on the pipe. Hook-and-loop cord straps work too, and you can reuse them next year (our addition).
- Outdoor extension cord. Rated for outdoor use.
- Hammer. Add safety glasses and work gloves for the stakes (our addition).
Quick tip: Build one arch first. Slide it onto a stake and make sure the pipe, tee and rebar all fit together. Then buy the rest.
How do you build a holiday light tunnel?
Four steps. Most of the time goes to wrapping lights, so plan on a Saturday afternoon (a planning estimate).
1. Build the arch
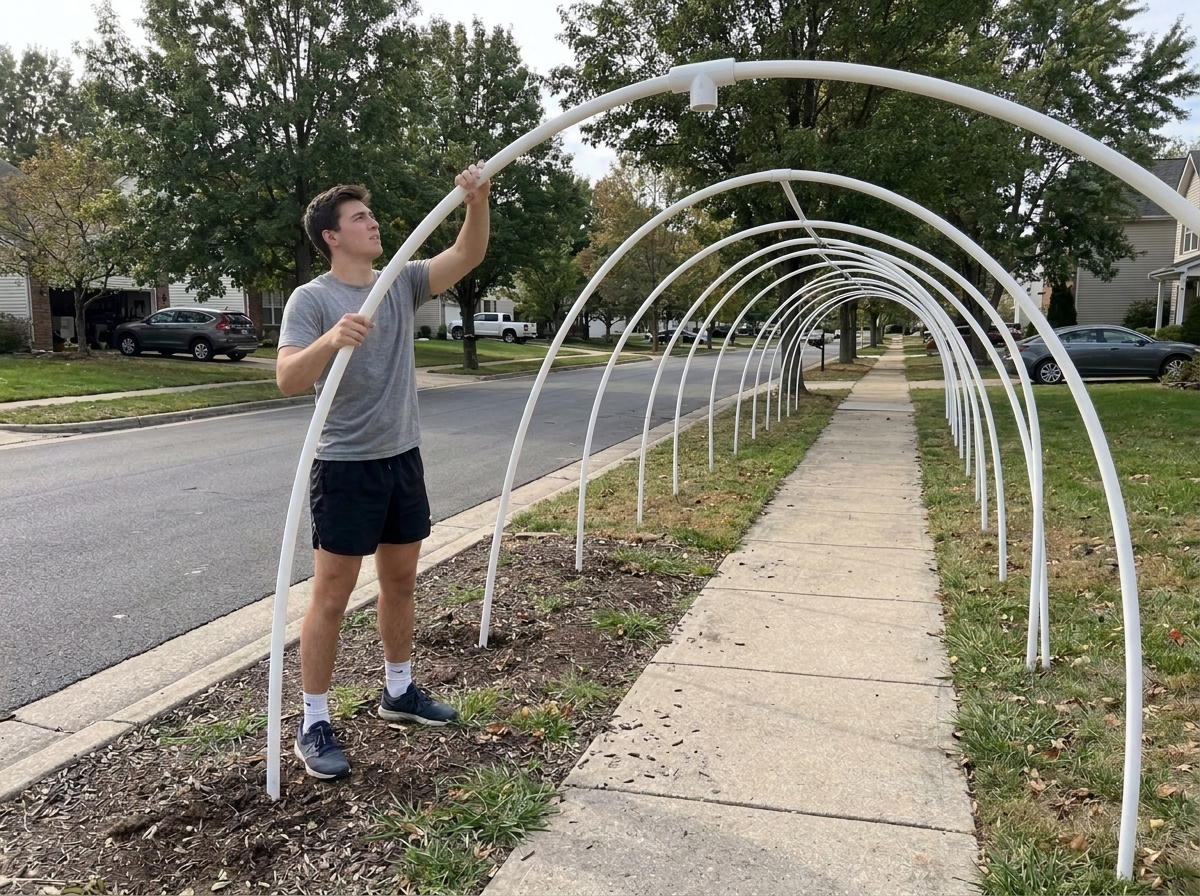
Push one pipe into each straight side of the tee. Now you have one long pipe with a tee in the middle. The short stub on the tee stays open.
Lift it and let it curve, with the tee at the top center and the open stub pointing along the tunnel (our addition). You don’t need glue on the tee, and leaving it loose lets the arches come apart for storage (our addition). Bend gently. If the joint pops apart, press it back together (our addition).
2. Hammer in the rebar
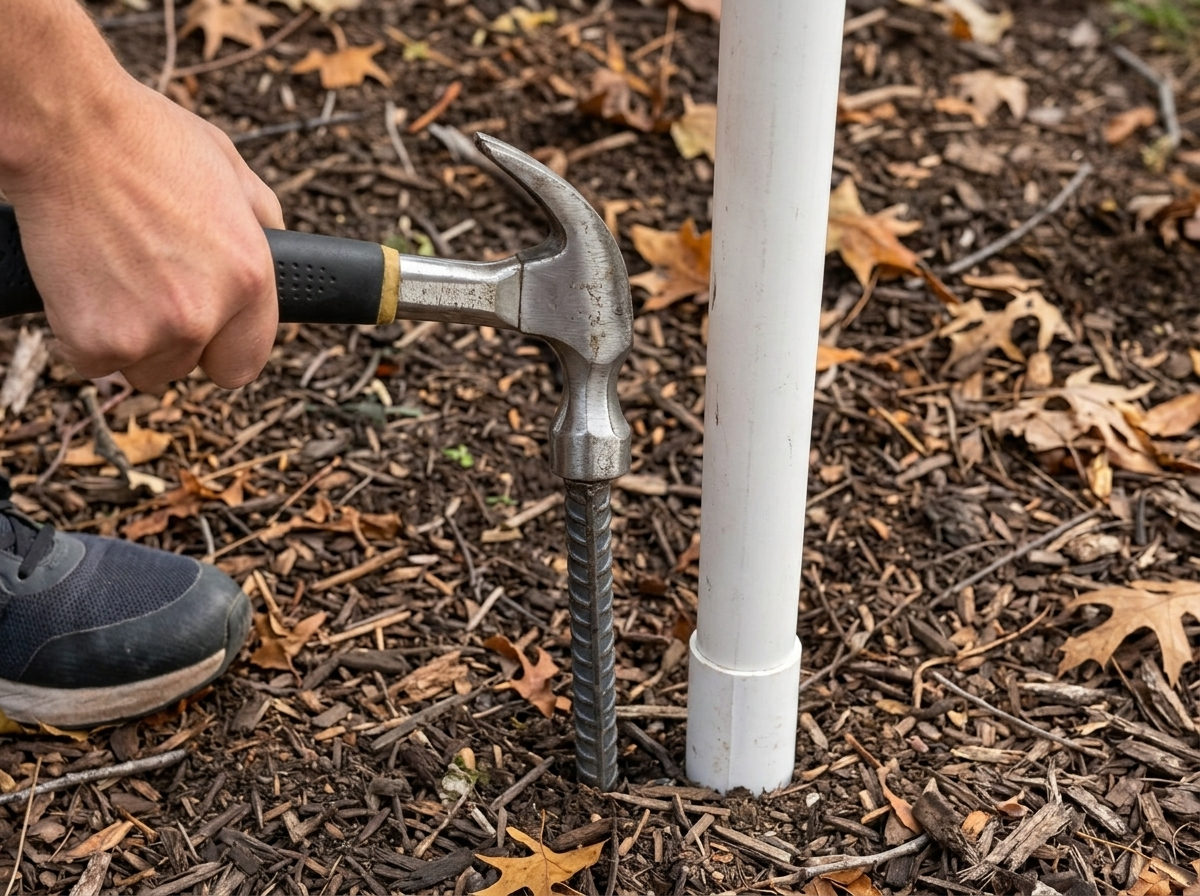
Mark where each arch will stand, one spot on each side of the walkway. Line the spots up across from each other so the arch stands straight. If your walkway has seams, use them as your guide (our addition).
Tap a stake in at each spot until it won’t wiggle. Wear safety glasses and gloves. Not sure what’s buried near your walkway? Call 811 before you drive stakes (our addition).
3. Slide on the arches and space them out
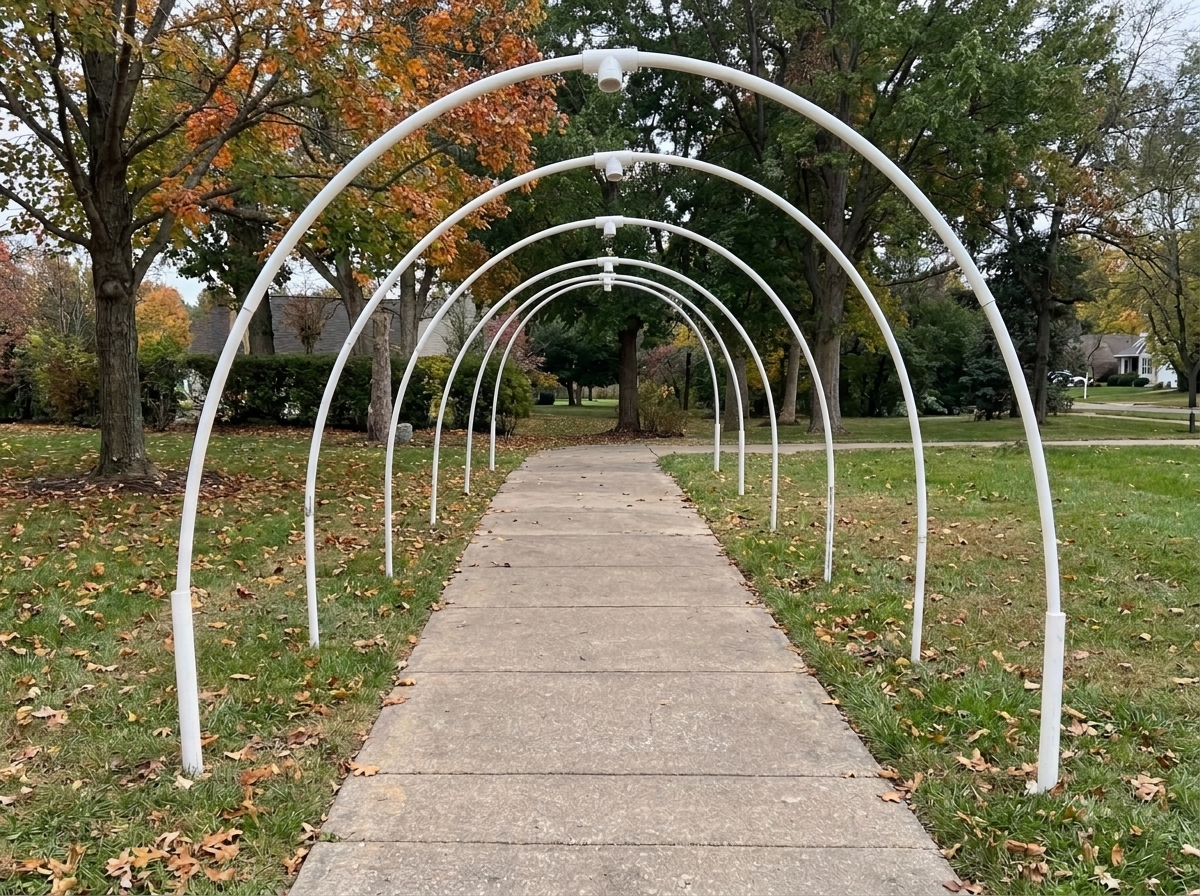
Slide each end of the arch down over a stake (our reading of the original project). Then set the next arch the same way, with every tee stub facing the same direction (our addition).
Keep the gaps even. Step back to the sidewalk often and check that the row looks like one smooth tunnel.
4. Wrap with lights, plug in and enjoy
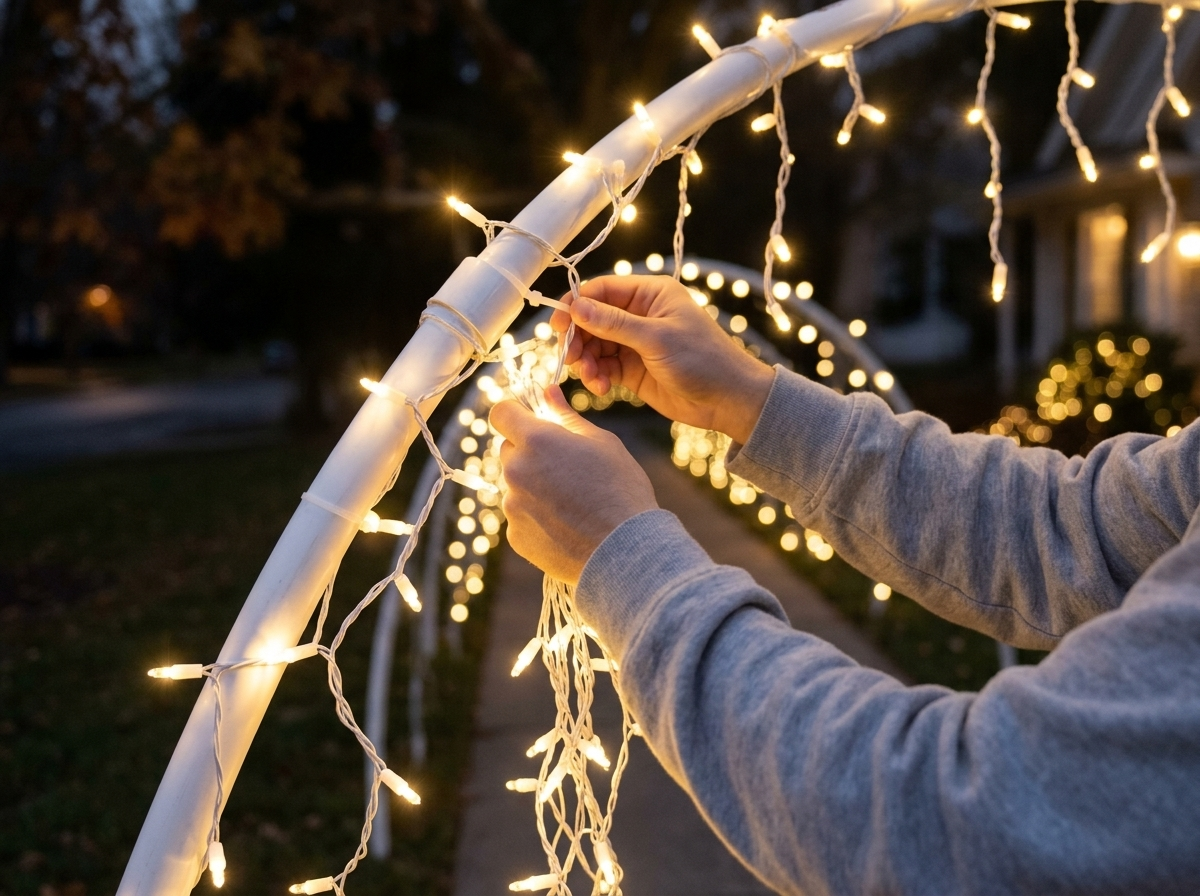
Start at the base of one arch. Wrap the strand up and over the top, then down the other side. Add a zip tie as you go so the strand stays put.
Move on to the next arch and keep the strand running. Check the safety section below before you plug in. Then switch it on and enjoy.
What two things should you get right?
Set the stakes firm. A loose stake lets an arch lean, and wind will find it. One published build reports no problems through a windy season because the rebar was set firmly in the ground. Tap each stake until it holds.
Test the fit before you buy it all. Pipe that won’t slide over the rebar stops the whole project. Pipe that’s too stiff can kink when you force a tight bend. Build one arch first, then buy the rest.
What does a holiday light tunnel cost?
These are planning estimates for each arch. One published build spent about $50 per arch, and cheaper lights saved about $10.
- About $40 per arch: Shop sales for plain outdoor lights and keep the rest basic.
- About $50 per arch: The average that published build spent on pipe, rebar, fittings and lights.
- $75 and up per arch: Upgraded lights and extra strands for a fuller glow.
Three arches at $50 each comes to about $150.
Is a holiday light tunnel safe?
Yes, when the power setup is right. Use lights and a cord that are rated for outdoor use. Check each strand and cord for cracks and bare wire before you hang anything.
Plug into an outlet with ground-fault protection. If your outdoor outlet doesn’t have it, hire a licensed electrician to add one. That’s a pro job, so don’t wire it yourself.
Don’t plug more than three standard sets of lights into one cord. Your light package may allow more, especially for LED strands, so follow it. Keep plugs and cord connections up off the ground and away from puddles. Run the cord along the edge of the walk so nobody trips on it. Switch the lights off at bedtime and when you leave the house.
Kids can hand you zip ties and straps. Let a grown-up swing the hammer and plug in.
Here’s how you know you nailed it. Stand at the start of the walkway at dusk and look down the row. If the arches shrink into one glowing line, you did it.
Want more lights for the yard? Try our DIY Christmas lights display, our simple Christmas decorations or our Dollar Tree Christmas crafts.
Ready to light up your walkway?
A holiday light tunnel takes pipe, stakes, lights and one good afternoon. Build one arch, then repeat it. Your whole street will slow down to look.
Show us your holiday light tunnel
Finished your tunnel? Snap a photo from the sidewalk at dusk and tag us on Facebook. Pin this one to your Christmas board on Pinterest so you can find it next year, and swing by Instagram for more easy yard projects.
A few helpful answers
Holiday light tunnel FAQs
Pipe size, tees, wind, lights and storage.
The original project doesn’t give a size. One published build used 1/2-inch pipe, two 10-foot pieces per arch, joined at the center top with a tee. Build one arch first to check the bend and the fit.
Yes. Use one PVC tee at the center top of each arch, where the two pipes meet. Push one pipe into each straight side, then let the pipes curve into the arch. The short stub points along the tunnel (our addition).
Set the rebar firmly in the ground, then slide the arch ends down over the stakes. Tap each stake until it won’t wiggle. One published build reports no trouble through a windy season with firm stakes.
About 100 lights per arch in one published build. A roll of 300 lights covered three arches. Treat that as a planning estimate and buy a little extra.
Unplug everything, then pull the arches up off the stakes and take the lights off. Coil the strands, and lay the pipes flat along a garage wall. Cord straps are easier to reuse than zip ties.
Warm white or multicolor lights for a holiday light tunnel?
Warm white looks classic and glows like a snow globe. Multicolor looks bold and happy and feels like childhood. Some people say colored lights ruin a good tunnel.
Vote, then tell us your pick and what your street does.