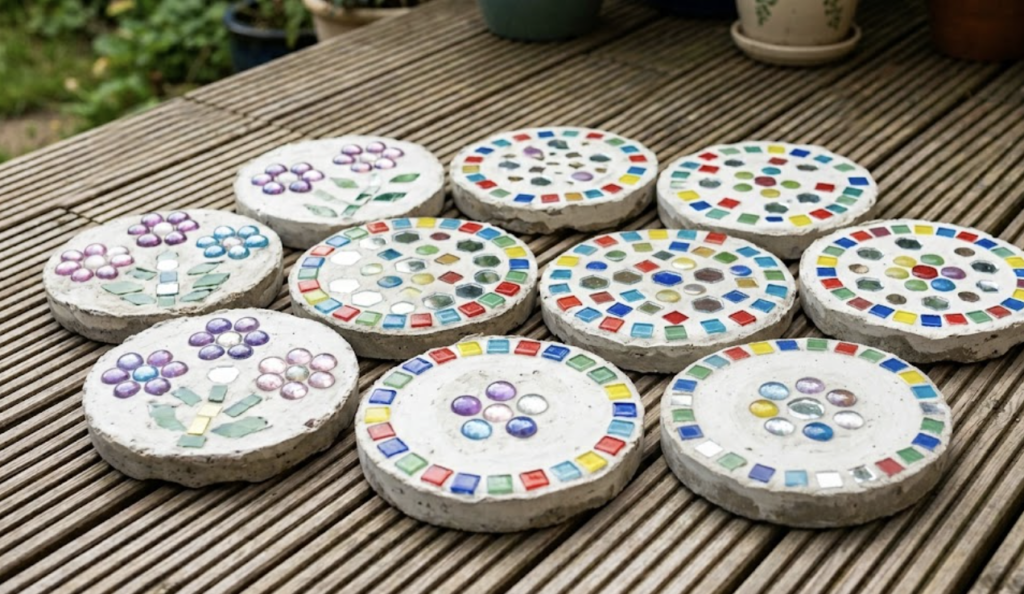

At a Glance: Painted Garden Stepping Stones for Kids
- Total cost: under $20 for one stone, under $40 for a family of four
- Active work time: about 1 hour. Cure time: 48 hours, no shortcuts
- Adult handles the mixing. Kids handle the design, decorating, and naming
Sick of hearing “I’m bored” every Saturday? Wishing you could pry the kids away from the iPad without a full-scale tantrum? I hear you. Sometimes you need a hands-on project that’s so fun, they’ll forget all about screen time. I’ll be sharing one today: painted garden stepping stones.
This is the ultimate kid-friendly weekend craft. They get their hands dirty, flex their creative muscles, and end up with something they made front and center in the yard. And you? You get an afternoon of quality family time and a garden accent piece that’ll last for years. Win-win.
Fair warning though: There’s a reason most blogs skip the nitty-gritty on this one. Concrete’s got a mind of its own. Rush the curing, eyeball the water ratio, or let an eager kiddo jam a pointy pebble in there, and your “forever” stone will be rubble by Labor Day.
But hey, that’s where this guide comes in. We’ll walk you through the foolproof way to mix, decorate, and cure a stepping stone that can handle whatever your kids (and the elements) throw at it.
STEPS
Safety First (Quick Read)
Concrete mix kicks up fine dust when it’s dry. An adult must do the mixing. Wear a dust mask and work outside where the air moves.
Kids only get smooth-edged decorations. Also keep an eye on the little ones around the little glass gems as they might accidentally cut themselves or ingest the item.
Materials List (Kid-Safe Edition)
The core mix and tools:
- Stepping stone mix — about 8 lbs for one 12″ stone.
- Water — roughly 2 cups, but follow what the bag says
- A big plastic pail for mixing
- A stirring stick
- A putty knife or small trowel for smoothing
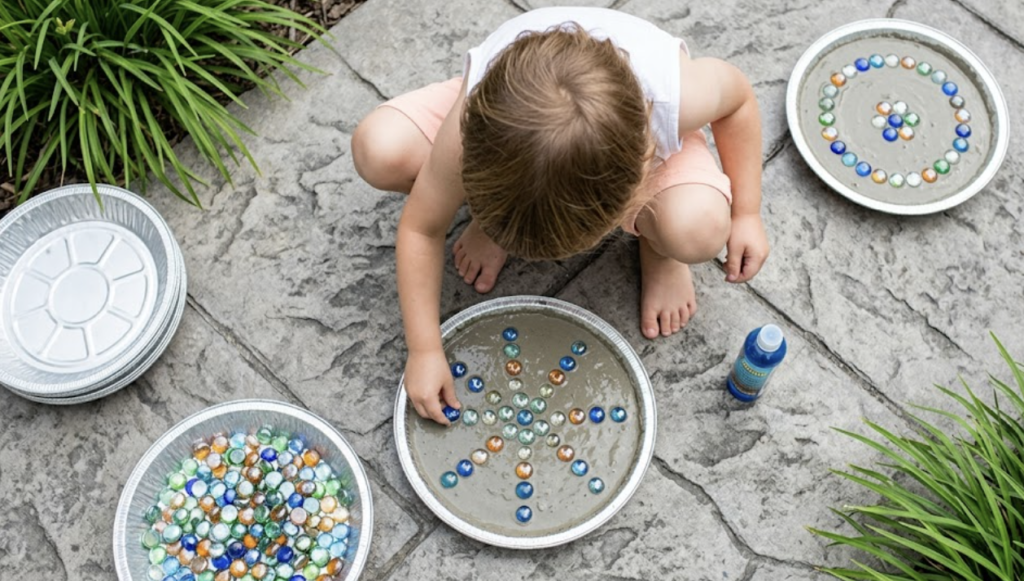
- A mold — a 12″ round plastic stepping stone mold works or get a heavy-duty round foil cake pan
The kid-safe decor (the fun stuff):
- Smooth glass gems or marbles
- Small plastic toys(mini dinosaurs, plastic bugs, little cars, etc)
- Smooth ceramic or plastic mosaic tiles (no sharp edges)
- Letter and number stamps (optional) for names or dates
I got my glass marbles from here:
No products found.
Step-by-Step Instructions
Step 1 : The Dry Run Design
Before you mix anything, have the kids plan their design on a flat surface or a piece of paper cut to the same size as the mold.
Tip: Trace the bottom of your mold onto cardboard. Let the kids arrange their gems inside that circle so they know exactly where everything goes when the clock starts ticking.
Step 2: Mix the Concrete (Adult Step)
In your pail, combine the stepping stone mix and water using the exact ratio on the bag. Stir hard with your dowel. You’re looking for thick pancake batter. If you can drop a spoonful and it slowly settles flat, you’re doing just fine.
Step 3: Pour and Level
Pour the wet mix into your mold or foil pan. Use the putty knife to spread it evenly to the edges. Then either tap the sides of the mold or lift it a few inches and set it down firmly a few times. That bumps the trapped air bubbles to the surface so your stone doesn’t crack later.
Step 4: Decorate (Kid Step)
Wait about 5 to 10 minutes after pouring. The mix should be wet but starting to firm up to keep heavy items like little toys from sinking straight to the bottom.
Now let the kids press their pre-planned items into the wet mix. Push each piece down firmly so it’s anchored, but don’t bury it. The top half should stay visible.
💡 The Kid-Safe Decor Vault
Skip anything sharp, brittle, or biodegradable. Wood and leaves end up rotting while sharp edges might injure someone. Stick with durable, smooth materials that can hold up outside:
- Smooth glass and stone: flat floral marbles, tumbled sea glass, river pebbles, polished agate slices
- Plastic figurines: mini dinosaurs, farm animals, Lego bricks, small toy cars
- Treasures and hardware: old coins, metal washers, spare brass keys, large plastic pony beads
- Beach finds: thick, sturdy seashells (skip thin or fragile ones that crush underfoot)
- Recycled goods: colorful plastic bottle caps, pre-tumbled ceramic mosaic tiles
Step 5: Stamp and Cure
If you’re using letter or number stamps, press them in now. Once everything’s set how you want it, move the mold to a flat, dry, out-of-the-way spot.
The waiting is the hardest part. Let it cure undisturbed for 48 hours. It might look finished after 24 hours but it actually isn’t done curing yet. Skip this part and the stone will crack the first time someone steps on it. Again, wait for two full days before popping the stone out (or peel the foil pan away).
That’s the whole thing! Now here’s to lazy Saturdays spent stirring concrete, sorting seashells and squabbling over the best spot for the purple pebbles. To getting your hands dirty and your heart full.
Because at the end of the day, that’s what it’s all about, isn’t it? Not just the pretty garden stones (though those are nice too). But the memories. The laughter, and the joy of creating something together with your family.
FAQs
1. How long does a painted garden stepping stone take to dry?
A painted garden stepping stone needs a full 48 hours to cure before you move it or step on it. It’ll look ready at the 24-hour mark, but it isn’t. Pulling it out early is the number one reason these crafts crack within a month.
2. What kind of paint should I use on a garden stepping stone?
Use outdoor-rated acrylic paint or patio paint. Regular craft acrylic will fade and chip within one rainy season. Seal the finished paint job with a clear outdoor sealer or polyurethane spray to lock the color in for years.
3. Can kids really help make a painted garden stepping stone?
Yes, let the kids handle the design, decorating, and stamping. The adult handles the dry mixing (because of concrete dust) and the pouring. Kids ages 4 and up can press in decorations and pick designs. Toddlers should stick to pre-cast paint kits instead.
4. What can I use instead of a stepping stone mold?
A heavy-duty round foil cake pan works perfectly and peels off easily once cured. Disposable pie tins also work for smaller stones. You can even use an old plastic plant saucer — just coat it lightly with cooking spray or petroleum jelly so the stone releases clean.
5. Will the decorations on my painted garden stepping stone stay in place outside?
If you pressed them in firmly when the mix was still wet (about 5 to 10 minutes after pouring), they’ll hold for years. Glass gems and small plastic toys are the most durable. Avoid pressing decorations in too late or too gently because that’s when they pop out during the first frost or hard rain.