
Last Updated: November 2026
At a Glance: 9 Washi Tape Ideas
- Nine ideas. Easy washi tape projects for walls, keys, keyboards, laptops and stairs, each with a time and skill level.
- Test first. Washi tape often peels clean, but not every time. A 2-inch test strip tells you what your paint will do.
- Start small. One roll and scissors you own is enough. Add a blade and a cutting mat later for crisp shapes.
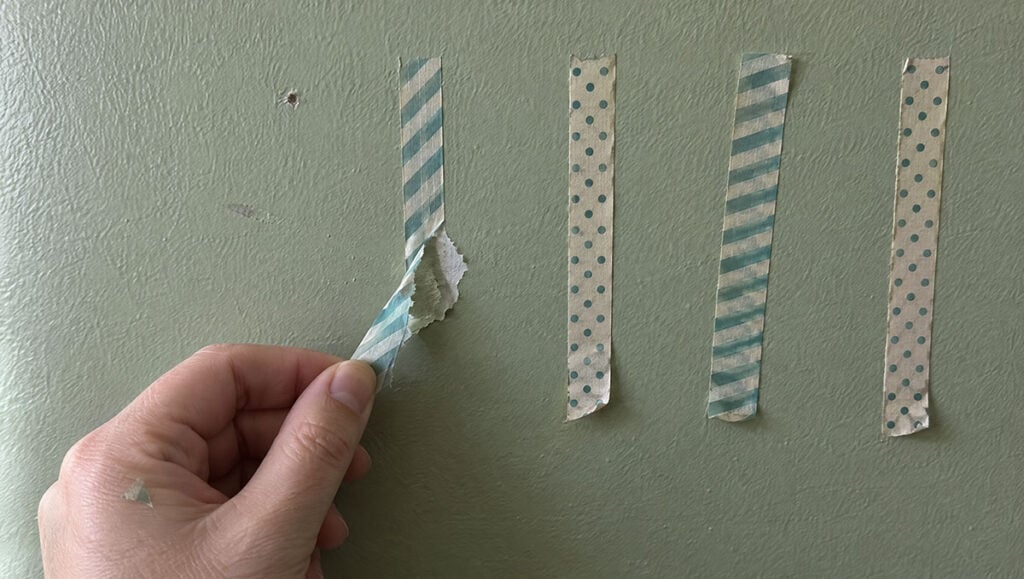
Will washi tape pull your paint? Sometimes. It depends on your paint and how long the tape stays up. Stick a 2-inch strip in a hidden spot for 3 days. If it comes off clean, go ahead with any of these washi tape ideas.
Washi tape is cheap, bright and easy to cut. That makes it a fun way to dress up a room, a desk or a pile of old keys without spending much. Pick a project below. Not sure your paint will hold? Run the quick wall test first, and read what not to do before you start.
RELATED: 4 Awesome Gift Wrapping Ideas | Gift Wrapping Tutorials
In this article:
Cable Labels | Mechanical Keyboard | Dot Wall | Cactus Mural | Toy Track | Light Switches | Laptop Skin | Mosaic Stairs | Key Covers | Wall Test | What Not to Do
| Project | Time | Skill |
|---|---|---|
| Cable Labels | 5 min | Beginner |
| Keyboard Skins | 30 min | Intermediate |
| Polka Dot Wall | 45 min | Intermediate |
| Cactus Mural | 20 min | Beginner |
| Toy Tracks | 10 min | Beginner |
| Light Switches | 5 min | Beginner |
| Laptop Skins | 15 min | Intermediate |
| Mosaic Stairs | 60 min | Advanced |
| Key Covers | 5 min | Beginner |
Swipe sideways to see every column.
What Is Washi Tape and Why Does Every Crafter Obsess Over It?
Washi tape is a decorative paper tape that originated in Japan. The “washi” part refers to traditional Japanese paper made from plant fibers. Unlike regular masking tape, it tears by hand and comes in thousands of patterns.
Crafters like it because it usually comes off easier than other tapes. That’s why people use it on walls, laptops and furniture. Easier isn’t the same as always, though, so test first. And don’t be afraid of messing up. If a strip looks crooked, peel it off and start over.
This post contains affiliate links. As an Amazon Associate I earn from qualifying purchases.
Creative Uses for Washi Tape Ideas You’ll Have Fun Working On
1. Color-Coded “Flag” Cable Labels

⏱️ Time: 5 Mins | 🛠️ Skill: Beginner
Ever spent ten minutes tracing a “dead” charging cable back to the wall? Labeling your tech fixes that for good. It pairs well with these organization hacks.
You’ll Need:
- Washi tape (distinct patterns per device)
- Fine-tip permanent marker
Steps:
- Clean the cable end with a dry cloth. Oily cables lead to peeling tape.
- Wrap a 2″ strip around the cord about an inch from the plug.
- Fold the tape over itself to create a “flag” shape.
- Label both sides so you can see it from any angle.
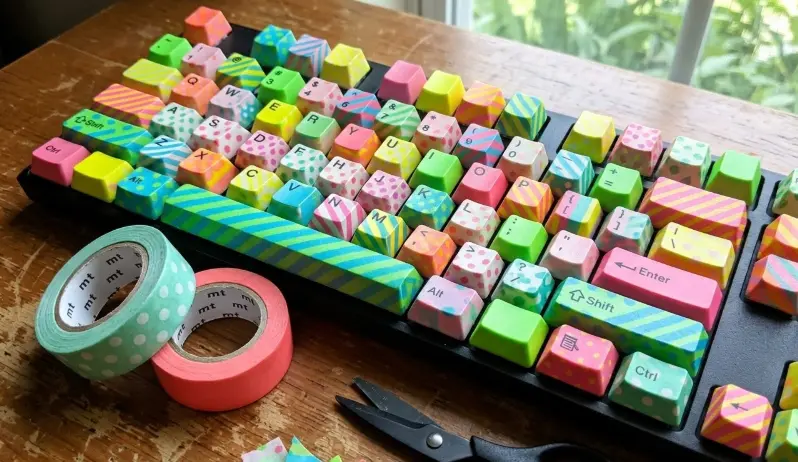
2. Custom Mechanical Keyboard Skins
⏱️ Time: 30 Mins | 🛠️ Skill: Intermediate
Regular masking tape can leave a sticky film on plastic keycaps. Washi tape usually comes off easier, but test one spare keycap before you wrap the whole board. That gives you the boutique look without the guesswork.
You’ll Need:
- Washi tape in assorted colors and patterns
- Hobby knife or precision scissors
- Keycap puller (optional)
- Fine-tip permanent marker (optional)
Steps:
- Pop off the keycaps with a puller or gently pry them off by hand.
- Cut a small strip on your mat, then press it onto the top of the keycap, smoothing from center outward.
- Fold the edges down the sides. Keep your blade off the keycap.
- Write the letters back on with a fine-tip marker, use alphabet stickers, or skip this if you touch type.
- Press the keycaps back into place and wrap the spacebar last.
For the boutique look, pick a set with a few widths and a vintage palette. This 36-roll set lists 6 sizes, so you can wrap the big keys and the small ones. The look leans gold and watercolor, so skip it if you want bright colors. (paid link)

- Size: You will get an exquisite box containing 36 rolls Van Gogh paintings washi tape, which come in...
- Vintage van gogh paintings designs: The Van Gogh vintage paintings aesthetic washi tape with gold...
This is an affiliate link. We may earn a small commission at no extra cost to you.
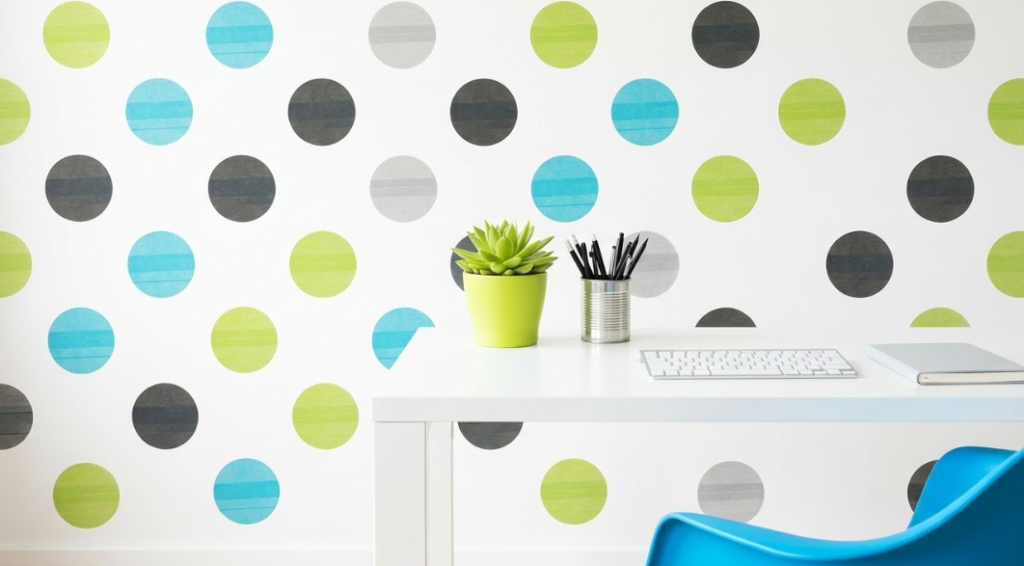
3. Renter-Friendly Polka Dot Wall
⏱️ Time: 45 Mins | 🛠️ Skill: Intermediate
Changing wallpaper is a renter’s nightmare, but a plain white wall can feel flat. Washi dots give you a polka dot look without paint or wallpaper. Run the 3-day wall test above first. For more ideas that won’t touch your walls, see these renter-friendly decor ideas.
You’ll Need:
- 3 rolls of coordinating washi tape
- Small glass (for tracing)
- Precision shears
Steps:
- Run the 3-day wall test from above on a hidden spot first.
- Trace your circles on the back of the tape. Tracing on the front will smudge the ink.
- Cut out 20 to 30 circles at once, on your mat, before you stick any.
- Use a 12″ ruler to create a light “grid” on your wall.
- Apply the dots at the intersections for a professional, non-random look.
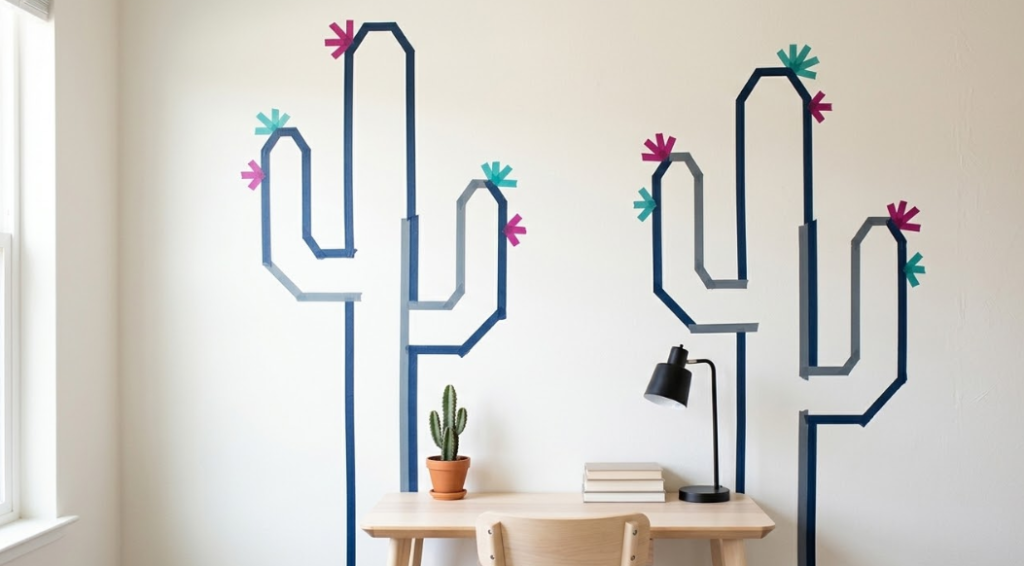
4. Minimalist Tape Wall Cactus Mural
⏱️ Time: 20 Mins | 🛠️ Skill: Beginner
Minimalist “line art” is a popular look, and tape makes it easy to try. If you can’t draw a straight line, let the tape do the work for you. Tape is easier to change than paint, so it’s a low-regret way to try a trend. Want something that hangs instead? Try these wall art ideas.
You’ll Need:
- Green washi tape
- Pink washi tape (for the “blooms”)
- Level or ruler
Steps:
- Run the 3-day wall test from above first.
- Use a level to place your first vertical “stalk” strip.
- Branch out with shorter strips at 90-degree angles.
- Add tiny pink “V” shapes at the tips to represent flowers.
- Pro-Tip: If it looks crooked, just peel it off slowly and reset. No paint required.
The cactus blooms and the dot centers need small pops of color. A mixed floral set gives you pinks and small patterns without buying rolls one at a time. Check the listing photos for the colors you want, because you can’t pick them. (paid link)

- The package includes 21 washi tape in assorted sizes and designs
- 3 different washi tapes are perfect for different scenarios. 0.6 inch (1.5cm) wide x 7 tapes...
This is an affiliate link. We may earn a small commission at no extra cost to you.
5. DIY Toy Car Road Tracks

⏱️ Time: 10 Mins | 🛠️ Skill: Beginner
Here’s a parenting hack. Don’t buy those massive plastic roads for toy cars. Build custom highways with tape, so you can peel them up by bedtime.
You’ll Need:
- Wide black washi tape
- White washi tape (skinny)
Steps:
- Test a hidden corner of your floor first.
- Lay long “highway” strips across your hardwood or tile.
- Cross the strips to create “T-junctions” and “Roundabouts.”
- Add 1-inch white dashes down the center for lane dividers.
- Build a “parking garage” under the coffee table for extra fun.
Plain tape works best for the base of the road. This set is colored masking tape, 1 inch wide, not washi tape. Check the color list for black and white, and test a hidden corner of your floor first. (paid link)
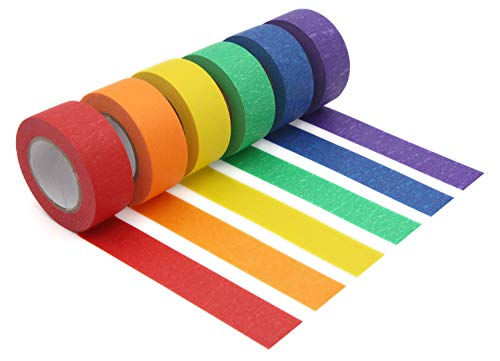
- Durable Versatility: It can be torn by hand, sticky enough to adhere to any clean surface and easy...
- Easy-to-stick, Easy-to-tear.Adhesive holds securely. Whether adults or children will find fun from...
This is an affiliate link. We may earn a small commission at no extra cost to you.
6. Decorative Light Switch Covers
⏱️ Time: 5 Mins | 🛠️ Skill: Beginner
A yellowing plastic switch plate can make a whole room look tired. This 5-minute fix makes it look curated, and you never touch a screwdriver.
You’ll Need:
- Washi tape in 3 to 4 coordinating patterns
- Craft knife or scissors
- Cutting mat
Steps:
- Leave the plate on the wall. Don’t unscrew it.
- Cut each strip to fit on your mat first, leaving a gap where the switch sits.
- Apply your first strip diagonally from corner to corner.
- Alternate patterns as you work outward, overlapping edges slightly.
- Wrap the tape around the edges of the plate for a clean finish.
If the plate is cracked, loose or warm, or the switch buzzes, call an electrician before you do anything else.
7. Laptop Skins You Can Change
⏱️ Time: 15 Mins | 🛠️ Skill: Intermediate
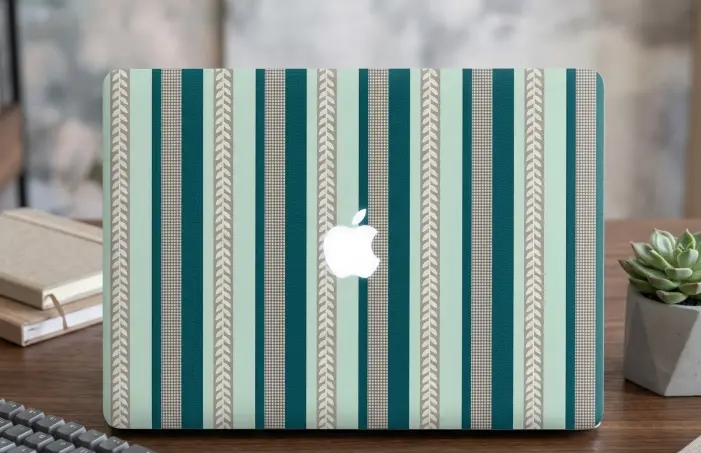
Stickers can leave a sticky film behind, which hurts resale value. Washi tape is a gentler way to personalize a laptop, but test a hidden corner first.
You’ll Need:
- Assorted washi tape
- Clear laptop case (optional)
Steps:
- Test a hidden corner of the lid for 3 days first.
- Start from the bottom edge of the laptop lid.
- Lay parallel strips and alternate colors for a “striped” look.
- Cut each strip to length on your mat first. Don’t trim tape that’s already on the lid.
- If you have a clear case, apply the tape to the inside of the case.
8. The “Mosaic” Staircase
⏱️ Time: 60 Mins | 🛠️ Skill: Advanced
The mosaic staircase is the ultimate “wow” factor for guests. Decorating the vertical risers of your stairs makes the whole entryway look like a custom art piece.
You’ll Need:
- Wide washi tape
- Measuring tape
- Squeegee or credit card
Steps:
- Test one riser for 3 days before you do the whole staircase.
- Measure the height of your stair riser. This is the vertical part.
- Cut tape strips to that exact length on your mat.
- Apply the tape horizontally, starting from the bottom of the riser.
- Use a credit card to “squeegee” out air bubbles for a paint-like finish.
- Keep tape off the treads, where feet walk.
9. “Polished” Color-Coded Keys

⏱️ Time: 5 Mins | 🛠️ Skill: Beginner
Fumbling with your keys in the dark is a special kind of annoyance. Color-coding them is great, but tape usually peels off in your pocket within a week. Here’s the fix.
You’ll Need:
- Washi tape
- Clear nail polish. This is the secret ingredient.
Steps:
- Wrap the “head” of the key in a bright pattern.
- Trim the edges so they don’t snag inside the lock.
- Paint a thin layer of clear nail polish over the tape.
- Let it dry for 10 minutes. The polish makes the tape last, but it won’t peel off clean, so use this on keys you’re happy to keep wrapped.
Learn how to make your own washi tape! Press play on this video by Fantasvale Art Lab:
Is Washi Tape Safe on Painted Walls?
Often, yes. Not always. Here’s the test that tells you.
- Pick a hidden spot, like the inside of a closet or behind a door.
- Check the paint first. If it’s fresh, check the can for the cure time. Fresh latex paint often needs about a month (a planning estimate, so go with the can if it says more).
- Press a 2-inch strip flat with your thumb.
- Leave it 3 days. That’s our test window, and longer is safer.
- Peel it slowly, close to the wall, at about a 45 degree angle.
- Look at the paint and the back of the tape. Clean paint and a clean tape back? Go ahead. Any paint on the tape? Skip the wall version of the idea and tape a poster board or frame backer instead.
Skip wallpaper, rough walls and peeling or damp spots unless your test says otherwise.
How Do You Cut Washi Tape Without Marking the Surface?
Cut your shapes before you stick them.
- Lay the tape on a cutting mat, or on a clean piece of scrap board.
- Cut with scissors for long strips. Use a fresh craft knife for dots and small shapes, and cut away from your fingers.
- Lift each piece with the tip of the blade and press it on.
Never press a blade into tape that’s already on a wall, a book page or a laptop. The blade can score what’s underneath.
If you don’t own a cutting mat yet, a set with a mat, a craft knife and a ruler covers this step in one buy. The listing says the mat is 12 by 18 inches, which fits most of these projects. It’s sold as a sewing mat, but it works the same for tape. The blades are sharp, so keep them away from kids. (paid link)

- Professional-Grade Self-Healing Surface: Protect your workspace with this 12.25x18.25 inch...
- Complete Hobby Mat Set with Essential Tools: This cutting mat set includes a 18-inch cork-backed...
This is an affiliate link. We may earn a small commission at no extra cost to you.
What Not to Do With Washi Tape
These are the mistakes behind most washi tape trouble. The first two are the big ones.
- Don’t skip the test strip. Paint can lift. That’s most likely on fresh paint, rough walls or tape that’s been up a long time. If tape feels stuck, warm it with a hair dryer on low for a few seconds, then peel slowly.
- Don’t leave it up for months. A sticky film shows up most when tape stays on a long time. Wipe it with the cleaner the maker of your surface or device recommends.
- Don’t tape fresh paint, wallpaper or damp walls. Peeling paint and damp spots need a real repair first. Tape won’t hold there.
- Don’t yank it off fast. Peel slowly, close to the wall, at about a 45 degree angle. Stop and warm it again if you feel paint start to lift.
- Don’t cut tape that’s already stuck down. A blade can score the paint, the page or the lid underneath. Cut on a mat first.
- Don’t tape the stair treads. Keep tape on the risers, where feet don’t walk.
- Don’t seal tape you want to peel off. Clear nail polish keeps tape on a key, but it won’t peel off clean.
How Much Do Washi Tape Ideas Cost?
Three ways to budget it
These are planning estimates. Check real prices before you buy.
- Under $10: one roll and the scissors you own. Enough for the cable labels and a keyboard skin.
- About $20: three or four rolls and a craft knife. Good for a small polka dot wall.
- About $40: a mix of rolls, a craft knife, a cutting mat and a washi tape dispenser (paid link). Better for the cactus mural and the stairs.
When Should You Call a Pro?
For the light switch cover, wrap the plate right where it hangs. Don’t unscrew it. If a plate is cracked, loose or warm, or a switch buzzes, call an electrician before you do anything else.
If a wall has peeling paint or damp spots, fix that first. Tape won’t hold, and the wall needs the real repair.
That’s nine washi tape ideas you can start today. Test your wall, cut before you stick, and peel slowly. A washi tape border also looks great on DIY photo frames.
If you try one of these, we’d love to see it. Tell us about your creations in the comments below.
Join our community! Follow DIY Projects on YouTube, Instagram, Pinterest, and Facebook.
Quick answers
Washi Tape Ideas FAQs
Paint, peeling, cutting and sticky film.
Often, yes, but not always. Fresh paint, rough walls and wallpaper are the risky ones. Tape a 2-inch test strip in a hidden spot for 3 days, then peel it slowly and check the paint.
Start with ideas that don’t touch the wall, like cable labels, a keyboard skin or a laptop skin. For wall ideas, run the 3-day test first. Or tape a poster board panel and hang that.
Peel slowly, close to the wall, at about a 45 degree angle. If it grips, warm it with a hair dryer on low for a few seconds first. Stop and warm it again if you feel paint start to lift.
Cut it before you stick it. Lay the tape on a cutting mat and use scissors for strips or a fresh craft knife for small shapes. Never cut tape that’s already on a surface you care about.
It can, especially if it stays on a long time. Test a hidden corner first. If a film stays behind, wipe it with the cleaner the device maker recommends.
QUICK POLL: Does washi-taping your laptop or phone make it look custom and artsy, or does it make gadgets look straight-up dirty?
Are you a maximalist tech decorator or a clean-gear purist? Let us know in the comments section below!