
At a Glance: Painted Rock Garden Markers
- A weekend craft that turns smooth river rocks into weatherproof plant labels for your garden.
- Total cost runs $0 to $40 depending on whether you forage rocks from your yard or buy them, plus paint pens and a clear outdoor sealer.
- Beginner-friendly, kid-friendly, and the markers last 1–3 seasons before they need a fresh coat of sealer.
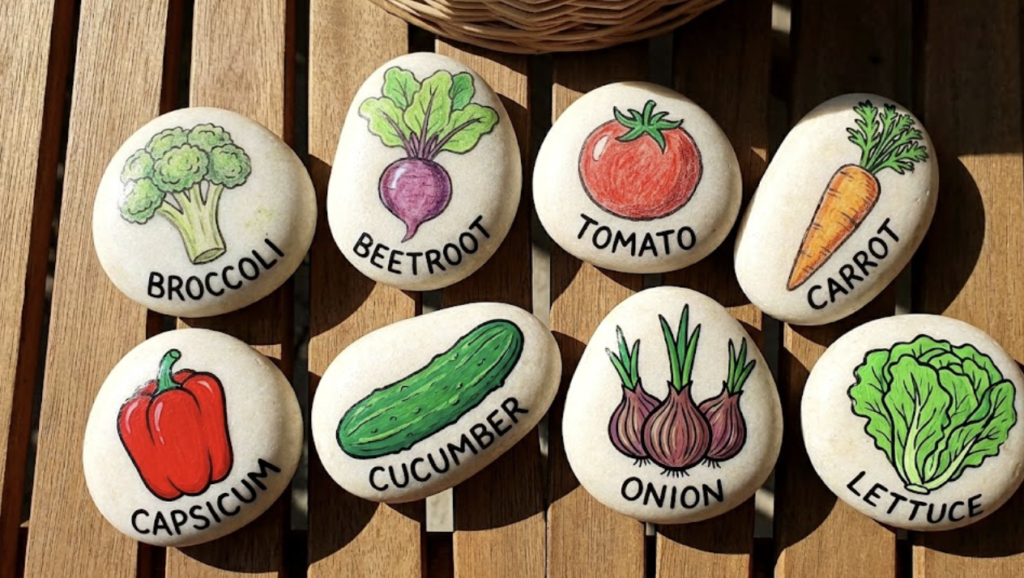
Every spring, you swear this is the year you’ll label everything you planted in your garden. Then July rolls around and you’re staring at three rows of mystery green stuff wondering which one’s the kale and which one’s a cabbage. You want to get markers but the store-bought plastic ones notoriously fade the moment they get wet. Wooden stakes also rot. Sticking a seed packet on a stick? Gone with the wind. A painted rock garden label is what you’re looking for. It actually stays put and holds up to weather. Plus, this is a family-friendly activity that you can do together this season.
Materials List
- Smooth Stones: Flat, light-colored river rocks, about 3 to 4 inches wide. Forage from your yard first, buy a bag from the garden center if you have to.
- Soap and Water: A bucket and an old scrub brush. Just enough to get dirt off.
- Pencil: Regular #2. For sketching your design before you commit.
- Acrylic Paint Pens: Posca pens work best. Regular craft paint and a small brush works too, but pens make the lines and lettering way cleaner.
- Black Fine-Tip Paint Pen: For the outlines and the plant names. Don’t use a regular Sharpie. It’ll bleed when you seal it.
- Clear Outdoor Sealer: A spray acrylic sealer (Rust-Oleum Clear Enamel or Krylon UV-Resistant Clear) or brush-on Mod Podge Outdoor. This is what keeps your art from washing away in the first rainstorm.
If you have no clue where to shop for these mess-free supplies, I’ve got you covered. Here are my favorite materials that make my garden labels absolutely rock solid (pun 100% intended!).
Table could not be displayed.Step-by-Step Instructions
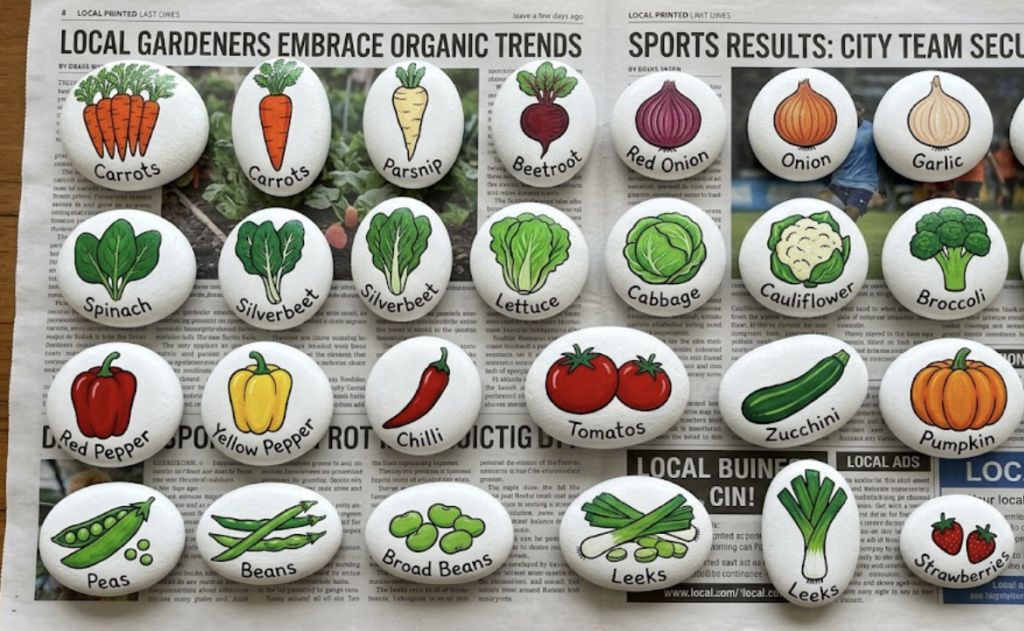
1. Clean the Stones Drop your rocks in a bucket of warm, soapy water and scrub off all the dirt, mud, and grit. Rinse them and let them dry fully in the sun at least a few hours, ideally overnight. One forum gardener put it best: “if there’s water underneath, it can ruin the paint over time.” Paint won’t stick to a damp rock, and trapped moisture will lift your design in a month.
2. Sketch Your Design Pick a vegetable or herb (carrot, tomato, lettuce, basil) and lightly draw the shape on the dry stone with a pencil. Leave room at the top or bottom for the plant’s name. Don’t overthink it. Cartoon-style works best because the colors pop and the outlines hide your shaky lines.
🎨 No Drawing Skills? No Problem! Try the Trace-and-Fill Method
- Print: Print your template on regular copy paper to fit your clean, dry stone.
- Scribble: Turn the paper to the blank back side and heavily rub a regular pencil right behind the design.
- Trace: Turn the paper picture-side up again, place it on your stone, and trace the outlines firmly with a pen.
- Paint: Remove the paper and color inside the faint pencil lines with acrylic paint pens.
- Seal: Once dry, finish your project with a coat of clear outdoor sealer.
3. Color It In Fill in the colors with your paint pens or a small brush. You’ll probably need two coats to make the colors bright and solid. Let the first coat dry for 10 minutes before adding the second. Don’t skip the dry time between coats to avoid streaks.
4. Add Outlines and Words Grab your black fine-tip paint pen and trace around the edge of your painted shape. This is the move that makes the whole rock look intentional like it came out of a cartoon, not a craft fail. Then write the plant name (Beetroot, Lettuce, Tomato) clearly on the stone. Block letters are easier to read from across the bed than cursive. If you guys are wondering, here’s the marker set that I use:
No products found.
5. Seal the Deal Once the paint is fully dry (give it 24 hrs), take the rocks outside and lay them on old newspaper. Spray a light, even coat of clear sealer, holding the can about 8 inches away. Light coats only. A heavy coat is how Sharpie ink runs and Posca pens bleed. Let it dry, then add a second coat. Two thin coats beat one thick one every time.
Shareable Result Benchmark
You’ll know you nailed it when:
- You can read the plant name from 6 feet away.
- The rock looks like the cartoon vegetable it’s meant to be.
- After the first rain, the design is still bright and crisp.
For under $20 and one Saturday afternoon, you get markers that outlast plastic, look better than store-bought, and actually feel like part of the yard. Re-seal them once a year and they’ll keep going for three or four seasons easy. That’s a better return than most things you’ll buy at the garden center this spring.
FAQs
1. How long will a painted rock garden marker actually last outside? With a good sealer and oil-based paint pens, expect 1 to 3 seasons before colors start fading. UV light and freeze-thaw cycles are the real enemies. Plan to re-spray a clear coat once a year. It takes 10 minutes for a full set and adds another season or two of life.
2. What’s the best paint for a painted rock garden? Posca paint pens (water-based acrylic) for the design, and a clear acrylic spray sealer like Krylon or Rust-Oleum to lock it in. Avoid regular Sharpies as tend to bleed when sealed. Some specialty outdoor patio paints (DecoArt Patio Paint) are self-sealing and skip the spray step entirely if you’d rather brush.
3. Can I use rocks from my own yard? Yes, and you should. Flat, smooth, light-colored stones work best. Wash them well, dry them at least a full day, and you’re set. The dollar saved on craft store rocks is real, and yard rocks look more natural in the garden anyway.
4. Do I really need to seal my painted rocks? If they’re going outdoors, yes. Unsealed acrylic paint will fade within weeks and wash off with the first heavy rain. The one exception is self-sealing outdoor patio paint (read the bottle. It’ll say “self-sealing” or “outdoor safe”). Everything else needs a sealer.
5. Why did my paint pen bleed when I sprayed the sealer? You probably sprayed too close, too thick, or used a Sharpie instead of a real paint pen. Hold the can 8 inches away, do light passes, and let the first coat dry before adding a second. If you used a Sharpie, redo the design with Posca or a similar acrylic paint pen. Sharpie ink and most spray sealers don’t get along.
QUICK POLL
What kind of garden DIYs do you like most?
Not in the choices? Comment down below!